How Virtual-DOM and diffing works in React
I have been trying to understand how virtual DOM works and though on an high level it was clear. I was looking for something that could explain to me in more detail.
With lot of searches and being unsuccessful to get exactly what I was looking for, I finally decided to look into the react and react-dom codes so that I get better understanding how things work.
But before we proceed, have you thought why we don’t render directly the changes on the DOM?
The next section will summarize on how DOM is created and will give you idea on why React created a Virtual DOM in the first place.
Understand how DOM is build
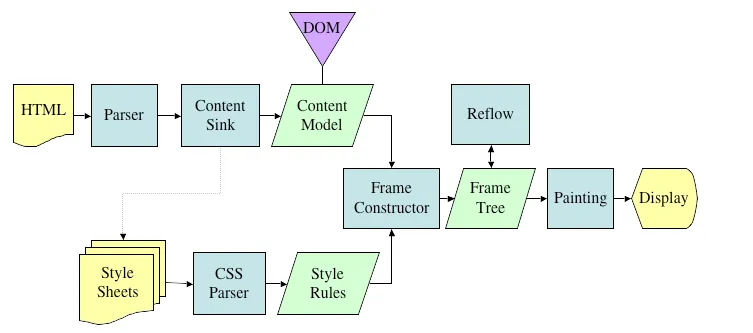
I will not go too much in detail on how the DOM is created and painted to the screen, but please go through this and this to understand the full stages from converting HTML to DOM and painting it to the screen.
Each time something in the DOM changes. Since DOM is represented as a tree structure, changes to the DOM is pretty quick but the changed element, and it’s children’s has to go through Reflow/Layout stage and then the changes has to be Re-painted which are slow. Therefore more the items to reflow/repaint, more slow your app becomes.
What Virtual-DOM does is, it tries to minimize these two stages, and thereby getting a better performance for a big complex app.
The next section will explain more in details on how Virtual DOM works.
Understanding the Virtual-DOM
Now that you know how the DOM is build, let us now look more into Virtual DOM.
So here I will use a small app and explain how virtual DOM works. So that it becomes easy for you to visualize it.
I will not go into details of how things work during initial render, but will focus on what happens when you re-render as that is what will help you to understand how the virtual-dom and diffing works. Once you are clear with this, understanding initial rendering is just a breeze :)
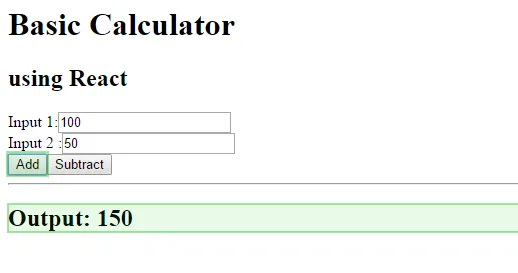
The code for the app I am using can be found in this git repo. And this is how our basic calculator screen looks

Everything else in the repo is trivial apart from the Main.js and Calculator.js
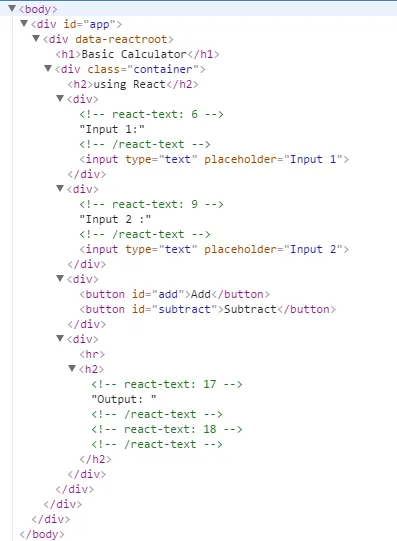
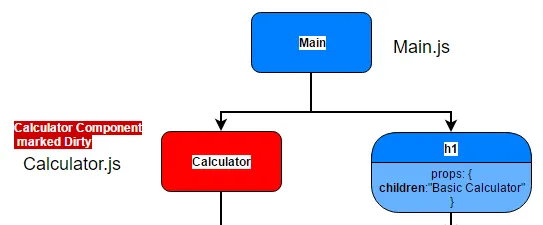
And this is how the DOM looks after initial load.
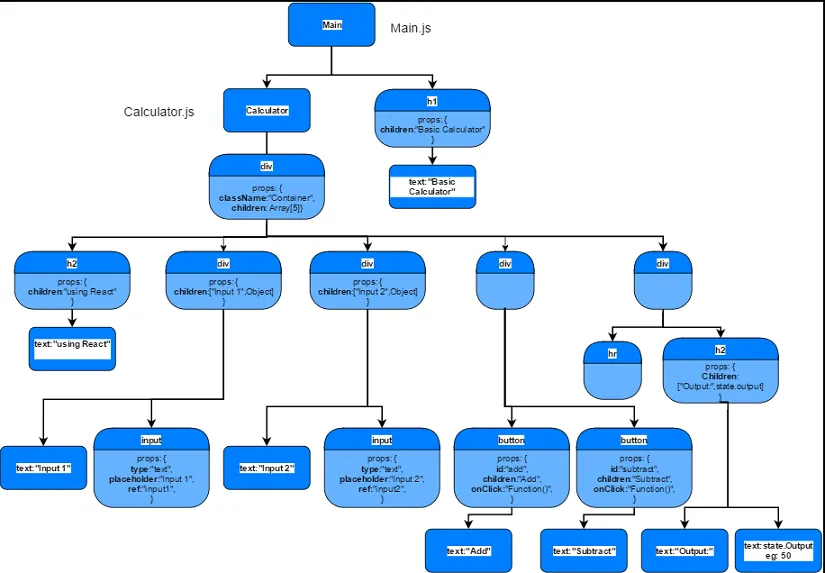
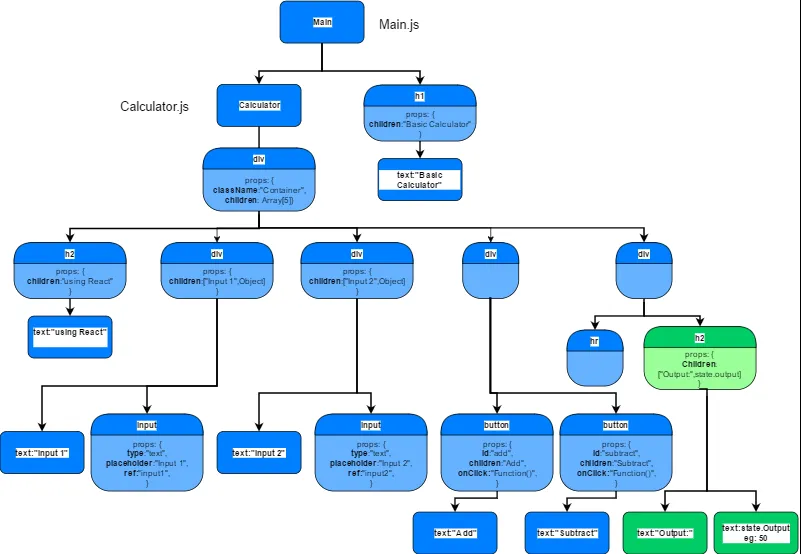
And this is how React builds internally the Component Tree structure for the above DOM.
Let us add two numbers and hit the Add button to understand further
To understand how the diffing works and the reconciliation is done from virtual DOM to the actual DOM, in the calculator I will give the following inputs 100 and 50 and hit the Add button. And the expected output is 150.
Input 1: 100
Input 2: 50Output : 150
So what happens when you hit the Add button?
In our example, on clicking the Add button, we set the State with the new output value which is 150.
//Calculator.js
<button id="add" onClick={ () => {
      IntegerA = parseInt(ReactDOM.findDOMNode(this.refs.input1).value)
      IntegerB = parseInt(ReactDOM.findDOMNode(this.refs.input2).value)
      IntegerC = IntegerA+IntegerB
      this.setState({output:IntegerC})
       }
     }>Add</button>
Marking the component dirty.
First let us understand the first step on how a component is marked dirty.
- All the DOM event listeners are wrapper within custom React event listeners. Therefore on clicking Add, the event is dispatched to the react event listener and thereby executing the anonymous function() that you see above.
- In the anonymous function(), we call the function this.setState() with the new state value.
- The setState() function, will in turn mark the component dirty as you see in below lines of code.
//ReactUpdates.js  - enqueueUpdate(component) function
dirtyComponents.push(component);
If you are wondering, why React didn’t just mark the button as dirty, but instead the whole component? Well, this is because you call setState as this.setState(), where this is the Calculator component.
4. So now our component, Calculator, is marked as dirty. Let us see what happens next.
Traversing the Component lifecycle.
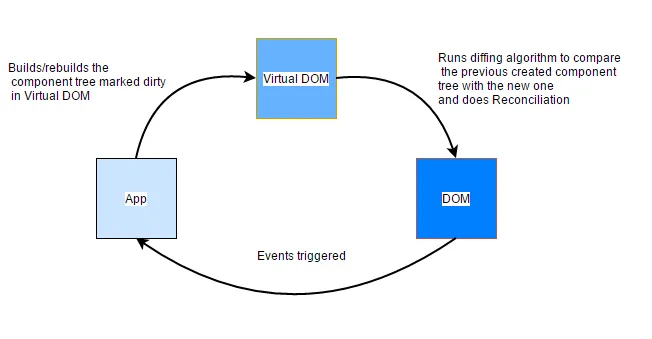
Great! So now the component is marked dirty. What next? Well now the next step is to update the virtual -DOM and then use the diffing algorithm to do the reconciliation and update the actual DOM .
Before we move to the next set of steps, it is very important to be familiar with the different lifecycle of a component.
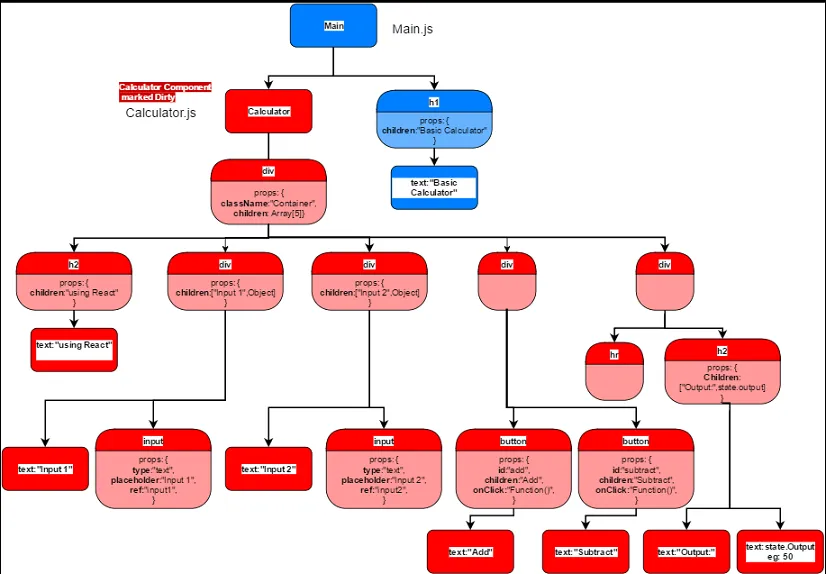
And this is how our Calculator component looks in React.

Next step is to update the component.
- This is done by React running batch update.
- In the batch update, it will check if there are components marked as dirty and starts updating.
//ReactUpdates.js
var flushBatchedUpdates = function () {
  while (dirtyComponents.length || asapEnqueued) {
    if (dirtyComponents.length) {
      var transaction = ReactUpdatesFlushTransaction.getPooled();
      transaction.perform(runBatchedUpdates, null, transaction);
3. Next, it will check if there is any pending state that has to be updated or a if a forceUpdate is issued.
if (this._pendingStateQueue !== null || this._pendingForceUpdate) {
      this.updateComponent(transaction, this._currentElement, this._currentElement, this._context, this._context);
In our case, you can see in the calculator wrapper, this._pendingStateQueue, has our state object with the new output value.
4. First it will check if we have used componentWillReceiveProps() and if we have used it, allows us to update the state with the new props that we received.
5. Next it will check if we have used shouldComponentUpdate() and if we have used, we can check if a component should be re-render with the change in state or props.
Use this when you know of scenarios where you don’t need the component to re-render, and therefore improving on the performance.
6. Next steps are componentWillUpdate() ,render() and finallycomponentDidUpdate()
From Steps 4,5 and 6, we only use render()
7. Now let us look more into what happens during render().
Render is where the Virtual DOM gets re-build and the diffing happens
Rendering the Component — Updating the Virtual-DOM, running the diffing algorithm and updating the actual DOM
In our example, all the elements under the component is build again in the Virtual DOM.
It will check if the previous and next rendered element are of same type and key, and then reconcile the component the type and key matches.
    var prevRenderedElement = this._renderedComponent._currentElement;
    var nextRenderedElement = this._instance.render(); //Calculator.render() method is called and the element is build.
Important point to note is, here is where our component’s render method is called. i.e
Calculator.render()
The reconciliation process in general goes through the below steps.
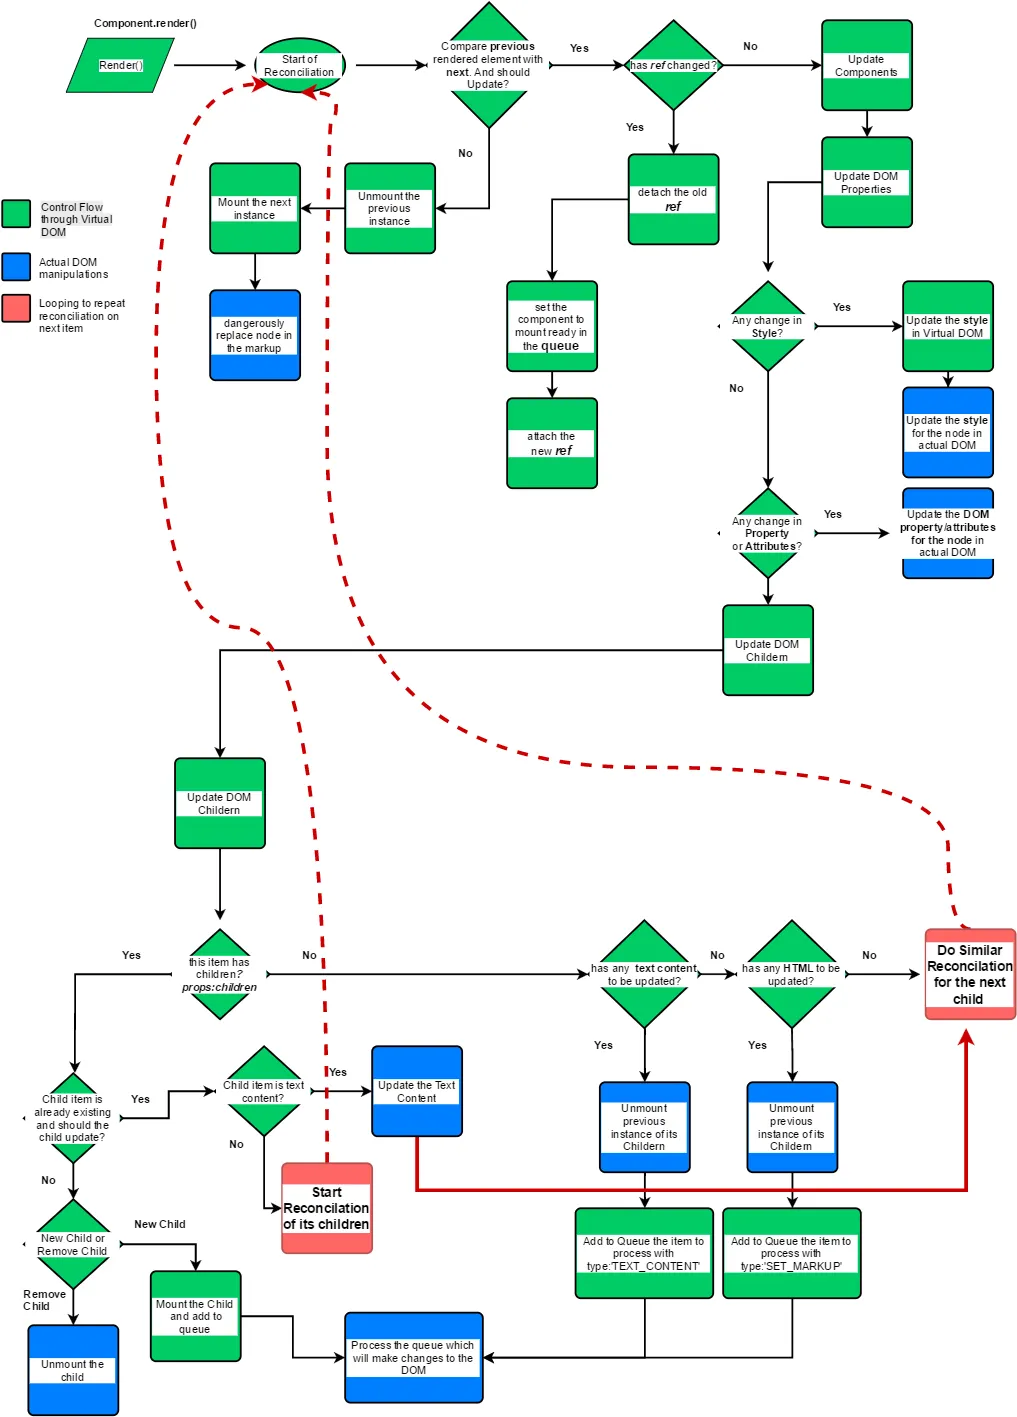
The red dotted lines means, all the reconciliation step will be repeated for the next child or children within this child
The above flowchart that I have prepared summarizes about how the Virtual DOM is used to update the actual DOM.
I may have missed a few steps knowingly or unknowingly, but this diagram covers most of the key steps.
Therefore you can see how in our example, the reconciliation would be done as below:

I will walk you through of updating the DOM to Output:150 and skipping the reconciliation steps of previous <div>'s
- Reconciliation starts from the main
<div>of the component which is the one with class=”container”. - Its child is
<div>which contains Output, and therefore react will start reconciliation of this child. - Now this child has it’s own children
<hr>and<h2> - So react will start reconciliation for
<hr> - Next, it will start with reconciliation of
<h2>and since it has it’s own children which are the texts Output: and the output from state, it will start reconciliation for these two. - First Output: text goes through reconciliation and since there is no change, nothing happens to the DOM.
- Next, output from state goes through reconciliation and since we have a new value now, i.e 150, react will update the actual DOM.
Rendering of the Actual DOM
In our example, during reconciliation, only our Output filed changes as shown below with paint flashing switched on from developer console.
And the component tree that is updated at the actual DOM.
Conclusion
Although this example is very trivial, it will give you a basic insight on what is happening under the hood in react.
I didn’t go for a more complex app as it would have been really tiresome to draw the entire component tree. :-|
The reconciliation process is where React
- Compares the previous internal instance with the next internal instance.
- Updates the internal Instance which is a Component Tree structure in JavaScript Object(Virtual DOM).
- And updates the actual DOM only at the node where there is an actual change along with it’s children.
