Step 1: Download Laragon
The first step is to download the Laragon installer from the official website. Go to https://laragon.org/download/ and choose the version of Laragon you want to download.
Step 2: Run the Installer
Once the download is complete, run the installer by double-clicking on the downloaded file. The installer will guide you through the installation process. Click on the “Next” button to proceed on the language selection screen.

Step 3: Choose Installation Location
In this step, you need to choose the location where you want to install Laragon. You can choose the default location or select a different location by clicking on the “Browse” button.

Step 4: Select Components
In this step, you can select the components and settings you want to install with Laragon. The default components include Apache, MySQL, and PHP. Also select options like auto start, pretty url (myapp.test) and the default text editors.

Step 5: Review the sections
Once you have completed all the steps, the screen will show you all the previous selections and click on the “Install” button to begin the installation process. Laragon will now be installed on your computer.


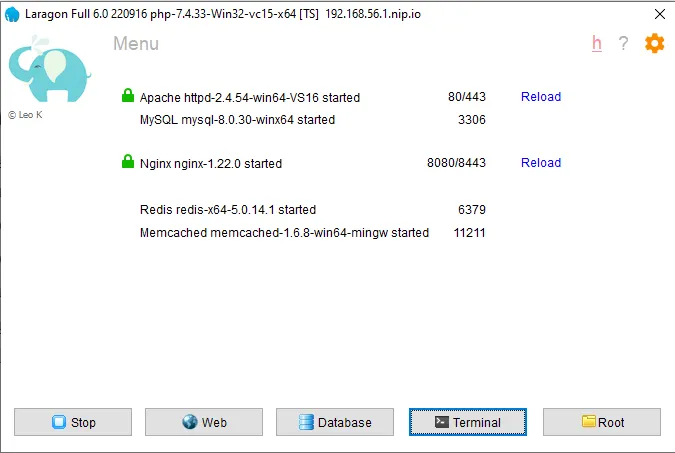
Step 6: Launch Laragon
Once the installation is complete, click on the “Finish” button to launch Laragon. You can now start using Laragon to develop your PHP applications. Click on the start all button to start the services like apache, nginx, redis, memcache and more.
Step 7: Enable the Auto-Create Virtual Hosts
To enable automatic creation of virtual hosts, click on the settings icon ⚙️, and select the General tab (which is the default selection when the window opens). Here, you can specify the hostname template. By default, the template is {name}.test, which means that when you create a project folder in C:\laragon\www, a virtual host and domain name with the folder name will be created. For instance, if you create a folder named “mysite”, the domain name will be mysite.test, and a virtual host file named auto.mysite.test.conf will be automatically created in C:\laragon\etc\apache2\sites-enabled and C:\laragon\etc\nginx\sites-enabled.

Step 8: Make sure you enable ports
Click on the settings icon ⚙️ and select the Service & Ports tabs and enable necessary options and ports. For SSL make sure enable the SSL port 443 for Apache and Nginx.

Laragon : Directory Structure
C:\laragon
├─── laragon.exe      # Laragon run file
├─── data\            # Data dir for MySQL, MariaDB, PostgreSQL, MongoDB
|   └─── mysql\
|   └─── ...
├─── www\             # Document Root (where you store your projects)
|   ├─── proj1\
|   └─── proj2\
├─── usr\             # User's preferences - Laragon respects any changes in this folder
|   ├─── tpl\         # User-defined templates (for changing something permanently)
|   └─── laragon.ini  # User's settings
├─── etc\             # Shared settings & apps
|   ├─── apps\
|   └─── ...
├─── bin\             # Binary dir
|   ├─── mysql\
|   └─── ...
└─── tmp\             # Where to store temporary data
For more details refer the official site : Laragon Docs