From the part 1 we learned that optical flow is not enough to do explicit motion estimation. Can we do something better than only optical flow?
Note this paper is a part of a series:
- Motion Modeling in Videos: Part 1 — Optical Flow (link)
- Motion Modeling in Videos: Part 2 — Optical Expansion
- Motion Modeling in Videos: Part 3 — Scene Flow (link)
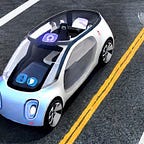
When driving a car, we perceive the motion of the vehicle in front of us by observing changes in its size. There are three possible scenarios:
1 . If the car in front of us appears larger, it is likely driving slower, and the distance between us is decreasing

2. If the car in front of us becomes smaller, it drives faster, and the distance increases.

3. If the car doesn’t change its size, it means we have the same speed and a constant distance between vehicles.

Through simple observation of how the scale of an object changes, we can intuitively understand its relative motion and velocity with respect to us.
This effect can be modeled in computer vision as optical expansion or scale change.
The optical expansion (or scale change) is key biological vision feature for velocity perception and navigation in dynamic environment.
What is optical expansion?
Optical expansion/contraction is a scale change of the object.

he optical flow provides us with information about how objects move along the x and y directions (u, v) in the image. The scale change (s) gives us insight into how the object moves in the depth (z) direction. Let’s develop an intuition with a simple 1D case.

As you can see from the image above, the scale change in the 1D case can be computed as the ratio between the pixel width of the car in the image at time t+1 and the pixel width of the car in the image at time t. This ratio is metric invariant (pixels/pixels cancel out), which means it is independent of any camera parameters or real-world object sizes.
Of course, we are also interested in computing the scale change in the 2D case. In this scenario, it is equivalent to the square root of the ratio between the areas in pixels covered by the blue car at time t+1 and at time t.
One way to achieve this is through instance segmentation and tracking, which allows us to obtain masks of the object in consecutive frames and compute their respective areas. Another option is to compute the scale change directly from optical flow.

The pytorch code for scale change estimation from optical flow:
import torch
import torch.nn.functional as F

def affine(pref: torch.Tensor, flow: torch.Tensor, pw:int =1)-> Tuple[torch.Tensor, torch.Tensor, torch.Tensor]:
    """Find affine transform.

    Note: original code from https://github.com/gengshan-y/expansion/blob/master/models/VCN_exp.py

    Args:
        pref: reference coordinates of the shape [B, 2, H, W]
        flow: optical flow of the shape [B, 2, H, W]

    Returns:
        exp: optical expansion of the shape [B, 1, H, W]
        error: error of the affine transform [B, 1, H, W]

    """

    b,_,lh,lw = flow.shape

    ptar = pref + flow
    pref = F.unfold(pref, (pw*2+1,pw*2+1), padding=(pw)).view(b,2,(pw*2+1)**2,lh,lw)-pref[:,:,np.newaxis]
    ptar = F.unfold(ptar, (pw*2+1,pw*2+1), padding=(pw)).view(b,2,(pw*2+1)**2,lh,lw)-ptar[:,:,np.newaxis] # b, 2,9,h,w
    pref = pref.permute(0,3,4,1,2).reshape(b*lh*lw,2,(pw*2+1)**2)
    ptar = ptar.permute(0,3,4,1,2).reshape(b*lh*lw,2,(pw*2+1)**2)
    # Find first inverse of pref by using The Moore–Penrose inverse

    prefprefT = pref.matmul(pref.permute(0,2,1))
    ppdet = prefprefT[:,0,0]*prefprefT[:,1,1]-prefprefT[:,1,0]*prefprefT[:,0,1]
    ppinv = torch.cat((prefprefT[:,1,1:],-prefprefT[:,0,1:], -prefprefT[:,1:,0], prefprefT[:,0:1,0]),1).view(-1,2,2)/ppdet.clamp(1e-10,np.inf)[:,np.newaxis,np.newaxis]

    Affine = ptar.matmul(pref.permute(0,2,1)).matmul(ppinv)
    error = (Affine.matmul(pref)-ptar).norm(2,1).mean(1).view(b,1,lh,lw)

    Avol = (Affine[:,0,0]*Affine[:,1,1]-Affine[:,1,0]*Affine[:,0,1]).view(b,1,lh,lw).abs().clamp(1e-10,np.inf)
    exp = Avol.sqrt()

    return exp, error
Now that we know how to compute scale change, we need to understand its relation to real motion in 3D (motion in depth) in order to make use of it.
How to relate optical expansion (scale change) to the motion in depth?

Let's examine an example to see how it works. Consider three cases:
- If the car in front of the camera moves forward, it decreases the depth (distance to the camera), and the motion in depth ratio is smaller than 1.0.
- If the car moves backward, the motion in depth increases and becomes greater than 1.0.
- If the car stays in the same place, the motion in depth equals 1.0

You may also note that, as the motion in depth is determined by the ratio between depth values, it does not have an inherent metric.

If we place our examples of scale change and motion in depth side by side, we can observe an interesting relationship.

Is this always true? Not necessarily.
In the examples above, we consider a specific scenario:
- The car does not have rotational motion.
- We also assume that the distance to all parts of the car can be measured as the closest point of the car to the camera. This condition is equivalent to modeling the projection to the camera with a scaled orthographic projection camera model.
What is scaled orthographic camera model projection?
The way how most of standard cameras projects 3d X(X, Y, Z) point to 2d point x(x,y) in image can be explained by pinhole projection model.

Orthographic projection model assumes that all 3d points of the world located on single plane, therefore they all have the same depth. In order to project the 3d points to 2d image we can ignore depth (since all world has same Z) and project to the image by following equations x = X, y = Y.
Here x,y — pixels coordinates, X, Y — 3d coordinates.

The orthographic projection could be reasonable approximation of the 3d world in case if the objects appear at far distances (e.g. in satellites images).
The scaled orthographic projection is a combination of the pinhole camera model and orthographic model. It is also called weak prospective model.

First, all the points of the objects projected to the single plane in 3d with Zconst distance to the camera, and than pinhole camera model is used to project this points to the image.


In the image above you may see how scaled orthographic assumption introduces the distance errors.
Note: The depth constancy assumption works only in the patches where we apply affine transformation for scale change estimation. It will be different for different patches.
The derivation of the relation between scale change and motion in depth
Lets first consider the case where we have motion of the car without rotation (see the image below).


We get exact inverse relation as in intuition example.
Now let’s consider 2d case with rotation (we assume top view world with only rotation theta angle.)


We may see that when we have rotation even in simple scenario, where we model only one angle theta, the relation becomes non-linear with respect to rotation. However, in case of small rotation angles it can be neglected.
This could be the case for the cameras with high frame rate (e.g. 30 fps).
Therefore, we will assume for such cameras the relation between motion in depth and scale change is simplified to inverse dependency.
Application of the motion in depth for time to collision estimation
One important application of the motion in depth is estimation of the time before collision.
The time to collision can be formulated as distance to the object divided by the relative velocity between it and the camera.
Let’s find out how time to collision (TTC) related to the motion in depth:

As application we can use cameras to estimate time to collision and replace ultrasound sensors for autonomous driving, or make automatic collision avoidance system for UAV drones, robots etc.

Motion modeling with normalized scene flow
We already learned that for motion modeling we need scene flow.
Let’s find out how motion in depth related to the scene flow and how can we use it to estimate the motion.


From the images above, we can observe that we can resolve ambiguities in motion directions from normalized scene flow by utilizing motion in depth (see equations above). If we know the motion direction of the ego vehicle (or can compute it from essential matrix estimation), we can apply rotational homography to de-rotate normalized scene flow vectors. Here’s the code:
def get_derotated_normalized_sene_flow(forward_flow: np.ndarray, motion_in_depth: np.ndarray, camera2_R_camera1: np.ndarray, intrinsic: np.ndarray)-> np.ndarray:
    """Get derotated normalized scene flow.

    Args:
    forward_flow: forward optical flow from t to t+1 of the shape [height, width, 2]
    motion_in_depth: motion in depth Z2' / Z1 of the shape [height, width]
    camera2_R_camera1: 3x3 rotation matrix from camera1(t) to camera2 (t+1)
    intrinsic: 3x3 intrinsic matrix form camera (we assume camera1 is the same as camera2)

    Return:
        norm_scene_flow: normalized derotated scene flow of the shape [height*width, 3]
    """

    height, width, _ = forward_flow.shape
    xx, yy = np.meshgrid(range(width), range(height), indexing='xy')
    coords1 = np.asarray(np.stack((xx, yy), axis=-1))
    coords2 = coords1 + forward_flow

    # Make homogeneous coordinates
    ones = np.ones((height, width, 1))
    coords1 = np.concatenate((coords1, ones), axis=-1).reshape(-1, 3).T
    coords2 = np.concatenate((coords2, ones), axis=-1).reshape(-1, 3).T

    H01 = intrinsic.dot(camera2_R_camera1).dot(np.linalg.inv(intrinsic))
    # Remove rotation
    coords1 = (H01 @ coords1)
    norm_scene_flow = np.linalg.inv(intrinsic).dot(motion_in_depth.flatten()[np.newaxis] * coords2 - coords1)
    return norm_scene_flow.T
and then we can estimate angle between ego motion translation vector and all normalized scene flow vectors as following:

def compute_plane_plus_parallax(norm_scene_flow: np.ndarray, camera2_t_camera1: np.ndarray)-> np.ndarray:
    """Compute plane plus parallax distance.

    Args:
        norm_scene_flow: normalized derotated scene flow of the shape [height*width, 3]
        camera2_t_camera1: translation vector from camera1(t) to camera2(t+1)

    Returns:
        c3d: plane plus parallax error of the shape [height * width]
    """

    norm = np.linalg.norm(norm_scene_flow, axis=-1) * np.linalg.norm(-camera2_t_camera1)
    dot_product = np.sum(norm_scene_flow *  -camera2_t_camera1[None], axis=-1)

    cos_theta = dot_product / (norm + 1e-8)
    sin_theta = np.sqrt(1.0  -  cos_theta**2)
    c3d = np.linalg.norm(norm_scene_flow, axis=-1) * sin_theta

    return c3d
As a result, we can model all possible motions with normalized scene flow except for collinear (same direction as the camera) motion. To resolve this final motion ambiguity, depth information is needed, indicating that we still require the estimation of full 3D scene flow.
Literature:
[1] Upgrading Optical Flow to 3D Scene Flow through Optical Expansion, https://openaccess.thecvf.com/content_CVPR_2020/papers/Yang_Upgrading_Optical_Flow_to_3D_Scene_Flow_Through_Optical_Expansion_CVPR_2020_paper.pdf
[2] TTC4MCP: Monocular Collision Prediction Based on Self-Supervised TTC Estimation, https://www.researchgate.net/publication/376502431_TTC4MCP_Monocular_Collision_Prediction_Based_on_Self-Supervised_TTC_Estimation
[3] Virtual kitti dataset: https://europe.naverlabs.com/research-old2/computer-vision/proxy-virtual-worlds-vkitti-2/