Add Emissions to Texture Maps with Gimp
Objective: Add emissions to our scene with Gimp.

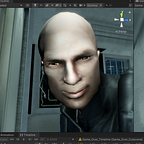
The control room is looking great, but I think adding emissions will elevate our scene to the next level.
Emissives are a texture that illuminate your scene. Why do you need one? Take a look and see what happens when I add emissions without an emissive.

It illuminates the whole object. We only want to illuminate the green part of the tube.
This will require us to make an emissive in a photo editor. Since my wallet is hiding from me to pay for photoshop, I’ll have to use Gimp.
In this article I will add an emissive to this wall piece for simplicity's sake.

Using the steps from the last article we can bring our texture map into Gimp.
- Right click the texture map and click the Show in Explorer option

Then drag your texture map into Gimp

Now we need to create a new layer called black background

Then grab the paint bucket tool and click on the texture to make it black.

Then create another layer called emission and disable the black background layer.

Now we need to use the select tool to select the portion we want emitted. Then use the paint bucket tool to make the selected portion white.

Now turn back on the black background layer. The white part of this texture map is the part that will have the emissions on. Save and place this into your Unity project.

Now after dragging our emissive into the emission map slot, it starts to glow the way we want it to.

You adjust bright your emissive is using the intensity meter
Before emissions

After emissions

If you want to see more of this control room, click here Control Room by JokingJester1 (itch.io)