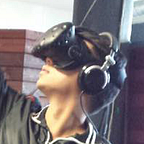
If you’ve ever wondered about how to build a user interface for VR, you have come to the right blog. Today we will go over some basics to get you started creating your own virtual reality UI. But first, here is a list of equipment and software that you will need.
Requirements:
- Unity
- Oculus Rift (and a computer that can operate it)
- Photoshop (or a comparable graphics editor)
Unity
Unity is a free 3D game engine that is a popular choice for VR development. It has excellent beginner tutorials, extensive online documentation, and a helpful developer community of diverse experience levels. The Unity Asset Store is also a great resource for out-of-the-box solutions that you can tap into for your project.
Download Unity’s free community edition, here.
Oculus Rift
Oculus Rift is the premiere VR headset from Facebook. It is an ideal headset for VR development because of the seamless integration with Unity and a focus on the developer experience.
Oculus provides constant software updates and new features, as well as, plenty of boilerplates and sample projects for you to draw from, so you’ll never have to start from scratch. Their documentation, while not as comprehensive as Unity, is getting better every day.
The big caveat is that you will need a computer with a powerful graphics card (GPU), and the required HDMI and USB ports to be able to run the Rift.
Photoshop
Photoshop needs no introduction. In a VR workflow, Photoshop is used to create sprites for your UI, where sprites are bitmap graphics such as icons and buttons. We will go over how to create UI sprites in subsequent parts of this blog.
Getting Started
Assuming that you have the required equipment and software setup, follow these steps:
- Launch Unity and create a new 3D project.
- Import the Oculus Integration package from the Unity Asset Store into your Unity project.
- Go to
File > Build Settingsand openPlayer Settings. - Find
XR Settingsand check theVirtual Reality Supportedcheckbox, then add Oculus SDK to the list.
Now plug in your Oculus Rift headset and peripherals, and test a sample scene from the Oculus package by opening a scene and clicking the Preview button in the Unity editor. If everything is working as expected then you are ready to create your first VR UI.
In the next part of this blog, we will learn how to set up a scene using Oculus prefabs and make them interact with Unity’s default UI components.
Want to see how a custom VR UI works? Check out my VR UI Design System in the Unity Asset Store.
And now here is part 2 of our tutorial: How to Build VR UI’s with Unity and Oculus Rift, Part 2
