Mastering MetaSleuth: Your Practical Guide to Tracking Cryptocurrency on the Blockchain
Take your blockchain investigations to the next level! This hands-on guide will teach you how to use MetaSleuth to track crypto transactions, follow stolen funds, and expose money laundering schemes.

This article is also published on Mirror.xyz.
In our initial article titled “Conduct Effective OSINT Investigations for Money Laundering & Sanctions,” we explored the foundations of creating a detailed profile of an individual of interest using tools like OpenSanctions and OpenCorporates.
Building on that foundation, our subsequent article, “Unmasking Crypto Money Laundering with OSINT & Blockchain Forensics,” delved into prevalent techniques of cryptocurrency laundering. We examined the essential tools for such investigations, how to set up investigative graphs, and the integration of cryptocurrency tracking graphs into broader investigative frameworks.
Following the response to that article, many of you expressed a desire for a deeper dive into tracking asset movements on the blockchain. In response, this article will focus exclusively on the practical aspects of monitoring cryptocurrency transactions on the blockchain, offering hands-on guidance to enhance your investigative skillset.
Navigating the MetaSleuth Dashboard
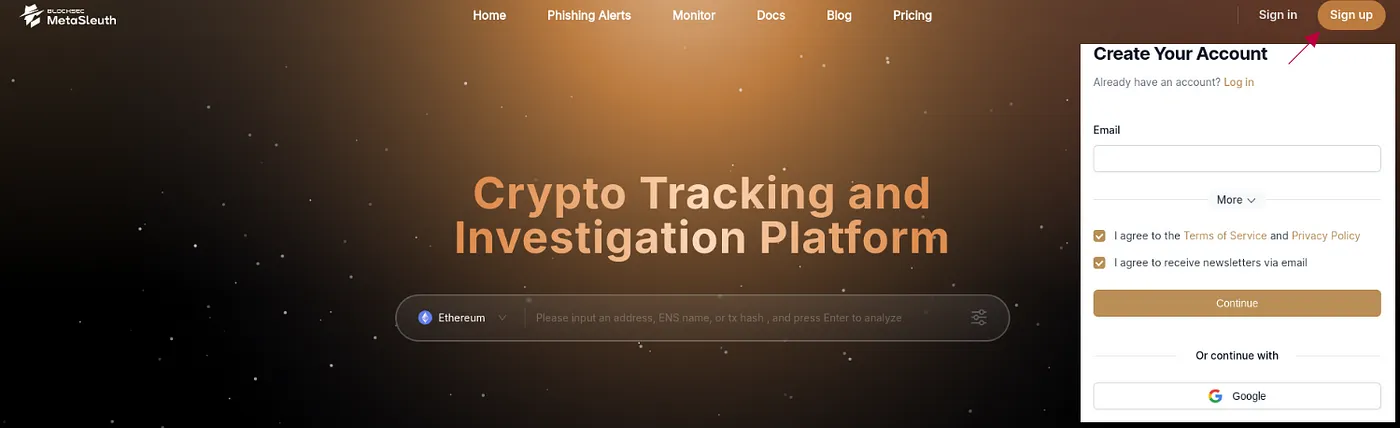
When you first visit the MetaSleuth homepage, you’ll find yourself welcomed by a sleek and uncluttered interface featuring just a search bar. Here, you can easily input a wallet address, transaction hash, or ENS name. While it’s possible to use MetaSleuth without logging in, this access is quite restricted and may quickly prove frustrating. To avoid any interruptions a few steps into your investigation, I strongly recommend setting up your login immediately. This proactive step ensures you won’t find yourself forced to pause and log in just when things are getting interesting.
Targeting Your Crypto Addresses
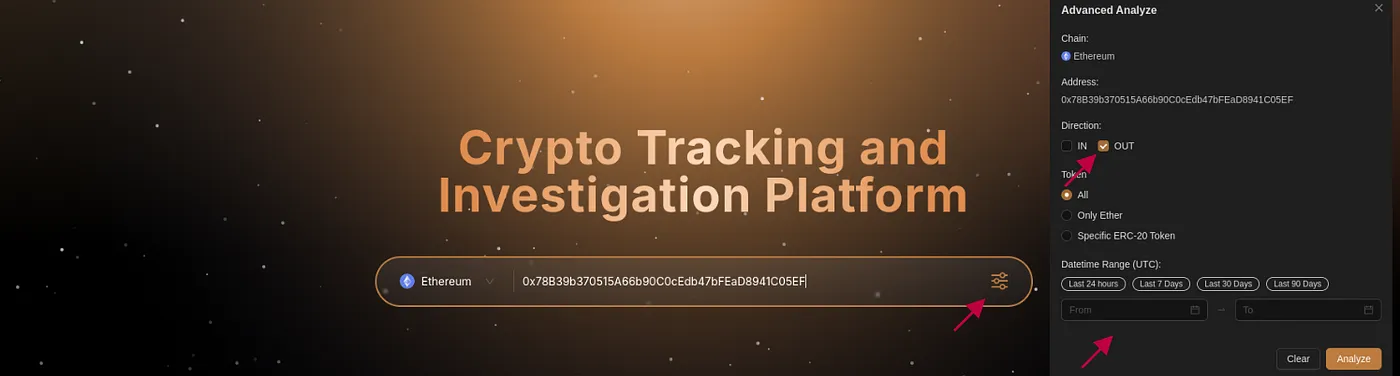
We’ll kick off our exploration by entering the addresses that capture our interest. For this demonstration, I’ve chosen to use an Ethereum-based address. It’s important to highlight that MetaSleuth’s versatility extends to a robust support for 13 different blockchains: Bitcoin, Ethereum, Binance Smart Chain, TRON, Solana, Polygon, Fantom, Arbitrum, Cronos, Moonbeam, Avalanche, Optimism, Base, Linea.
This extensive compatibility is crucial, particularly considering our previous discussions on how ‘chain-hopping’ is a prevalent technique in modern crypto laundering.
Before I proceed with hitting “enter,” I’ve already added the address into the search bar, but I’ll need to set some parameters first. This is a matter of personal preference, yet experience has taught me that the number of transactions associated with your targeted address can quickly make the graph unwieldy. Knowing that this address fell victim to a phishing attack, I’ll narrow the search to the days surrounding the attack. Additionally, to streamline the analysis and make it easier to follow, I’ll specifically filter for outgoing transactions, as our primary interest lies in tracking where the stolen money is headed.
Visualizing the Flow of Funds
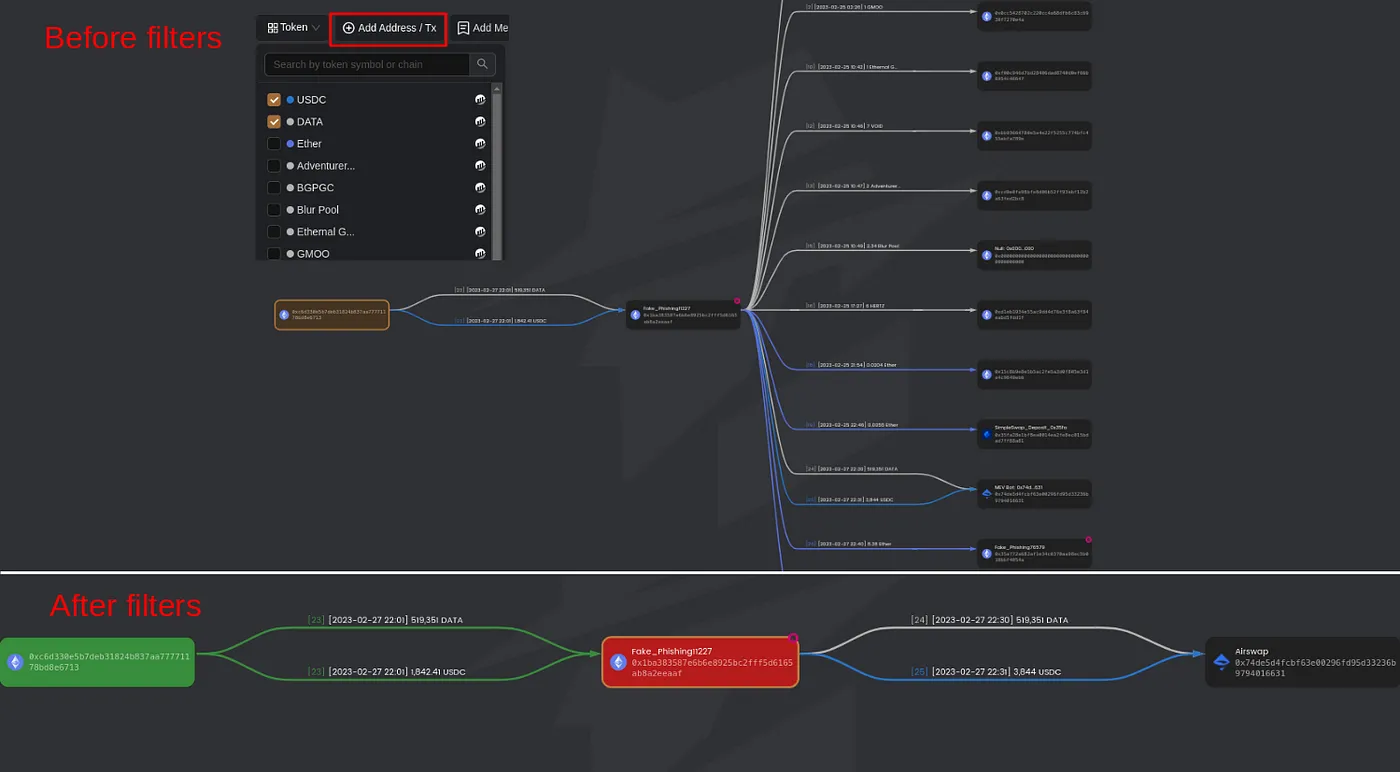
Once you apply your settings, MetaSleuth will create a detailed fund flow graph that visually depicts the movement of funds between addresses and transactions. As you can observe, even with our filters in place, the graph remains quite busy (I’ve intentionally cut off a portion to concentrate on the essential details). To further clarify the visualization for myself, I immediately implement additional modifications. I color-coded the victim’s address in green and highlighted the tokens I’m specifically interested in tracking — USDC and DATA in this instance. Additionally, I filter out any transactions that aren’t immediately relevant, streamlining the graph to focus solely on our primary areas of concern.
Diving Deeper into Transaction Details
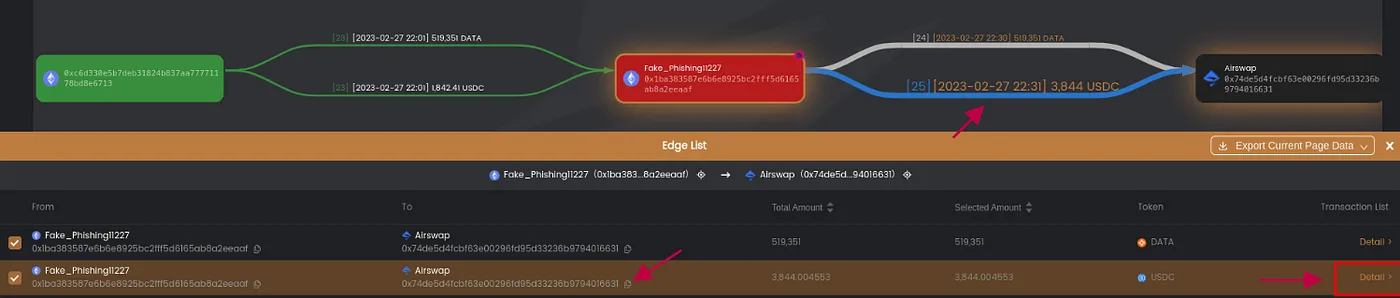
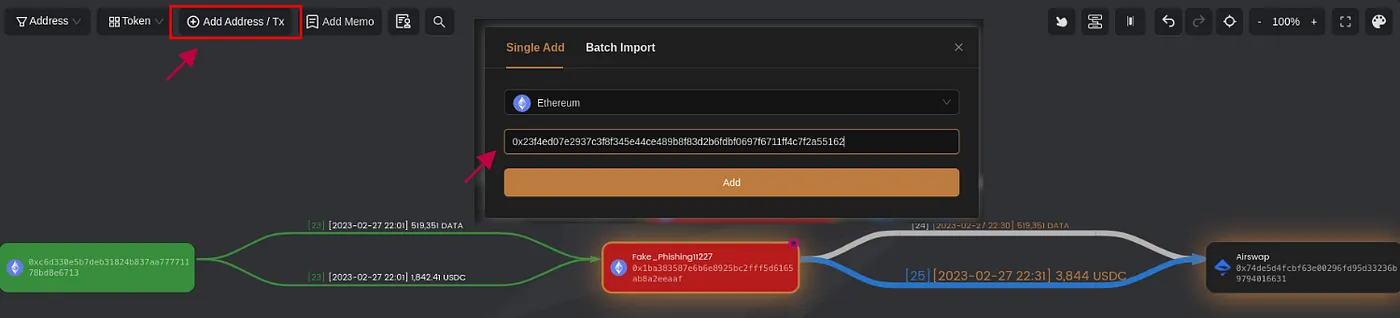
Having applied some basic graph hygiene, we can clearly see that the fake phishing address transferred the stolen funds to AirSwap. To delve deeper into this particular transaction, click on the ‘asset transfer edge’ on the canvas, then select ‘details’ from the edge list to access a list of transactions. Locate and copy the transaction hash for this specific transfer.
By incorporating this transaction into the ‘Add Address’ feature, we facilitate a comprehensive examination of the asset transfers involved, thereby deepening our understanding of the transaction’s details.
With these insights, we now possess a full overview of the token swapping process. The phishing address exchanged USDC and DATA tokens through AirSwap and successfully acquired 14.58 ETH, shedding light on the dynamics of the fraudulent activities.

Following the Trail of Suspicious Activity
To further trace the movement of the funds, simply replicate the steps we’ve already taken. Start by setting the date range that interests you and then add the relevant addresses or transaction hashes using MetaSleuth’s ‘Add Address’ feature. This approach enables you to monitor subsequent transactions linked to those addresses. By persistently applying this method, you’ll be able to track the flow of funds across multiple nodes and unravel the relationships between the various entities involved in the chain.
Monitoring and Alerts
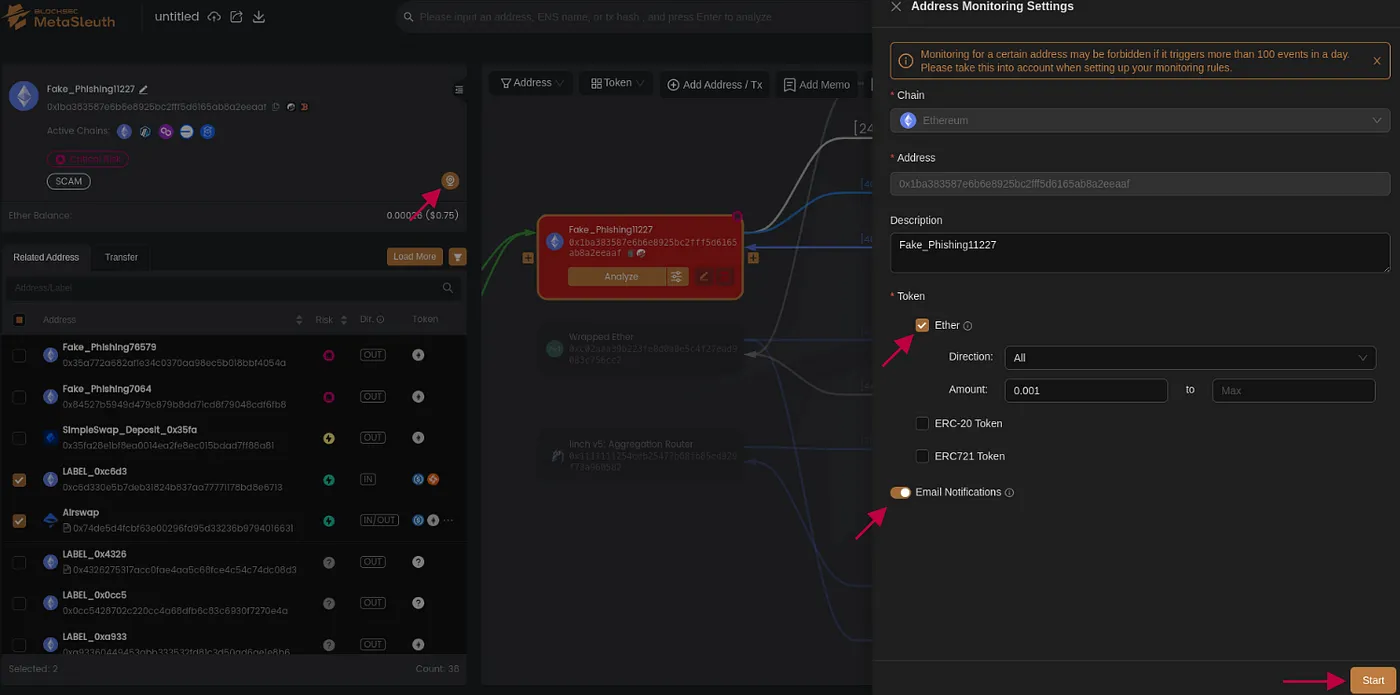
Finally, remember that you can set up alerts to actively monitor funds that haven’t been transferred yet. By enabling monitoring, you’ll receive email notifications for any relevant asset transfers. To do this, click on the node or address you want to keep an eye on, select the specific tokens you’re interested in, and then click ‘Start’ to begin monitoring. This feature ensures you’re promptly informed of all pertinent transactions.
Final Thoughts
I hope this article serves as a helpful starting point for using MetaSleuth. This tool is just one of the many invaluable resources available to investigators delving into the complex realm of blockchain transactions. As the world of cryptocurrency develops, so too will the tools we use to monitor it. If you’ve experimented with other tools, feel free to share your experiences in the comments below. Your insights could benefit the entire community, offering us all a chance to explore additional resources.
Thank you for reading, and catch you next time.
Explore Next
Take your phishing investigations to the next level: learn how to visually map and expose threats using Maltego and OSINT. Read on…
Discover how blockchain is transforming industries on the Blockchain Insights Hub. Follow me on Twitter for real-time updates on the intersection of blockchain and cybersecurity. Subscribe now to get my exclusive report on the top blockchain security threats of 2024. Dive deeper into my blockchain insights on Mirror.xyz.