Create AI-Powered Art using text prompts from your own custom Discord.js Bot
In this tutorial, you’ll learn how to use a StableDiffusion provider and Discord.js to create a Discord Bot that generates unique art from text prompts.

Prerequisites & Software Needed
- Prior knowledge of how to create a Discord Bot
- Node.js
- A code editor —I will be using Visual Studio Code
- A Discord and Discord Developer account with a Discord Application already registered
- Advanced Requisites — Stable Diffusion Docker(Docker Image) or RunPod (GPU Cloud) to run your own Stable Diffusion Web UI on your machine or Cloud. You can view the advanced command that uses this method
Step 1: Clone and Configure
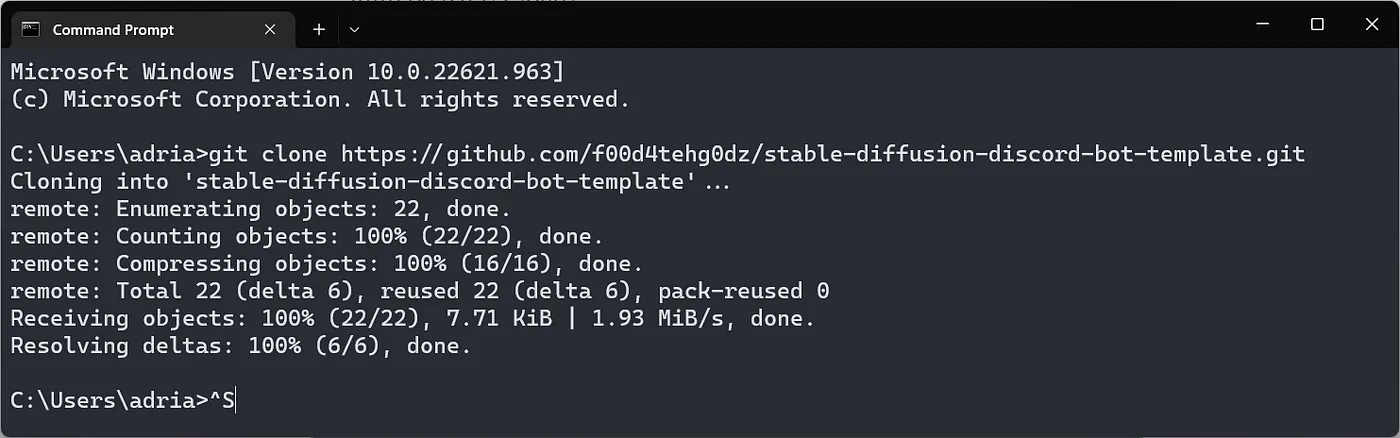
First, clone this repository to your machine and open it with your code editor. This repository is a base template for any Discord.js Discord Bot. It is similar to the Discord.js guide to building your first bot.
Step 2: Set Up the Environment
To start coding your bot, open your preferred code editor.

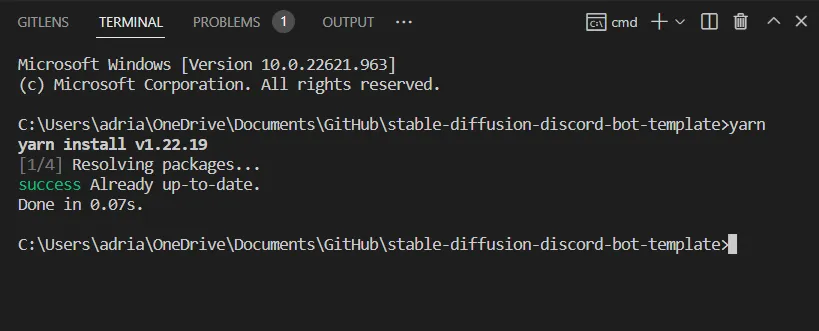
Open your Terminal and run yarn to install the packages from package.json
Next, rename .env-sample to .env and inside DISCORD_TOKEN= place your Bot token from the Discord developer Bot section

Lastly, let’s take a look at the package.json file for development. Open package.json.
You will notice two commands under "scripts"
"deploy": "node deploy-commands.js",
"start": "node index.js"
These are the commands to deploy new commands for your bot and start your bot subsequently.
Next, create a folder called Commands.
Inside that folder make a generate.js file and advanced.js file.

With everything set up, let’s begin development!
Step 3: Coding the Bot
Let’s start up our bot. To do that, open the terminal, go to your project folder directory, and run yarn start.

You should see a message along the lines of “Ready!” If you don’t, please ensure all packages are installed and you don’t have syntax errors in package.json.
Let’s open up generate.js first and begin.
Place all the required packages at the top of the file. Make sure dotenvis initialized first and foremost.
const dotenv = require('dotenv');
dotenv.config();
const WebSocket = require('ws');
const { SlashCommandBuilder, AttachmentBuilder } = require('discord.js');
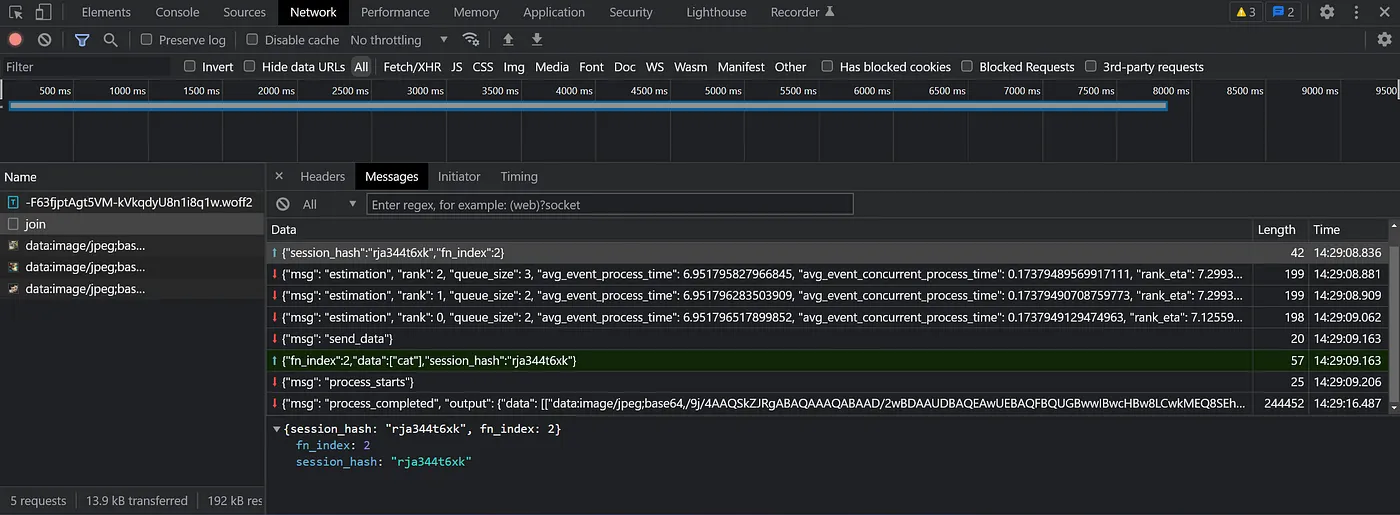
const createHash = require('hash-generator');We are going to create a function that returns a generated hash. This hash is specific to the StableDiffusion 1.5 demo being used by the provider here:
The Stable Diffusion 1.5 Demo requires a hash to be sent through Web Sockets when prompted.
To provide an example, below you’ll notice that both fn_index:2 and session_hash inside “session_hash”. Next, we will include these parameters in our generate.js file.
function generateHash() {
  let hash = createHash(12)
  return {
    session_hash: hash,
    fn_index: 2
  }
}
Now we need to build out a SlashCommandBuilder
We will modularize this command with `module.exports`
module.exports = {
  data: new SlashCommandBuilder()
    .setName('generate')
    .setDescription('Generates an image from a text prompt using Stable Diffusion 1.5')
    .addStringOption(option => option
      .setName('prompt')
      .setDescription('generate image prompt')
    ),
};
But wait! Do not run the code just yet.
You may have noticed we don’t have an execute at the end. Let’s add that next.
async execute(interaction) {
  },
};
Let's put it all together now.

Next, we want to fetch the interaction and the string from running the command /generate prompt .
const prompt = interaction.options.getString('prompt');
console.log('What to generate?', prompt);
Now let's wrap the next piece of code in try/catch and define a few constants with an immediate reply to the interaction.
The first constant is for Web Sockets. This connects directly to the /queue/join and places us in the Web UI queue upon generation prompt.
try {
      interaction.reply("I'm generating...");
      const ws = new WebSocket('wss://runwayml-stable-diffusion-v1-5.hf.space/queue/join');
      const hash = generateHash();

} catch (error) {
      interaction.reply(error);
      console.error(error);
}console.error(error);
Now we should probably apply our Web Sockets and get to the fun stuff!
ws.on('open', () => {});
ws.on('message', async (message) => {});
ws.on('error', async (error) => {
   interaction.editReply({
      content: 'An error occurred while generating the image',
   });
   console.error(error);
});
Your generate.js should look similar to this now.
module.exports = {
      data: new SlashCommandBuilder()
        .setName('generate')
        .setDescription('Generates an image from a text prompt using Stable Diffusion 1.5')
        .addStringOption(option => option
          .setName('prompt')
          .setDescription('generate image prompt')
          ),
      async execute(interaction) {
        const prompt = interaction.options.getString('prompt');
        console.log('What to generate?', prompt);

        try {
          interaction.reply("I'm generating...");

          const ws = new WebSocket('wss://runwayml-stable-diffusion-v1-5.hf.space/queue/join');
          const hash = generateHash();
          ws.on('open', () => {});

          ws.on('message', async (message) => {});

          ws.on('error', async (error) => {
            interaction.editReply({
              content: 'An error occurred while generating the image',
            });
            console.error(error);
          });
        } catch (error) {
            interaction.reply(error);
            console.error(error);
        }
      },
};
Inside ws.on(‘message’)we are going to first JSON.parse the returned message and determine if the msg = ‘send_data’ or if it = ‘process_completed’.
Note more messages get sent, but these two are the main focus of this tutorial.
To do that, we first create a msg constant that contains a JSON.parse of the returned message:
const msg = JSON.parse(`${message}`);
if (msg.msg === 'send_data') {
} else if (msg.msg === 'process_completed') {
} else {}
Next, we want to add the ‘data’ we want to send. We will create a data constant containing both the Discord users prompt wrapped in an array, as well as the hash constant we made.
const data = {
   data: [prompt],
   ...hash,
};
ws.send(JSON.stringify(data));
You may have noticed I added an ws.send as well. That is specifically to send the data package with all that is needed to begin the generation process.
Now, take a look at your code and make sure it matches this:
const dotenv = require('dotenv');
dotenv.config();
const WebSocket = require('ws');
const {
  SlashCommandBuilder,
  AttachmentBuilder
} = require('discord.js');
const createHash = require('hash-generator');

function generateHash() {
  let hash = createHash(12)
  return {
    session_hash: hash,
    fn_index: 2
  }
}

module.exports = {
  data: new SlashCommandBuilder()
    .setName('generate')
    .setDescription('Generates an image from a text prompt using Stable Diffusion 1.5')
    .addStringOption(option => option
      .setName('prompt')
      .setDescription('generate image prompt')
    ),
  async execute(interaction) {

    const prompt = interaction.options.getString('prompt');
    console.log('What to generate?', prompt);

    try {
      interaction.reply("I'm generating...");

      const ws = new WebSocket('wss://runwayml-stable-diffusion-v1-5.hf.space/queue/join');
      const hash = generateHash();
      ws.on('open', () => {});

      ws.on('message', async (message) => {
        const msg = JSON.parse(`${message}`);
        if (msg.msg === 'send_data') {
          const data = {
            data: [prompt],
            ...hash,
          };
          ws.send(JSON.stringify(data));
        } else if (msg.msg === 'process_completed') {

        } else {}
      });

      ws.on('error', async (error) => {
        console.error(error);
        interaction.editReply({
          content: 'An error occurred while generating the image',
        });
      });
    } catch (error) {
      console.error(error);
    }

  },
};
Great! You are nearly there!
We are now going to add a try/catch and fetch the images sent back to us after msg = ‘process_completed’
try {

} catch (error) {
       console.error(error);
       interaction.editReply({
          content: 'An error occurred while generating the image',
       });
}
Next inside the try we are going to fetch the msg output. Additionally, we are creating a constant called attachments for an array. Remember we are going to have several images sent back to us.
try {
     const results = msg.output.data[0];
     const attachments = [];
} catch (error) {
       console.error(error);
       interaction.editReply({
          content: 'An error occurred while generating the image',
       });
}
Next, we want to loop through the results, and split them into new rows for each , found.
Add to the buffer the results constant and attach them to Discord’s AttachmentBuilder.
Make sure to push each attachment into the array with attachments.push(attachment).
Your code should look similar to below:
try {
     const results = msg.output.data[0];
     const attachments = [];
     for (let i = 0; i < results.length; i++) {
         const data = results[i].split(',')[1];
         const buffer = Buffer.from(data, 'base64');
         const attachment = new AttachmentBuilder(buffer, {
               name: 'generate.png',
         });
         attachments.push(attachment);
      }
} catch (error) {
       console.error(error);
       interaction.editReply({
          content: 'An error occurred while generating the image',
       });
}
Lastly, we must send the attachments to Discord for the user to view!
Note we are using editReply as we originally sent a reply when we began the generation process.
interaction.editReply({
           content: `You asked me for ${prompt}`,
           files: attachments,
});
Your final code for the file generate.js should look similar to below:
const dotenv = require('dotenv');
dotenv.config();
const WebSocket = require('ws');
const {
  SlashCommandBuilder,
  AttachmentBuilder
} = require('discord.js');
const createHash = require('hash-generator');


function generateHash() {
  let hash = createHash(12)
  return {
    session_hash: hash,
    fn_index: 2
  }
}

module.exports = {
  data: new SlashCommandBuilder()
    .setName('generate')
    .setDescription('Generates an image from a text prompt using Stable Diffusion 1.5')
    .addStringOption(option => option
      .setName('prompt')
      .setDescription('generate image prompt')
    ),
  async execute(interaction) {

    const prompt = interaction.options.getString('prompt');
    console.log('What to generate?', prompt);

    try {
      await interaction.reply("I'm generating...");

      const ws = new WebSocket('wss://runwayml-stable-diffusion-v1-5.hf.space/queue/join');
      const hash = generateHash();
      ws.on('open', () => {});

      ws.on('message', async (message) => {
        const msg = JSON.parse(`${message}`);
        if (msg.msg === 'send_hash') {
          ws.send(JSON.stringify(hash));
        } else if (msg.msg === 'send_data') {
          const data = {
            data: [prompt],
            ...hash,
          };
          ws.send(JSON.stringify(data));
        } else if (msg.msg === 'process_completed') {
          try {
            const results = msg.output.data[0];
            const attachments = [];
            for (let i = 0; i < results.length; i++) {
              const data = results[i].split(',')[1];
              const buffer = Buffer.from(data, 'base64');
              const attachment = new AttachmentBuilder(buffer, {
                name: 'generate.png',
              });
              attachments.push(attachment);
            }
            interaction.editReply({
              content: `You asked me for ${prompt}`,
              files: attachments,
            });
          } catch (error) {
            console.error(error);
            await interaction.editReply({
              content: 'An error occurred while generating the image',
            });
          }
        }
      });

      ws.on('error', async (error) => {
        console.error(error);
        await interaction.editReply({
          content: 'An error occurred while generating the image',
        });
      });
    } catch (error) {
      console.error(error);
    }

  },
};
Now, let's run the command and see it in action!

Success! You have generated your first set of images using Stable Diffusion through your very own custom Discord Bot! This is just an example of what’s possible with Discord commands and Web Sockets. Please note that this is best used for demo purposes, and I advocate for you to host your own Stable Diffusion Web UI.
You can find the final code for the bot below, along with an Advanced Command that connects to a Web UI that you, yourself, host with either a GPU Cloud service or a docker image all utilizing the request package: https://github.com/f00d4tehg0dz/stable-diffusion-discord-bot-template/tree/final
Thank you for reading. Please check out my Discord Bot, Arti, and try out some more advanced commands in action!