Sketch-guided Image Generation with Stable Diffusion
Stable Diffusion (SD) generates images from text. Amazing images, but they might not always be exactly what you had in mind. Read on to learn how to guide the diffusion process with a sketch using text-to-image (T2I) adapters.

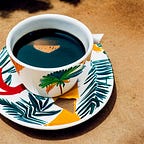
I began my personal journey into the SD world with a drawing from my girlfriend.

Picture this: you have a vision in your mind, and you try to convey it with a prompt like “tree, swing chair, sun, water, and a few fish”. You quickly realise that it’s challenging to capture all the intricacies of your imagination in a string of words.
This tutorial will show you how to overcome this:
- Use Stable Diffusion XL and text-to-image (T2I) adapters to
generate a variation of your input image guided by a text prompt - Tune the most important parameters
- Focused on Python code, parameters, and example images — rather than handling of the popular SD UIs (they gave me a headache)
T2I Adapters
The core idea is to take an existing image and transfer some of its elements to a new image.

Text-to-image (T2I) adapters were introduced in early 2023 (paper). They guide the diffusion process using another image in addition to the text prompt. There are various adapters for different purposes, read more on Hugging Face. We will use the sketch adapter sketch_sdxl_1.0.

I won’t go into other aspects of Stable Diffusion here, as there are plenty of resources available: Start with the Reddit Wiki.
Code 🚀
Let’s dive right in.
Prerequisites
pip install these packages:
controlnet-aux            0.0.7
diffusers                 0.23.1
open-clip-torch           2.20.0
Pillow                    9.5.0
pytorch-lightning         1.9.4
torch                     2.1.0
torch-grammar             0.3.3
torchaudio                2.1.0
torchdiffeq               0.2.3
torchmetrics              1.2.0
torchsde                  0.2.5
torchvision               0.16.0
transformers              4.30.2
Python version 3.10.12, running on Ubuntu 22.04.3 LTS. All of this was done on a single Nvidia GeForce RTX 3090 GPU.
Load the input image
We’ll begin with an image of a dog, a German Shepherd.
from PIL import Image
import io, requests

# Load a  random image from a URL
url="http://..."
image_input = Image.open(io.BytesIO(requests.get(url, stream=True).content))
Preprocess image: Convert to sketch
We will use Pixel Difference Network (PiDiNet) here, it’s a fast and efficient system for finding edges in images. PiDiNet uses a blend of traditional edge detection methods like Canny and Sobel.
from controlnet_aux.pidi import PidiNetDetector

# Initialize the PiDiNet Detector for edge detection
preprocessor = PidiNetDetector.from_pretrained("lllyasviel/Annotators").to("cuda")

# Preprocess the image to convert it into a sketch-like format
image_preprocessed = preprocessor(
  image_input,
  detect_resolution=1024,
  image_resolution=1024,
  apply_filter=True).convert("L")
Other preprocessors are available, some of them for different purposes than sketch-guidance, read more here.

For this tutorial we will stay with the PidiNetDetector and sketches.
Load the SD model and t2i adapters
We’ll start by loading the stabilityai/stable-diffusion-xl-base-1.0 model and t2i adapter sketch_sdxl_1.0, code taken from the Hugging Face TencentARC/t2i-adapter page.
import torch
from diffusers import (
    T2IAdapter,
    StableDiffusionXLAdapterPipeline,
    DDPMScheduler,
    AutoencoderKL,
    EulerAncestralDiscreteScheduler
)
from diffusers.utils import load_image

# the SD XL model
model_id = "stabilityai/stable-diffusion-xl-base-1.0"

# load the T2I adapter
adapter = T2IAdapter.from_pretrained(
    "Adapter/t2iadapter",
    subfolder="sketch_sdxl_1.0",
    torch_dtype=torch.float16,
    adapter_type="full_adapter_xl")

# load variational autoencoder (VAE)
vae = AutoencoderKL.from_pretrained(
    "madebyollin/sdxl-vae-fp16-fix",
    torch_dtype=torch.float16)

# load scheduer
euler_a = EulerAncestralDiscreteScheduler.from_pretrained(
    model_id,
    subfolder="scheduler")

# instantiate HF pipeline to combine all the components
pipe = StableDiffusionXLAdapterPipeline.from_pretrained(
    model_id,
    adapter=adapter,
    vae=vae,
    scheduler=euler_a,
    torch_dtype=torch.float16,
    variant="fp16",
).to("cuda")
Diffuse
Now, let’s generate an image. As a prompt we use “a robot dog in real world, 4k photo, highly detailed”.
image = pipe(
        prompt="a robot dog in real world, 4k photo, highly detailed",
        negative_prompt=f"disfigured, extra digit, fewer digits,
                        cropped, worst quality, low quality",  # Negative prompt to avoid unwanted traits
        image=image_preprocessed,  # input sketch
        guidance_scale=7.5,                 # we will talk about this one
        num_inference_steps=40,             # and this one
        adapter_conditioning_scale=0.9,     # yes
        adapter_conditioning_factor=0.9,    # same
    ).images[0]
And here’s the result — a robot dog!

Now, let’s explore how to control the diffusion process. We’ll go through each parameter and see how it changes the final image.
Generation parameters
Inference Steps
The most crucial parameter is num_inference_steps. Stable diffusion starts with an image of random noise and steps towards the final image. The more inference steps, the better the final image will be, and the longer it will take.

Guidance Scale
guidance_scale determines how much the prompt influences the image.
- A value of 0 results in random images unrelated to the prompt.
- Lower values generate more creative, but sometimes unrelated, images.
- Higher values produce images that closely match the prompt but may lack creativity.
- The optimal range is typically between 5-15.
You’ll notice that when guidance_scale is very low, the "robot" in our robot dog disappears.

In a similar way, the prompt itself can be tuned down by making it more generic. For example, if we use a prompt like “high-quality image” (without telling the model that we want to see a dog), the model might generate something completely unexpected.

Adapter Conditioning Scale and Factor
These parameters control how much the sketch guides the final image.
adapter_conditioning_scale: Determines the influence of the adapter on image generation. High values mean stronger conditioning.adapter_conditioning_factor: Specifies the fraction of timesteps for which the adapter is applied.0.5means that the adapter is applied to the first half of the timesteps only, with1.0it is applied to all of them.
0.9 for both is a good start in my experience. In practice you will simply have to try and see how different values change your image.
Let’s see how these parameters mess with our robot dog. Here’s one sweep for adapter_conditioning_scale and one for adapter_conditioning_factor.


adapter_conditioning_factor. While adapter_conditioning_scale leads to gradual changes, the effect of adapter_conditioning_factor is more drastic and hardly any change is seen with values >0.5It’s interesting to note that for adapter_conditioning_factor values >0.5, the final image remains the same. Increasing adapter_conditioning_scale leads to more continuous and subtle changes.
This pattern holds for various images, not just the robot dog, as I will show you in just a second.
Let’s do a more thorough sweep first.

Still, same picture here, no change for adapter_conditioning_factor values >0.5.
Maybe it’s something about this particular image? Try Jimi Hendrix.


Same. So, for the examples we’ve explored, the provided parameter values seem to be good starting points.
However, keep in mind that optimal values may vary depending on your specific goals, and the devil is often in the details when fine-tuning for desired outcomes.
Summary
You now possess the fundamental tools necessary to create images using SD XL and T2I adapters.
- Stable diffusion is an amazing AI tool, it’s an entire universe of tools, rapidly expanding. If you don’t feel it yet, check the website Civitai
- Generative AI is easy, even without a fancy user interface
- T2I adapters are a great innovation, providing additional control over the image generation process beyond the text prompt
- Use the T2I sketch-adapter to guide the diffusion process from an input image
I gathered all the code in a notebook. Use it to build your own generative AI pipeline. Or even an app, I provide a basic implementation to get you started, built with Streamlit.
I hope you enjoyed this story! If you have any feedback, additional ideas, or questions, feel free to leave a comment here or reach out on Twitter.