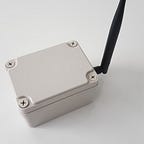
Arduino MKRFOX1200 — Testing the new Sigfox Arduino
This a Arduino MKR1000 with a Atmel SAM D21 chipset and a Sigfox module.
Compare to others Arduino, this device is really ultra-low power.
Device available on Arduino store: https://store.arduino.cc/arduino-mkrfox1200
How to send our first “Hello World!” to Sigfox backend ?
1/ Get device ID and PAC
To be able to activate the device on Sigfox backend, we need to get device ID and PAC
Open Arduino IDE
Sketch > Include Library > Arduino SigFox for MKRFox1200
Tools > Board: “Arduino SigFox MKRFox1200”
Tools > Port: “/dev/cu.usbmodemXXXX (Arduino MKRFox1200)”
Copy/paste this code (details available here : https://www.arduino.cc/en/Tutorial/SigFoxFirstConfiguration)
#include <SigFox.h>void setup() {
 Serial.begin(9600);while(!Serial) {};if (!SigFox.begin()) {
 Serial.println("Shield error or not present!");
 return;
 }String version = SigFox.SigVersion();
 String ID = SigFox.ID();
 String PAC = SigFox.PAC();// Display module informations
 Serial.println("MKRFox1200 Sigfox first configuration");
 Serial.println("SigFox FW version "+ version);
 Serial.println("ID = "+ ID);
 Serial.println("PAC = "+ PAC);Serial.println("");Serial.println("Register your board on https://backend.sigfox.com/activate with provided ID and PAC");delay(100);// Send the module to the deepest sleep
 SigFox.end();
}void loop() {

}
Then, open serial monitor
Finally, verify and upload code to the Arduino device.
You will have something like this:
2/ Activate your Arduino device on Sigfox Backend
Follow the instructions on: https://backend.sigfox.com/activate/arduino
3/ Send our first message “Hello World!”
With the following code, we can type the message we want to send:
#include <SigFox.h>
#include <ArduinoLowPower.h>void setup() {
 Serial.begin(9600);
 while (!Serial) {};if (!SigFox.begin()) {
 Serial.println("Shield error or not present!");
 return;
 }
 // Enable debug led and disable automatic deep sleep
 // Comment this line when shipping your project :)
 SigFox.debug();String version = SigFox.SigVersion();
 String ID = SigFox.ID();
 String PAC = SigFox.PAC();// Display module informations
 Serial.println("MKRFox1200 Sigfox first configuration");
 Serial.println("SigFox FW version "+ version);
 Serial.println("ID = "+ ID);
 Serial.println("PAC = "+ PAC);Serial.println("");Serial.println("Register your board on https://backend.sigfox.com/activate with provided ID and PAC");delay(100);// Send the module to the deepest sleep
 SigFox.end();Serial.println("Type the message to be sent");
 while (!Serial.available());String message;
 while (Serial.available()) {
 message += (char)Serial.read();
 }// Every SigFox packet cannot exceed 12 bytes
 // If the string is longer, only the first 12 bytes will be sentif (message.length() > 12) {
 Serial.println("Message too long, only first 12 bytes will be sent");
 }Serial.println("Sending "+ message);// Remove EOL
 message.trim();// Example of message that can be sent
 sendString(message);

}void loop()
{
}void sendString(String str) {
 // Start the module
 SigFox.begin();
 // Wait at least 30mS after first configuration (100mS before)
 delay(100);
 // Clears all pending interrupts
 SigFox.status();
 delay(1);SigFox.beginPacket();
 SigFox.print(str);int ret = SigFox.endPacket(); // send buffer to SIGFOX network
 if (ret > 0) {
 Serial.println("No transmission");
 } else {
 Serial.println("Transmission ok");
 } Serial.println(SigFox.status(SIGFOX));
 Serial.println(SigFox.status(ATMEL));
 SigFox.end();
}
For example, type “Hello World!” then press Enter (or “Send” button).
So you will obtain this:
Now, go to your Sigfox backend: https://backend.sigfox.com/device/DEVICE_ID/messages
Here we go, you will see your message “Hello World!” (hexadecimal)
On this website, you can decode the data from Hexadecimal to string:
http://string-functions.com/hex-string.aspx
48656c6c6f20576f726c6421
Hello World!
