Laura & LouisaJewelbots Tutorials Lesson 7: VariablesIn programming, we are always looking to do things as efficiently as possible with the least repetition of lines of code.Mar 17, 2017Mar 17, 2017
Laura & LouisaJewelbots Tutorials Lesson 6: Pushing buttonsUp to this point, every program we’ve coded for the Jewelbot has been written inside the loop function, so when you upload the program and…Mar 17, 2017Mar 17, 2017
Laura & LouisaJewelbots Tutorials Lesson 5: Turning all the LEDs on and offIn the last lesson we learned how to blink a single LED using the LED class’ turn_off_single function and the Timer class’ pause function…Jan 23, 2017Jan 23, 2017
Laura & LouisaJewelbots Tutorials Lesson 4: Using the timer function to blink LEDsAt the end of the last lesson , we had turned on LEDs in different colors. That was kind of cool, but what if we wanted to make the LEDs…Jan 20, 2017Jan 20, 2017
Laura & LouisaJewelbots Tutorials Lesson 3: Hello World explained, part 2Now, let’s dig into the two lines of code you wrote in the loop function.Dec 30, 2016Dec 30, 2016
Laura & LouisaJewelbots Tutorials Lesson 2: Hello World Explained, Part 1At the end of the last lesson, we programmed this:Dec 30, 2016Dec 30, 2016
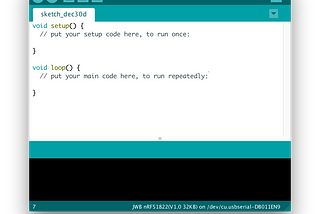
Laura & LouisaJewelbots Tutorials Lesson 1: Hello WorldWe assume you own a Jewelbot and have installed the Arduino IDE. For instructions on downloading the Arduino IDE, please see the Jewelbots…Dec 30, 2016Dec 30, 2016
Laura & LouisaJewelbots Tutorials Lesson 0: IntroductionUnderneath the charm on your Jewelbot is a small computer. It’s similar to your phone or your laptop, but it’s a lot more simple. Just like…Dec 30, 20161Dec 30, 20161