Easy Realistic Avatars with Stable Diffusion DreamBooth: No-Programming, Step-by-Step Guide (No Third-Party Apps)
In this step-by-step tutorial on creating lifelike avatars using Stable Diffusion DreamBooth! In this era of immersive digital experiences, having a personalized and realistic avatar is more important than ever. Whether you’re a content creator, a game developer, or just someone looking to build a unique online identity, this tutorial is for you.
Stable Diffusion DreamBooth is a cutting-edge tool that leverages the power of artificial intelligence to generate stunningly accurate avatars based on your desired input. With its user-friendly interface and advanced algorithms, you can create an avatar that not only captures your likeness but also exhibits true-to-life expressions and movements.
In this tutorial, I will guide you through the entire process of creating your lifelike avatar, from setting up your workspace and importing your reference images to fine-tuning your avatar’s appearance and integrating it into your desired platform. By the end of this tutorial, you will be equipped with the skills and knowledge needed to bring your digital persona to life. So let’s get started on this exciting journey together!

Let’s start creating Avatars!
- Before we begin, ensure that you have a Google account. If you don’t have one, head over to https://accounts.google.com/signup and create one. This account will grant you access to Google Colab, where we’ll be working on our avatar generation.
- Now that you have a Google account, navigate to Google Colab (https://colab.research.google.com/github/ShivamShrirao/diffusers/blob/main/examples/dreambooth/DreamBooth_Stable_Diffusion.ipynb) and open a new workbook. This will be your workspace for creating your avatar with Stable Diffusion DreamBooth.
- Then just run the install requirements cell.

Sing Up for HuggingFace and get your Access Token
- In order to utilize the Stable Diffusion DreamBooth for avatar generation, we need to log in to HuggingFace, an AI community platform that hosts a wealth of models and resources.
- Head over to the HuggingFace website (https://huggingface.co/) and create an account if you don’t already have one. Simply click on “Sign Up” in the top right corner and follow the registration process.
- Then Go to HuggingFace and click settings.

3. From settings find the section Access Tokens and click it.

4. Then you need to create a new token.

5. Give your access token a name and modify role settings to write and then click generate a token.

6. Copy your access token and paste it in the colab to HUGGING_TOKEN section and run the cell.
Upload your pictures.
- Now that you have everything set up, it’s time to train the model and upload your reference pictures for avatar generation. Follow these steps:
- Choose the
save_to_gdriveoption – This allows you to rerun the code without retraining the model repeatedly. - MODEL_NAME: Keep the default setting; there’s no need to change this.
- OUTPUT_DIR: Provide a name for the output directory where your avatar will be saved.
- Run the cell.
Upon executing the cell, you’ll be prompted to grant permission to access your Google Drive. Allow access so that the model can save the generated avatar to your designated output directory.
Once you’ve granted permission, the training process will begin, and your output directory will be created in your Google Drive. You’re now one step closer to having your lifelike avatar!

Start Training
Before beginning the training process, you’ll need to set some parameters to guide the model in generating your desired avatar. In this step, we’ll modify the class_prompt parameter to provide the model with a context for creating the avatar.
- class_prompt: As we aim to generate portrait images, use a prompt such as “portrait of a person” (or your gender). If you prefer to create full-body images, change the prompt to “full-body photo of a person.”
- Update the
instance_data_dirandclass_data_dirto reflect your desired directories, such as/content/data/myimageand/content/data/photosofperson, respectively. - Run the cell.
By adjusting these parameters, you’ll guide the model in producing avatars that meet your specific needs, whether it’s a portrait or a full-body image.

Upload and Resize Images
To achieve the best results, you’ll need to upload and resize your images to 512x512 pixels. The number of images required depends on their quality, but a good rule of thumb is to use 10–30 pictures.
Resize Images: Visit the Birme Bulk Image Editor (https://www.birme.net/) to resize your images. Upload your pictures, adjust the dimensions to 512x512 pixels, and ensure your face is clearly visible in the frame.
Upload Images
- Run the designated cell and click “Choose Files” to upload the resized images. They will be uploaded to your private folder, which you can delete later if desired.

Set Training Parameters
- Update the
--save_sample_promptparameter to match yourinstance_promptfrom the previous steps. - Set
num_class_imagesusing the formula: (NUM_OF_YOUR_IMAGES * 12). For example, if you have 13 images, the value would be 156. - Calculate
max_train_stepsusing the formula: (NUM_OF_YOUR_IMAGES * 80). In the example above, the value would be 1040. - Determine the
lr_warmup_stepsparameter by dividingmax_train_stepsby 10 and rounding to the nearest integer. In our example, the value would be 104.

Start Training
Now you’re ready to begin training your avatar! Be aware that this process may take some time to complete, for me, it took 24mins to finish depending on how many photos you uploaded.
Save Training Data
Congratulations on completing the training! Now, you’ll need to save the training data (weights) to your Google Drive for future use.
- Copy the
OUTPUT_DIRpath you previously set (e.g.,/content/drive/MyDrive/stable_diffusion_weights/dreamBoothOutPut). - Paste the path into the
WEIGHTS_DIRsection of the appropriate code cell. - Run the cell to save the weights to your Google Drive.
Now that your training data is safely stored, you’re ready to move on to the next steps in your avatar creation.

Generate Preview Images
Now that you’ve saved the training data, it’s time to generate a grid of preview images using the last saved weights.
- Run the designated cell to generate the preview images. Don’t worry if the pictures don’t look perfect just yet — they’ll look amazing once the process is complete!
Note: There is an optional step in this stage, but it’s not necessary for our purpose. You can simply skip it and move forward

Create a Personal Prompt for Your Images
In this crucial step, we’ll create a personal prompt for your images, which will help guide the model in generating your desired avatar.
Run the provided code to download the weights for future improvements.
Note: If you encounter an error stating “model_index.json not found,” please check your Google Drive for the file’s location. For instance, it might be located under /content/drive/MyDrive/stable_diffusion_weights/dreamBoothOutPut/1040. Updating the path in the code should resolve the error (WEIGHTS_DIR).

If you want to regenerate similar photos over and over again, you can run this cell if you like but is not necessary.

Writing the prompts
Providing accurate text inputs is essential for generating images based on the algorithm’s learned data.
Here’s what you need to set for optimal results:
- The Prompt: Begin with the type of pictures and the
instance_promptyou saved at the beginning. This will guide the model in creating your avatar. - num_samples: Set the number of pictures you want to generate.
- num_inference_steps: This parameter determines the quality of the generated images. For better results, you can use a value like 50.
- The negatice_prompt parameter plays a crucial role in the avatar generation process by helping the model avoid incorporating undesirable features in the final image. By defining a negative prompt, you can guide the model to exclude specific elements, resulting in an avatar that better aligns with your preferences.
- You can also search some example prompts from https://prompthero.com/

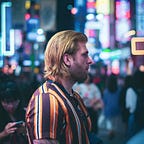
Here is an example that I used (Not for the image below).
By configuring these inputs, you’ll ensure the model generates high-quality images tailored to your preferences.

Conclusion
In conclusion, creating a lifelike avatar using Stable Diffusion DreamBooth is an exciting and rewarding process. By following the steps outlined in this tutorial, you’ve learned how to set up your environment, prepare your images, and configure essential parameters to generate high-quality avatars.
As a recap, we covered:
- Setting up a Google Account and accessing Google Colab.
- Installing necessary requirements and logging into HuggingFace.
- Adjusting training parameters to guide the model.
- Uploading and resizing images to the correct dimensions.
- Saving the training data to your Google Drive.
- Generating preview images and creating a personal prompt for your avatar.
I hope that this tutorial has provided you with the necessary knowledge to create stunning avatars that truly represent your digital persona. As you embark on your avatar creation journey, don’t forget to experiment with different parameters and prompts to achieve the best results.
Thank you for following along with this tutorial, and I wish you the best of luck in perfecting and personalizing your digital avatar. If you like this content leave a comment below and give some claps! Stay tuned for more tips and tutorials on refining your digital persona. Happy avatar-making!
Learn Programming
Recently, I’ve been writing about how to learn programming with the help of artificial intelligence, specifically with ChatGPT. If you’re interested in this topic, I encourage you to check out my latest article as well.
Useful links
Google Colab notebook link: https://colab.research.google.com/git...
Huggingface https://huggingface.co/join
Bulk image editing: https://www.birme.net
Example prompts: https://prompthero.com/
https://medium.com/towards-easy-artificial-intelligence/master-programming-quickly-with-chatgpt-25a78da6718d