Buy your own Full Iota Node low-power device
Get your own Device!
It’s finally there, one website where you can order your own pre-installed Full Iota Node Device! Visit https://www.rock64Iota.com
History lessons
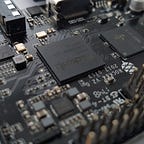
These last months have been a roller coaster. I’ve been working 40 hours a week, but next to that I have been trying to figure out how to get a stable Rock64 node running.
I managed to get it stable a couple of weeks back, and after that I have been working hard to give the community the same opportunity: To get your own Full Iota node Rock64 device.

I’ve been struggling with the best approach. I did not want to deliver a product with the latest IRI version installed, but without the possibility to give updates the the users. Whenever a new IRI version is released, I would like to push the Arm64 version to all the Rock64 users.
This required a bit of thinking and scripting, and after a week, I had a first draft ready. The concept was simple: If you start IRI, it will first connect to the website to check for updates. If an update is found, remove the current version and download the new one.
I completed this setup and created the website where people could buy the device. But then muXxer responded to my post on Reddit. He told me that he had just figured out how to get docker working for the Rock64 in combination with IRI. As a complete Linux noob I had no clue what docker was, and I had to look it up. The concept was fascinating, and I could not let this pass by without diving a bit deeper into the subject of Docker.
Docker — The missing link
The concept of Docker is rather simple. You can create an Image (or multiple) that contains all the software you need. This image is than ran as a container on your device. This runs completely stand-alone on your device, so the chance that there are conflicts between it and the operating system for example is minimal. Also, it is a lot more user friendly, because all the software you need for a node can be included in one or multiple images. If software needs to be updated, I can just update the image and the user can download it. There is no need to install anything, because it all runs in a separate container.
Now that I knew more about Docker it was time to update my plan. I discarded my original scripts and copied the docker images over from MuXxer. I then altered the things that I needed and created some installation scripts. I also figured out how he made the docker files himself, so that I can update my docker files in the future with new versions.
The next thing was to finish the website and add all the content. I tested the scripts and images multiple times, to make sure it all works. And then it was time to launch the website.
Installation Guide
If you order a full Iota Node you will need to do a couple of things yourself. Almost everything is working out-of-the box, or is automated, but there are still two things you’ll have to do yourself: Port forwarding and getting a static public IP. But with these steps completed, you are ready to start your own node.
Installation:
- Unbox the Rock64 and hook everything up
- (Optional, only if needed) Obtain a static public IP address
- Forward some ports on your router
- Boot up the device
- Run the installer to setup your device. This will setup the following: Node Name, local IP Address, Donation address for Field, Neighbors.
- Start the full Node.
Do it yourself:
Next to the pre-installed devices, I also encourage people who want to setup their own node. On the website, you can read how you can do this yourself. There is an easy to follow tutorial attached as well.
Visit the Do It Yourself section.
Donations
Of course donations are always welcome!
Address PerfectStorm85: IWYWXFING9VEEXSQDCRRUEBBZECKZUYMKMMFOPDBGZKHKASRYLTEXLGGPUCLUIGDZQXSOWI9UXUNYWFEYZAAKXTEND
Address muXxer (Setting up Docker Hub for IRI):
PHCIWQQIHQCAKPTJYXSRHIOSMZHHYVBBCALEBGXULYIAYJLBMFNAOHVJZUJZZZJXYUQSXHZZAKUBVLUDCE9AK9ZNVW