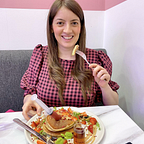
My Photography Process: How I Take and Edit Instagram-Worthy Cake Photos
As someone who loves sharing cake photos on Instagram, I’ve developed a process for capturing and editing my images. It took a while to find the best approach, but now I’ve got it down to a science. Here’s how I do it.
The Gear I Use
I use an iPhone 11 Pro camera to take all my photos. It’s compact and convenient, and the built-in photo editing software is surprisingly robust. This setup allows me to take high-quality photos without lugging around a lot of extra equipment.
Timing is Key
Natural light is my best friend when it comes to photography. I always try to take photos during the day when there’s plenty of natural light. Nighttime photography often leads to dark or grainy images, and even the best editing software can’t always brighten them up to my liking.
However, natural light has its challenges. I have to be mindful of the angle of the sun. Too much direct sunlight can create harsh shadows and overexposed areas. For example, when I recently went for afternoon tea at The Willow Rooms in Edinburgh, we sat by a window, and the sunlight was so intense that the cakes looked too dark. The photos were okay, but they weren’t good enough for my Instagram feed, so I ended up using them in my Instagram Stories instead.
Setting the Scene
I prefer having a background with a bit of depth in my photos rather than a solid colour, like a plain table. To achieve this, I often add objects to the scene, like a teacup or a spoon. Sometimes I lift the cake and photograph it with the café in the background. This way, the focus remains on the cake, but there’s more context and visual interest.
My Editing Process
Once I’ve taken my photos, I use the iPhone’s built-in editing software to make adjustments. Here’s my usual workflow:
- Exposure: I start by clicking “edit” at the top right corner, then “adjust” at the bottom centre. I usually increase exposure by 3 points to brighten the photo.
- Brilliance: I bump this up by 3 points to enhance the photo’s overall vibrancy.
- Highlights: I increase highlights by 3 points to bring out more detail.
- Shadows: I remove shadows entirely by moving the bar all the way to the right. This helps reduce dark areas in the photo. Please note this is in the majority of cases but not always.
- Contrast: I lower contrast by 3 points to soften harsh lines.
- Brightness: This varies depending on the original lighting. I adjust it from halfway up the bar to fully up to get the right level of brightness.
- Blackpoint: Like brightness, I adjust this based on the photo, often going halfway to fully up.
Once I’ve adjusted these settings, I might go back and tweak them a bit, depending on the photo’s original lighting.
Square Mode and Cropping
I take my photos in square mode to ensure they’re ready for Instagram without additional cropping. This way, I know I’ve included everything I want in the frame. However, if there’s some extra space I don’t need — like too much of my hand holding up the cake — I’ll crop a little off the edges to keep the focus on the main subject.
That’s my process for taking and editing cake photos for Instagram. I hope this helps you understand my approach, and maybe it gives you some ideas for your own photography. If you have any questions or want more tips, feel free to ask!
