Add Realtime 3D Avatars to Agora Live Video Streams
In today’s rapidly evolving digital landscape, live-stream video is dominating. Users now expect more immersive and customizable streaming options. Content creators are increasingly seeking creative new ways to stream themselves, giving rise to the demand for dynamic 3D avatars that mirror their movements and expressions.

Real-time virtual avatars traditionally required complex motion capture equipment and sophisticated software, often making them inaccessible to everyday users and independent creators. However, this is another area where artificial intelligence is changing the status quo. With advancements in computer vision, it’s now possible to run sophisticated AI algorithms on-device that can accurately capture and translate human facial gestures into digital form in real-time.
In this walkthrough, we’ll look at how to integrate 3D virtual avatars into your Agora live streams using MediaPipe and 3D avatars from ReadyPlayerMe. Whether your goals are to enhance audience engagement or add a fun creative twist to your app’s video calls/live broadcasts, this guide will provide the necessary steps to bring 3D virtual personas to life.
Prerequisites
- Node.JS
- A developer account with Agora
- A basic understanding of HTML/CSS/JS
- A basic understanding of ThreeJS
- A basic understanding of Agora — Web QuickStart
- A code editor (I use VSCode)
- A 3D avatar from ReadyPlayerMe
Agora + MediaPipe project
To keep this guide concise, I assume you understand how to implement the Agora Video SDK into a web app; if you don't, check out my guide on Building a Group Video Chat Web App.
To get started, download the demo project. With the code downloaded, navigate to the project folder in the terminal and use npm to install the node packages.
git clone git@github.com:digitallysavvy/agora-mediapipe-readyplayerme.git
cd agora-mediapipe-readyplayerme
npm i
Core Structure (HTML)
Let’s start with the HTML structure in index.html, at the top of the <body> are the "call" UI elements. These include a container for the remote videos, a container for the local user with buttons for muting and unmuting the audio/video, and a button to leave the chat.
<!doctype html>
<html lang="en">
  <head>
    <meta charset="UTF-8" />
    <link rel="icon" type="image/svg+xml" href="/agora-box-logo.svg" />
    <meta name="viewport" content="width=device-width, initial-scale=1.0" />
    <link rel="stylesheet" type="text/css" href="style.css" />
    <title>Agora Live Video Demo</title>
  </head>
  <body>
    <div id="container"></div>
    <div id="local-user-container"></div>
    <div id="local-media-controls">
      <button id="mic-toggle" class="media-active">Mic</button>
      <button id="video-toggle" class="media-active">Video</button>
      <button id="leave-channel" class="media-active">Leave</button>
    </div>
    <div id="overlay" class="modal">
      <div id="form-container">
        <h1 id="form-header">Avatar Video Chat</h1>
        <form id="join-channel-form">
          <div id="form-body">
            <div class="form-group">
              <label for="form-rpm-url">Ready Player Me URL</label>
              <input type="text" id="form-rpm-url" placeholder="http://models.readyplayer.me/<MODEL-ID>.glb" class="form-control">
            </div>
            <div id="form-footer">
              <button type="submit" id="join-channel-btn">Join Channel</button>
            </div>
          </div>
        </form>
      </div>
    </div>
    <script type="module" src="/main.js"></script>
  </body>
</html>
Aside from the call UI, we’ll need an overlay screen for users to input the URL to their avatars, and a button to join the channel.
Agora Client and data stores
In main.js we create a new Agora client to use Agora's SDK and use localMedia to keep a reference to the audio, video, and canvas tracks and their active state. We'll need headRotation and blendShapes to store the data we get from MediPipe's computer vision.
// Create the Agora Client
const client = AgoraRTC.createClient({
  codec: 'vp9',
  mode: 'live',
  role: 'host'
})

const localMedia = {
  audio: {
    track: null,
    isActive: false
  },
  video: {
    track: null,
    isActive: false
  },
  canvas: {
    track: null,
    isActive: false
  },
}

// Container for the remote streams
let remoteUsers = {}

//  store data from facial landmarks
let headRotation
let blendShapes
DOMContentLoaded and Event Listeners
When the page loads, we’ll add listeners for the Agora events, the media controls, and the form submission. With the listeners in place, we’re ready to show the overlay form.
// Wait for DOM to load
document.addEventListener('DOMContentLoaded', async () => {
  // Add the Agora Event Listeners
  addAgoraEventListeners()
  // Add listeners to local media buttons
  addLocalMediaControlListeners()
  // Get the join channel form & handle form submission
  const joinform = document.getElementById('join-channel-form')
  joinform.addEventListener('submit', handleJoin)
  // Show the overlay form
  showOverlayForm(true)
})
NOTE: Make sure to add client event listensers before joining the channel, otherwise some events may not get triggered as expected.
3D & Avatar Setup
One of the Prerequisites for this guide is a 3D avatar from ReadyPlayerMe because ReadyPlayerMe provides 3D files that adhere to the name conventions outlined by Apple’s ARKit ARFaceAnchor locations. These definitions are industry standard and match the output from MediaPipe.
Getting back to the code, when the user clicks the “Join” button, initialize the ThreeJS scene and append the <canvas> to the localUserContainer.
// get the local-user container div
const localUserContainer = document.getElementById('local-user-container')

// create the scene and append canvas to localUserContainer
const { scene, camera, renderer } = await initScene(localUserContainer)
Using the newly created scene, load the user’s ReadyPlayerMe avatar using the glbURL. You’ll notice URL parameters are appended to the glbURL. This is because blend shapes are not part of the default .glb file provided by ReadyPlayerMe. These parameters are part of the ReadyPlayerMe RESTful API for Avatars.
Once the 3D avatar is loaded, we'll traverse its scene graph and create an object with all the nodes. This will give us quick access to the headMesh.
// append url parameters to glb url - load ReadyPlayerMe avatar with morphtargets
const rpmMorphTargetsURL = glbURL + '?morphTargets=ARKit&textureAtlas=1024'
let nodes
// Load the GLB with morph targets
const loader = new GLTFLoader()
loader.load(rpmMorphTargetsURL,
  async (gltf) => {
  const avatar = gltf.scene
  // build graph of avatar nodes
  nodes =  await getGraph(avatar)
  const headMesh = nodes['Wolf3D_Avatar']
  // adjust position
  avatar.position.y = -1.65
  avatar.position.z = 1

  // add avatar to scene
  scene.add(avatar)
},
(event) => {
  // outout loading details
  console.log(event)
})
To account for the noticeable delay between the time the scene is initialized and the moment the 3D avatar is loaded. It’s good practice to display a loading animation to inform the user the model is loading and remove it once the 3D avatar is added to the scene.
// show a loading animation
const loadingDiv = document.createElement('div')
loadingDiv.classList.add('lds-ripple')
loadingDiv.append(document.createElement('div'))
localUserContainer.append(loadingDiv)

/* loader.load - success callback */
loadingDiv.remove() // remove the loading spinner
Init video element with Agora

We’re using Agora to get camera access and create the video and audio tracks. We’ll use the camera’s video track as the source for the video element. If you’d like a deeper explanation check out my guide on using Agora with custom video elements.
// Init the local mic and camera
await initDevices('music_standard', '1080_3')
// Create video element
const video = document.createElement('video')
video.setAttribute('webkit-playsinline', 'webkit-playsinline');
video.setAttribute('playsinline', 'playsinline');
// Create a new MediaStream using camera track and set it the video's source object
video.srcObject = new MediaStream([localMedia.video.track.getMediaStreamTrack()])
MediaPipe Setup
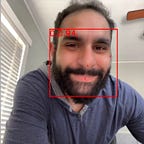
Before we start recognizing faces and their gestures, we first need to download the latest WebAssembly (WASM) files for MediaPipe’s computer vision technologies. These files are essential for setting up the FaceLandmarker task, a computer vision algorithm that identifies specific "points of interest" on a user's face within the video stream. This precision enables the AI to track facial features effectively.
In computer vision, executing a task involves sending a request to an AI, which then returns a level of confidence, often called a prediction. We’ll continuously run this task for each video frame in a loop, which we’ve named the predictionLoop.
In the face landmarks configuration, we’ll set the FaceLandmarker to generate two crucial types of data: outputFacialTransformationMatrixes and outputFaceBlendshapes: true. The former provides estimates of the face's position, rotation, and scale, essential for tracking head movements. The latter might not be immediately apparent—it involves a 3D modeling technique known as blend shapes or shape keys. These allow a 3D mesh to smoothly transition between predefined shapes—like a mouth moving from "closed" (represented by 0) to "open" (represented by 1). This method is efficient because it saves 3D artists from having to model every potential facial movement; instead, the rendering engine interpolates these states.
These settings are crucial because we use the transformation matrix to monitor head rotations and positions, while the blend shape predictions provide a range from 0 to 1 for ARKit standard blend shapes, covering 52 different facial movements.
// initialize MediaPipe vision task
const faceLandmarker = await initVision()

// init MediaPipe vision
const initVision = async () => {
  // load latest Vision WASM
  const vision = await FilesetResolver.forVisionTasks('https://cdn.jsdelivr.net/npm/@mediapipe/tasks-vision@latest/wasm')
  // configure face landmark tracker
  const faceLandmarker = await FaceLandmarker.createFromOptions(
    vision, {
      baseOptions: {
        modelAssetPath: `https://storage.googleapis.com/mediapipe-models/face_landmarker/face_landmarker/float16/1/face_landmarker.task`,
      },
      outputFaceBlendshapes: true,
      outputFacialTransformationMatrixes: true,
      runningMode: 'VIDEO'
    })
  return faceLandmarker
}
Computer Vision Prediction Loop
With the faceLandmarker and <video/> set up, we can start a prediction loop to run MediaPipe's computer vision task on every video frame. As the prediction returns a result it will give us access to the facialTransformationMatrixes which allows us to calculate the headRotation. The prediction result also gives us estimated weights for the blend shapes in the face mesh.
video.addEventListener("loadeddata", () => {
  video.play()                            // start video playback
  initPredictLoop(faceLandmarker, video)  // start face landmarks prediction loop
})

const initPredictLoop = (faceLandmarker, video) => {
  // flag to keep track of stream's playbacktime
  let lastVideoTime = -1
  // prediction loop
  const predict = () => {
    // create a timestamp
    const timeInMs = Date.now()
    // while video is still streaming
    if (lastVideoTime !== video.currentTime) {
      lastVideoTime = video.currentTime
      // run vison task to detect faces in video frame
      const result = faceLandmarker.detectForVideo(video, timeInMs)
      // get face matrix transformation for face 1
      const faceMatrix = result.facialTransformationMatrixes
      if (faceMatrix && faceMatrix.length > 0) {
        const matrix = new THREE.Matrix4().fromArray(faceMatrix[0].data)
        headRotation =  new THREE.Euler().setFromRotationMatrix(matrix)
      }
      // get blend shape predictions for face 1
      const blendShapePredictions = result.faceBlendshapes
      if (blendShapePredictions && blendShapePredictions.length > 0){
        blendShapes = blendShapePredictions[0].categories
      }
    }
    // predect om every frame update
    requestAnimationFrame(predict)
  }
  // start loop
  requestAnimationFrame(predict)
}
Commuter Vision + 3D Avatar
To render the ThreeJS scene we use a render loop. When we initialize the render loop we’ll pass a function to update the head rotation and blend shape intensity using the results of the prediction loop.
// create the render loop
const initRenderLoop = (scene, camera, renderer, sceneUpdates) => {
  const render = (time) => {
    // update the scene
    sceneUpdates(time)
    // render scene using camera
    renderer.render(scene, camera)
    // add render back to the call stack
    requestAnimationFrame(render)
  }
  // start render loop
  requestAnimationFrame(render)
}

initRenderLoop(scene, camera, renderer, (time) => {
  // return early if nodes or head rotation are null
  if(!nodes || !headRotation) return
  // apply rotatation data to head, neck, and shoulders bones
  nodes.Head.rotation.set(headRotation.x, headRotation.y, headRotation.z)
  nodes.Neck.rotation.set(headRotation.x/2, headRotation.y/2, headRotation.z/2)
  nodes.Spine1.rotation.set(headRotation.x/3, headRotation.y/3, headRotation.z/3)
  // loop through the blend shapes
  blendShapes.forEach(blendShape => {
    const headMesh = nodes.Wolf3D_Avatar
    const blendShapeIndex = headMesh.morphTargetDictionary[blendShape.categoryName]
    if (blendShapeIndex >= 0) {
      headMesh.morphTargetInfluences[blendShapeIndex] = blendShape.score
    }
  })
})
You may notice that by default the mouth movement is only visible when you exaggerate your facial expressions. This isn’t typically how someone’s face moves when they speak. To compensate for this, we can exaggerate the blend shape score to make the avatar’s mouth appear more responsive.
Let’s list all the blend shapes we want to target and set a multiplier for the base score. To avoid showing mouth movement when there shouldn’t be or over-exaggerating, we’ll set up a threshold with upper and lower limits.
// mouth blend shapes
const mouthBlendShapes = [
  'mouthSmile_L', 'mouthSmile_R', 'mouthFrown_L','mouthFrown_R',
  'mouthOpen', 'mouthPucker','mouthWide','mouthShrugUpper','mouthShrugLower',
]
// multipliyer to embelish mouth movement
const exagerationMultiplier = 1.5
const threshold ={ min: 0.25, max: 0.6}
To apply the multiplier, we need to check for specific keys in the mouthBlendShapes list. We can do this within the same loop we use to apply the score. When we identify the mouth blend shapes, we'll also verify if they're within the threshold.
// loop through the blend shapes
blendShapes.forEach(blendShape => {
  const headMesh = nodes.Wolf3D_Avatar
  const blendShapeIndex = headMesh.morphTargetDictionary[blendShape.categoryName]
  if (blendShapeIndex >= 0) {
    // exaggerate the score for the mouth blendshapes
    if (mouthBlendShapes.includes[blendShape.categoryName] && blendShape.score > threshold.min && blendShape.score < threshold.max ) {
      blendShape.score *= exagerationMultiplier
    }
    headMesh.morphTargetInfluences[blendShapeIndex] = blendShape.score
  }
})
ThreeJS to Agora Video Stream

The render loop renders the 3D scene onto a canvas. To publish the scene from the <canvas> into Agora, create a captureStream and use the video track to initialize a custom video track.
If you'd like a deeper explanation check out my guide on How to Create an Agora Video Track using a Canvas Element.
// Get the canvas
const canvas = renderer.domElement
// Set the frame rate
const fps = 30
// Create the captureStream
const canvasStream = canvas.captureStream(fps)
// Get video track from canvas stream
const canvasVideoTrack = canvasStream.getVideoTracks()[0]
// use the canvasVideoTrack to create a custom Agora Video track
const customAgoraVideoTrack = AgoraRTC.createCustomVideoTrack({
  mediaStreamTrack: canvasVideoTrack,
  frameRate: fps
})
localMedia.canvas.track = customAgoraVideoTrack
localMedia.canvas.isActive = true
// publish the canvas track into the channel
await client.publish([localMedia.audio.track, localMedia.canvas.track])
Once the local client joins the channel, the event listeners we set up earlier will take over. As users join the channel their video streams will be displayed in the #container.
Testing
Since we are using Vite, testing locally is easy, in the terminal navigate to the project folder and use npm to run our code.
npm run devWith the local server running, it’s time to test our code. Go to ReadyPlayer.Me and copy the URL for your Avatar. Paste the URL into the form and click “Join”.


To simulate multiple users in the channel, copy the URL from your first tab, open another browser window, and paste the URL. Copying the URL ensures you join the same channel. Using two windows ensures each canvas is visible. This is important because browsers are optimized to pause AnimationFrame requests when a website's tab is not in focus.

If you want to test with multiple devices you’ll need a way to run the project with a secure https connection. To set one up, you have two options: configure a custom SSL certificate for your local device; or use a service like ngrok; which creates a tunnel out from your local machine and provides an https url.
Fin.
And there you have it, how to use Agora’s Video SDK for Web with MediaPipe’s computer vision to enable custom 3D avatars. Whether for engaging webinars, interactive education platforms, or any other application where live video plays a key role, this example is a great base. Feel free to tweak and use this code to build more complex AI-driven features for extending reality.
This guide covers two advanced video topics from Agora, Raw Video and Custom Video. Dive deeper into advanced video topics in the Agora Video for Web Documentation.