(Android) Run Video Chat within your Unity application📱🎮

Something that makes all games more fun is having the ability to see and speak with other players in the game. Games have been including voice chat services for years but when it comes to video there are limited options especially when using Unity. The best option I’ve found is the Agora.io Video SDK for Unity available through the Unity Asset Store.
Update: May 5, 2020
Please Note: This post walks you through how to run the demo scens included within the Agora Video SDK for Unity plugin.
For a step by step tutorial on how to build a cross-platofrm Unity app that uses Agora, see my post “How To: Create a Video Chat App in Unity.”
Getting a sample Android app up and running is simple and took less than 10 minutes. Let’s run through the steps together.
Prerequisites
Getting Started
To start, open Unity and create a blank new project named Agora Video Demo.

The next step is to navigate to the Unity Store (if you are in the scene view, click the Unity Store tab) and search for “Agora Video SDK”. Once the plugin page has loaded, go ahead and click Download. Once the download is complete, click and Import the assets into your project.
Add Your AppID
Great! Now that we have the plugin downloaded and imported to our project we need to add our AppID before we can build and run our app. Log into your Agora.io developer account and create a new AppID or select an existing one.
Open SceneHome from the project’s assets.

Next select the GameController from the scene’s hierarchy. You’ll notice that the GameController GameObject has a property App ID, this is where we’ll add our Agora App ID.

Player Settings for Building the Sample Application
Open the Build Settings and drag the TestSceneHome.unity & TestSceneHomeWorld.unity scenes from the assets list into the “Scenes in Build” list. Select Android from the Platform list and click Switch Platform.

Once Unity finishes its setup process, open the Player Settings and set a unique package name, I chose io.agora.gaming.video.hello.
Next we’ll need to make sure we set our Scripting Backend setting to IL2CPP and our Target Architectures to ARM64.

Set Plugin Identities
The Agora.io Video Unity SDK has cross-functionality with Android, iOS, Mac, and Windows we need to set the plugin identities. Along with identities we will also need to also choose between x86 and x86_64 identities.

Let’s start by going into Assets>Plugins>x86 folder, select only Android and then click Apply.

To ensure that the various build plugins don’t collide we will then need to go into Assets>Plugins>x86_64, select all the files. Next go into the Inspector, uncheck all items and click Apply.
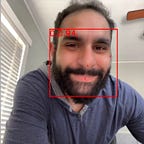
Make sure your Android device is plugged and click Build And Run. Unity will prompt you to save your project, I named my build Android.
All Done!
Thanks for following along, feel free to leave a comment below!
Other Resources
- The complete API documentation is available in the Document Center.
- For technical support, submit a ticket using the Agora Dashboard or reach out directly to our Developer Relations team devrel@agora.io
Troubleshooting early version issues
If you happen to be using an early version of the Agora SDK it’s worth noting that there are a few changes in the project setup and file structure. Below are these changes.
Gradle:
Older versions of the Agora Unity SDK shipped with gradle that can cause compile errors. If you run into an issue when building for Android, where Unity throws an error “Unable to build gradle,” open your file explorer and navigate into the project Assets > Plugins > Android and delete the mainTemplate.gradle file.
Render Settings:
Older versions of the Agora Unity SDK only supported openGL2 render engines and single threaded rendering. If you happen to be using one of the early builds, make sure to deselect Multithreaded Rendering option and deselect the Auto Graphics API. Then, within the Graphics API options that are now visible, make sure only OpenGLES2 is on the list (you may need to add it using the `+` icon) and remove any other APIs that may appear on the list.

App ID setup in Versions Older than 2.9.1.42
If you are using a version older than 2.9.1.42 of the Agora Unity SDK, then you will need to open theTestSceneScript.cs file within the assets panel to edit it.

The file will open in Visual Studio (Unity’s default code editor). Let’s scroll down to line 19.
private string appId = "YOUR APP ID";At this point we need to log into our Agora.io developer account and create a new AppID or select an existing one. I had previously created one so I’ll copy paste this appid into the “ ” on line 19. Make sure to save your changes.
We can scroll through the TestSceneScript.cs file to see all the various event callbacks the Agora.io Voice SDK for Unity offers.
I invite you to join the Agora Developer Slack community.