Getting Started with ML5.js — Tutorial Part III: Model Training
Beginner-friendly tutorial to train and load a Machine Learning model in the browser
_________________________________________________________________
PSA: It is a key value for us at AIxDESIGN to open-source our work and research. The forced paywalls here have led us to stop using Medium so while you can still read the article below, future writings & resources will be published on other platforms. Learn more at aixdesign.co or come hang with us on any of our other channels. Hope to see you there 👋

Machine Learning/ML is changing the world, and it has gradually evolved into a new medium and design material for artists, designers, and creatives; however, algorithms and programming can become a great entry barrier for many to understand and explore the capability that ML offers.
ML5.js exists precisely for this purpose. With their entry-level interface, ML5.js made ML more approachable and easy to use, specifically with designers and artists in mind.

In November and December 2021, we hosted a series of ML5.js workshops with Erik Katerborg — a creative technologist, lecturer teaching Creative Media and Game Technologies at the Rotterdam University for Applied Sciences, and active AIxDesign community member.
To spread the word and invite more people to make their first steps into coding, we created this article as a written version of the workshop for anyone to follow at any moment in time. If video is more your thing, you can also watch a recording of the workshop on our Youtube channel here.
We have published Part I & Part II of this workshop series. Make sure to check it out!
Tutorial Part III (this one) and Part IV covers Erik’s workshop on ML model training and yoga postures detection.
- In this article (Tutorial Part III), we will look at how to train and load a yoga posture detection model in the browser. This will serve as a foundation for Part IV. If you know the basics of model training and loading in the browser, please feel free to skip to Part IV.
- In the upcoming Tutorial Part IV, we will use the trained model to build your own yoga posture detection website.

What is a Neural Network?
Before training a machine learning model, let’s take a brief look at what is the foundational infrastructure for model training — Neural Networks.

Similar to a human’s neural networks, Neural Network in Machine Learning consists of cells or neurons. Each neuron could take input, send them through a series of mathematical computations, and create outputs. Neural Network is a network structure that has many neurons connected, and it could have as many layers and neurons as it needs.
For this workshop, we don’t need to understand the math behind the computation. The key is to understand that by providing input to the Neural Network, we can get outputs.
Lastly, Neural Network is very good at finding patterns in things. To represent the world in a way that machines can understand, we often use numbers so that they can be fed into the network for a result. Before training our own Machine Learning model, we will need to get some data first.
Where to get data?
There are many ways to get data, and thanks to data scientists and machine learning practitioners, many data are in fact available online!
Kaggle is one of the platforms that provide free public data that you could use. The data comes in many forms as well, and one of the major formats that we use for ML model training is .csv.
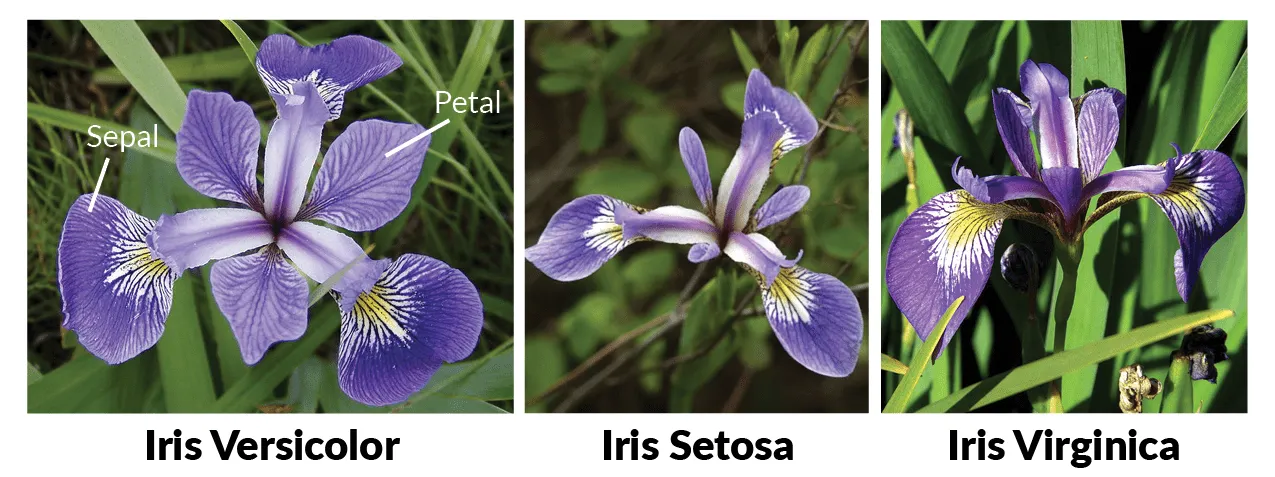
For your convenience, the data for this workshop is included in the sample file (link in the following section). We will be using the classic iris flower database and training a ML model to detect iris flowers.
Let’s train a ML model in the browser!
In today’s model training tutorial, we will do the following steps:
- Step 0. Set up the environment
- Step 1. Create a neural network with ML5, tell it to load data from a CSV file.
- Step 2. Train the network when the CSV has loaded.
- Step 3. Classify new data when training has finished.
Without further ado, let’s get started!
Step 0. Setup
To start, go to the template that Erik has set up and click “Remix your own”

If you are not familiar with the basic Glitch interface, make sure to pay a visit to our previous post.
In this tutorial, you will be able to see a csv file iris.csv, which contains data on flower species, based on the properties of flowers:
sepal_length,sepal_width,petal_length,petal_width,species
5.1,3.5,1.4,0.2,Iris-setosa
Feel free to explore all the files and play with the HTML and CSS content.
Step 1. Create a neural network with ML5
First, let’s head over to the script.js file.
We can create a variable for the Neural Network that we will be using. You can name it whatever you want, but make sure it will stay consistent in the file. Now let’s name it myNeuralNetwork instead of nn, and change all the nn in the file to myNeuralNetwork.

Following the variables, we have a function called start, which will be called when the program starts. The options in this function delineates the data address, the input parameters (features of a flower), the output (the flower species), task (classify the flower). Based on your data, you should change the content accordingly.
function start() {
  const options = {
    dataUrl: "./iris.csv",
    inputs: ["sepal_length", "sepal_width", "petal_length", "petal_width"],
    outputs: ["species"],
    task: "classification",
    debug: true,
  }  myNeuralNetwork = ml5.neuralNetwork(options, dataLoaded)
}

The last line in the function indicates the function will take the content of options and run function dataLoaded once the process is completed.

Now, let’s add start()at the end of the code and run the code. If this is done correctly, in your preview panel you should be able to see the change in the text to “Finished loading — Start training.”


Step 2. Train the network
Woohoo! Now you have set up an environment and loaded the data. Let’s look at how to normalize the data and train the network. Don’t worry. Following our steps would be super easy!
To normalize the data, simply edit the following line in function dataLoaded(),
myNeuralNetwork.normalizeData()Then to train the network, uncomment the last line in the function and edit the name to myNeuralNetwork. This will take the parameter from trainingOptionsand train the model, and once the process is done, function finishedTraining()will be run.
myNeuralNetwork.train(trainingOptions, finishedTraining)Your code should look like this,

If you have done everything correctly, refresh the preview panel and see the training execute in real-time! It is learning from the data what kind of pattern emerges when a certain iris flower is detected. The goal is to get the curve in the graph as low as you can.

Notice that we have a trainingOptions that defines epochs and batchSize. Epoch defines how long you want to model to train and the larger it is, the longer it would take and the better the result (most likely before reaching a threshold). We can experiment by changing the epoch number to 64, and see how does that impacts the graph.

If you run into any issues, make sure to check out the end of the tutorial where we have included a set of finished codes for you to refer to.
Step 3. Classify new data
Our last step would be using the model we trained to classify some data.
Once the training is done, function finishedTraining()would be executed, and the computer should know the characteristics of iris species. First, call the classify function within function finishedTraining(). Within the bracket, add a set of 4 numbers to represent new iris data that can be used. Essentially, the code will take the new 4 numbers to the model, and let the model tell us what iris it is most likely to be.
The code should look like this,
function finishedTraining() {
    console.log("Finished training!")
    message.innerHTML = "Finished training"

    classify([4.9,3,1.4,0.2])
}
Then, edit function classify() and use the trained Neural Network to classify the data.
function classify(input) {
    myNeuralNetwork.classify(input, handleResults)
}
If you want to see the classifying result, edit function handleResults() to below. This will change the message in HTML to the most likely result.
function handleResults(error, result) {
    if (error) console.error(error)
    console.log(result[0].label + " confidence:" + result[0].confidence)
    message.innerHTML = result[0].label + " confidence:" + result[0].confidence
}
Lastly, we don't want to train the Neural Network every time we use it, so make sure to save the Neural Network we just trained. In the future, we can reuse it again. In function finishedTraining(), add
function finishedTraining() {
    console.log("Finished training!")
    message.innerHTML = "Finished training"

    classify([4.9,3,1.4,0.2])

    myNeuralNetwork.save()
}
Your final code should look like this,

Once you refresh the preview panel, you will be able to see the training performance, a result for iris classification, and a pop-up window prompting you to save the model.

Load and reuse the model
Since we have trained and saved the ML model, we can reuse it every time to classify an iris flower without training a new model.
In the loading model tutorial, we will do the following steps:
- Step 0. Save the model file
- Step 1. Upload and input the file directory
- Step 2. Run the model to classify new flower data.
Step 0. Save the model file
In the previous step, you should be able to download 3 files using myNeuralNetwork.save()

Instead of working on the previous Glitch page, we will start fresh. Start by remixing Erik’s file for the loading model here.
Step 1. Upload and input the file directory
Use Glitch’s upload function, upload the three files to this glitch project. You will notice that the .bin file gets placed in the Assets directory.
- model.json
- model_meta.json
- model.weights.bin
Now you can place the URLs of your own model in script.js:
const modelInfo = {
    model: './model.json',
    metadata: './model_meta.json',
    weights: 'https://cdn.glitch.me/a6c6c0cf-e944-49b0-aeb6-da0d4ebbd87a%2Fmodel.weights.bin?v=1637670952785',
}
nn.load(modelInfo, modelLoaded)
Make sure to change the weights info to your own file’s weights URL. You can find the url of the .bin file by clicking on it in the assets directory.


Now you have loaded the model. Simple!
Step 2. Run the model to classify a new flower data
All you need to do to classify new data is to change the classify parameter as we did earlier and display the text in the window.
Add the two lines and your code should look like this,
function modelLoaded() {
    message.innerHTML = "Model loaded - start classifying"
    console.log("classify iris flower")

    classify([2,3.5,5,7])
}function classify(input) {
    nn.classify(input, handleResults)
}function handleResults(error, result) {
    if (error) console.error(error)
    console.log(result[0].label + " confidence:" + result[0].confidence)
    message.innerHTML = result[0].label + " confidence:" + result[0].confidence
}

After the edits, you can refresh the preview window to see the classifications. It’s an Iris Virginica!
Congrats! Now you have learned how to train a Machine Learning Neural Network and use it to classify iris flowers!
In our next tutorial Part IV, we will show you how to use the PoseNet data to create a model and build a yoga posture detector in the browser. All the foundational information has been covered by this tutorial!

Ran Into Any Issues? No Worries.
You can always review the workshop video on Youtube: https://www.youtube.com/watch?v=dnk6kT38sBo
In addition, we have provided the finished file that you can access at:
Conclusion & Next Step
We hope you had fun and gained some new perspectives and ideas to bring back to your own practice. And of course, a big shout out to our brilliant host Erik Katerborg who showed us the potential and fun creative applications of doing Machine Learning in the browser using ML5.
This tutorial covers half of the content in the workshop, which showcases the foundation of model training and loading. In the upcoming tutorial Part IV, we will learn how to train a model using PoseNet data and make your own yoga posture detection website.
We’d love to hear your key takeaways in a reply or a post if you’re willing to share! Please leave a like and share with your friends if you found the article helpful!
Links to Workshop Materials
To rewatch the workshop, please head over to our Youtube Channel where we have uploaded the recording:
This is Erik’s Glitch account where you can find all his projects: https://glitch.com/@KokoDoko.
Again, you can always access the finished project:
Helpful Resources
Beginners guide to ML5 by the Coding Train — https://thecodingtrain.com/learning/ml5/
Made with Tensorflow.js Youtube channel — https://www.youtube.com/watch?v=h9i7d4R36Lw&list=PLQY2H8rRoyvzSZZuF0qJpoJxZR1NgzcZw
ML5.js documentation — https://learn.ml5js.org/
Interested in More Workshops?
Stay tuned to our Eventbrite page for upcoming workshops, keynotes, and networking events!
Thank you, Erik!
This tutorial is fully based on the workshop developed and hosted by Erik for AIxDesign in November & December 2021. So big shout out to Erik for this amazing work! Erik Katerborg is a creative technologist and lecturer in creative media at the Rotterdam University for Applied Sciences. He is especially interested in making technology and coding more accessible to people with a creative or design background.
To stay in touch, you can connect with Erik on Linkedin, Twitter, or Instagram.
About AIxDesign
AIxDesign is a place to unite practitioners and evolve practices at the intersection of AI/ML and design. We are currently organizing monthly virtual events (like this one), sharing content, exploring collaborative projects, and developing fruitful partnerships.
To stay in the loop, follow us on Instagram, Linkedin, or subscribe to our monthly newsletter to capture it all in your inbox. You can now also find us at aixdesign.co.