
The Full Stack Data Scientist Part 2: A Practical Introduction to Docker
Learn how to use containerised applications for smooth collaboration and deployment
In a beginner tutorial for data science, what’s the first thing you did? It probably involved installing Python or R, downloading the data to analyse, and installing packages through Anaconda or RStudio. At least that’s what it was like when I started learning. Nowadays, online courses like DataCamp let you get straight to coding by hosting everything in a portal. Of course there’s nothing wrong with that, but eventually we all have to learn about the painfully tangled web of dependencies and errors that come with local development, meaning development frustrations such as:
- Import Error: No module named [insert package name]. Huh? I’m SURE that I installed that package!
- Sending a script to a co-worker. You are shocked if it runs successfully the first time. Even more if s/he is using a different OS. Same for running code on a remote machine.
- Creating many different environments, in which you are not sure which packages are installed where.
- Accidentally developing in multiple environments for one project, meaning you don’t know what the real dependencies are.

If you can relate to any of the above, I would highly recommend learning Docker. Docker is the tool that will give you peace of mind, since it:
- Completely controls the environment from the ground up so you know exactly what is installed.
- Allows for full portability of application and its dependencies, meaning the only requirement is Docker itself.
- Ties the Docker configurations directly to the project so that you know the exact runtime environment at all stages of development.
Docker is based around two fundamental definitions:
💻Containers: a virtual isolated environment for running applications.
🗒Images: a snapshot of your container.
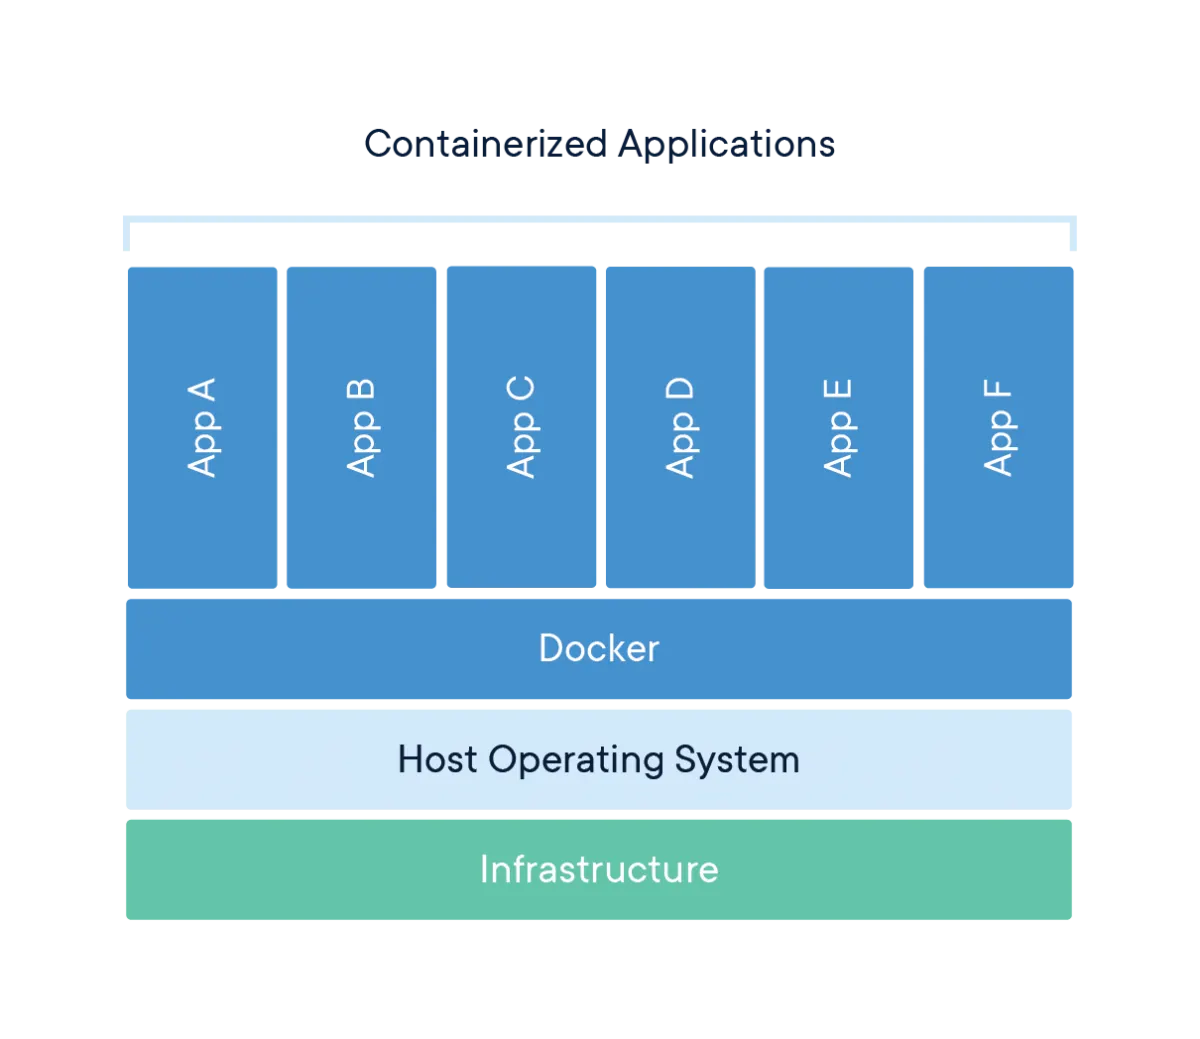
This turns Docker into only requirement to develop and deploy applications. Because of this, Docker lends itself perfectly to a continuous integration/continuous deployment (CI/CD) workflow and is the go-to tool for developing web/software applications in an agile, iterative manner. For data science projects to transition from ‘proof-of-concept’ to production, we have to be able to integrate seamlessly into the rest of the business’ technology stack, and using Docker helps us do just that.
Getting Started with Docker
What we are going to build
In most data science projects, there are two core infrastructure components: a database and a machine running Python/R code. We will build a docker image for each of these components.
- app: environment for running python code.
- db: an MSSQL server instance.
We will run python code from the app container to ingest data from the Fortnite player stats API to the db container.

Code Walkthrough
First, make sure you have a working Docker application on your machine:
- Install Docker. This is a straightforward download from the docs.
- Follow the hello-world tutorial to double check the installation works properly.
Time to build! Go and download a copy of the blog’s code repository. Open up the project in the IDE of your choice. I use VS code. You should have the following file structure:

The first file of interest is app/Dockerfile. Open that up, you should see this:
A Dockerfile contains a series of commands that are used to build a Docker image. The first line instructs Docker to build the image on top of the ubuntu:xenial-20180417 public image. The next few lines create the base environment (including boiler plate Python 3), then we install a bunch of dependencies for interacting with MSSQL, install the python requirements, copy the local code onto the container’s file system, and set our working directory.
If we just wanted to build this image we would run something like:
docker build -t ds .But we want to be able to build and manage our other image too, and it would be convenient to do that in one place with a dedicated set of commands. That’s where docker-compose.yml comes in. Open up the docker-compose.yml file:
This file defines the two images under services: one for running Python code called app, and the other for hosting the dev database called db. The app image specifies the following:
- build — where to find the Dockerfile.
- volumes — tells the app to edit code on our host file system when edited on app and vice versa.
- ports — map the ports from the container to the host. Allows us to access jupyter.
- depends_on — tells app to depend on a running instance of db, so db will be spun up first.
- tty — setting as true means we can interact with the container (i.e. open a bash shell)
- environment — set environment variables. These will allow us to easily set up a connection to our DB.
- command — set the default command on running of the container.
And for db:
- image — tells docker which image to pull from Docker hub.
- ports — map port to host machine, allows access from e.g. database management system.
- environment — set up password and accept the EULA (end user license agreement)
This file is essentially a configuration for the apps you want to run. But the docker-compose command is what lets us actually build the images and run the containers. There are 4 fundamental commands to learn:
1.
docker-compose buildBuild your images as defined by docker-compose.yml
2.
docker-compose up -dRun the built images as local containers (-d to do it in the background)
3.
docker-compose exec app bashLaunch a shell from inside the app container
4.
docker-compose stopStop the running containers
It’s time to put these commands to use! From the same directory as your docker-compose.yml file, run:
docker-compose buildThis will create the two images. On first run this may take a while to complete, but you will see something like this:

Except you probably aren’t using caches like me, so you will have download logs instead.
Next we want to spin up the containers. To do this run:
docker-compose up -d On success, you should see something like this:

This tells us that docker was able to run the containers. Now let’s go into the app container and run a jupyter notebook server. To do this we need to get into the container’s bash shell, fire up a jupyter server and access it through a browser. Run:
docker-compose exec app bashThis will load up a shell inside the app container.

Next we run the following to start a jupyter notebook server:
jupyter notebook --ip 0.0.0.0 --no-browser --allow-rootIn order to develop in this notebook we need to take a URL from the output. As it instructs, copy and paste the URL into your browser.

You’ll now be in the familiar jupyter web app and there’s already a notebook ready there called extract.

Open the notebook and run it. The connection string is what will let you connect to the MSSQL container. Note that this brings together the containers environment variables that you set in docker-compose.yml.

After running the notebook your database table called ‘fortnite’ will be populated with the overall stats of the famous YouTube player Ninja. You can view the table in a database management app (I use DBeaver) by using the following credentials:
Host: localhost
Database/schema: master
Port: 1433
User name: sa
Password: blogPWD123!
There should be some data there! Well done, you’ve built and run two docker containers and shown a simple interaction between the two. If you’d like to stop using up your machine’s resources go ahead and run:
docker-compose stopLessons learned
You might be wondering why it was useful to have our own local database. This has several positives for development:
- You can exactly replicate the production environment locally (database type, version, configuration etc.).
- You don’t have to compete for resources or worry about you or others messing up the data as you do on a shared database.
- You can develop offline.
One downside of Docker is the clunky interaction with jupyter. Manually copying and pasting tokens isn’t the most pleasant of experiences. In most situations it will be favourable to manage a local development environment in conda for exploratory analysis; and maintain a parallel docker image for running python scripts for the production code. Thankfully this workflow remains lightweight and can easily be maintained in a central Git repository.
I hope you enjoyed this practical introduction to Docker. Please leave a few claps if you found it useful, and make sure to follow for subsequent posts in the series!
Check out The Full Stack Data Scientist Part 1: Productionise Your Models with Django APIs

Applied Data Science is a London based consultancy that implements end-to-end data science solutions for businesses, delivering measurable value. If you’re looking to do more with your data, please get in touch via our website.
