Using Velo by Wix to Integrate 3rd-Party API Data

Recently, a member of a local activism group with which I am involved reached out for help with integrating Petfinder API data on her cat rescue website. The rescue owner has an existing Wix website and is not, herself, a developer. Her goal was to have a gallery of all of the adoptable cats in her rescue. Each time she takes in a cat, she adds it to the Petfinder registry, making the Petfinder API the ideal way to supply the data for her gallery.
When I saw her request — which included a link to Petfinder’s API documentation — I knew I could handle digesting the API. I briefly read over the documentation just to be sure, and then told her I’d be happy to help.
The new challenge of this project, for me, was working with an interface designed for non-technical website builders rather than for developers. However, I soon discovered that Wix has a package called Velo used to provide a dev mode to their sites. In this article, I break down the process of digesting a third-party API using Velo by Wix, and then how to display that data on the Wix site itself.
Step One: Hiding API Secrets in Wix
The first and most important step to getting started with most APIs is requesting and securing API identification, secret keys, tokens, etc. Luckily, the site owner had already requested an ID and secret key from Petfinder for her site.
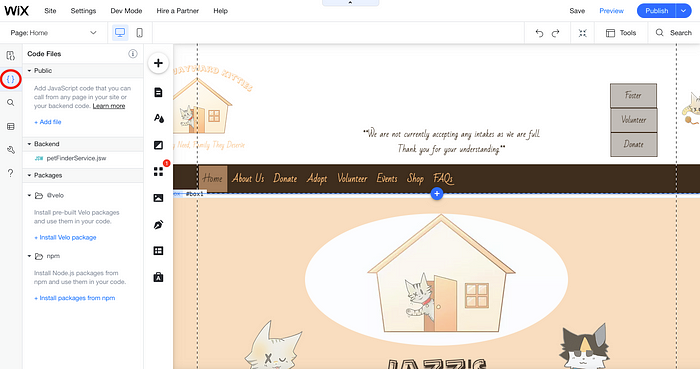
Velo turns out to have a special way to store this information, which must be protected from access by site users. The first step, once logged into the site editor, is to turn on dev mode using the Dev Mode menu. Next, clicking the wrench symbol exposes the Velo tools menu, and from there, the Secrets Manager can be accessed.

Entering the Secrets Manager reveals the current secrets — not the actual data, but the names given when they were entered — and a button for storing a new secret. When a new secret is stored, Wix encrypts it and only reveals it if a logged-in site administrator requests it.

The secrets are accessible via variable names given to them within the Secrets Manager, much like using a .env file on the backend of a site to hide sensitive information. Although Velo does provide a place for backend code, it is better to keep and encrypt sensitive data in the Secrets Manager. For more information on why this is the case, check out the Secrets Manager documentation from Wix.
Step Two: Accessing Third-Party API Endpoints from Wix
Assuming the developer is familiar with the endpoint(s) of the API they want to use, and how to access that specific API, the next step is to enact API calls from Wix. For the Petfinder API, an initial POST request is required to secure a bearer token, using the ID and Secret Key provisioned to the developer. Once the bearer key is returned, it can be used to make data GET requests to the API.
The best place I found to write this code is in a service module on the backend. Wix uses JSW files, or JavaScript web modules, to enact code on the backend that needs to respond to client calls (which the fetch requests here do).
Within the ‘Backend’ portion of the Code Files section, I added a file called petFinderService.jsw. Within that file, I imported the necessary modules and functions from Wix packages, and then wrote my API calls.
import {fetch} from 'wix-fetch';
import {getSecret} from 'wix-secrets-backend';
import wixData from 'wix-data';async function getBearerToken(){
 const clientId = await getSecret('PETFINDER_ID')
 const clientSecret = await getSecret('PETFINDER_SECRET_KEY')
 const configObj = {
  method: 'POST',
  headers: {
   'Content-Type': 'application/x-www-form-urlencoded'
  },
  body: `grant_type=client_credentials&client_id=${clientId}&client_secret=${clientSecret}`
 }
 return fetch('https://api.petfinder.com/v2/oauth2/token', configObj)
 .then(resp => resp.json())
 .then(data => data.access_token)
}export async function petFinderService(){
 const bearer = await getBearerToken()
    const url = 'https://api.petfinder.com/v2/animals?organization=sc544'
 const headers = {
  headers: {
   'Authorization': `Bearer ${bearer}`
  }
 }
 fetch(url, headers)
 .then(resp => resp.json())
 .then(data => {
  data.animals.forEach(animal => {
   wixData.query('PetfinderAdoptables')
    .eq('url', `${animal.url}`)
    .find()
    .then(results => {
     if(results.items.length === 0){
      const infoToAdd = {
       url: animal.url,
       name: animal.name,
       age: animal.age,
       gender: animal.gender,
       photo: animal.photos[0].medium,
       status: animal.status,
       mainColor: animal.colors.primary,
       size: animal.size,
       spayedNeutered: animal.attributes.spayed_neutered,
       houseTrained: animal.attributes.house_trained,
       declawed: animal.attributes.declawed,
       specialNeeds: animal.attributes.special_needs,
       shotsCurrent: animal.attributes.shots_current,
       goodWithKids: animal.environment.children,
       goodWithDogs: animal.environment.dogs,
       goodWithCats: animal.environment.cats,
      }
      wixData.insert('PetfinderAdoptables', infoToAdd)
     }
    })
  })
 })
}
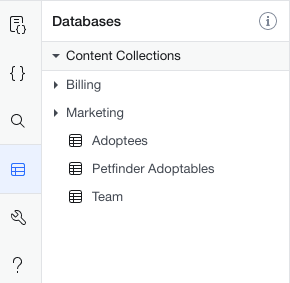
Two of the three imports are fairly self-explanatory — fetch is needed to make the API calls and getSecret is the function Wix offers for using data stored in the Secrets Manager (as discussed above). The third import, wixData, is used to add the information returned from Petfinder to a Content Collection on the Wix site. For a developer, Content Collections function much like databases would on the backend of a site, with the exception that non-technical site editors can make changes to these collections via the Wix editor GUI. There is more information on Content Collections and their management below.
The rest of the code is fairly self-explanatory; first, petFinderService calls the function getBearerToken, which reaches out to the API with the client ID and secret key, then returns the access token once the API responds. Next, petFinderService makes a GET request using the bearer token and then adds the relevant data to the Content Collection if it does not already exist. As of this writing, functionality to remove pets that have been removed from the Petfinder API has not been implemented. This is really all of the code required for this project. Next, the data must be handled using some Wix GUI components.
Step Three: Managing and Displaying Data with Wix
In order to add information programmatically to a Content Collection, it has to first exist. No columns or other information have to be created. For this project, I created the Content Collection PetfinderAdoptables, and used the wixData function ‘insert’ to add Petfinder API data to the collection upon successful return (as shown in the section above).
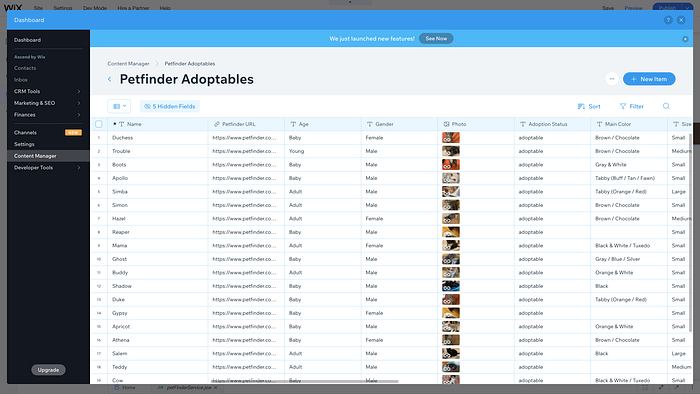
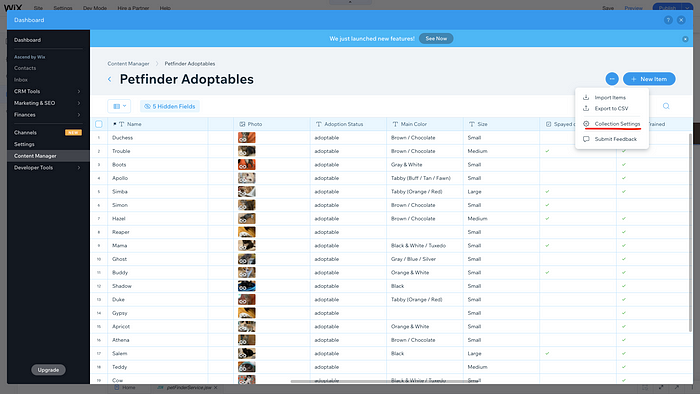
When the Content Collection is initially populated, the column names will have a small marking indicating that they have been imported and need to be officially named and have their data type selected for access by other Wix site features. There may be a programmatic fix for this, but I have not found it. I did not find it too much effort to use the GUI to change these column names, as it would only need to be done once. All future imports use the existing columns.
One very important lesson I learned via trial and error is to make the collection viewable for Site Content in the settings menu — otherwise, the content is viewable when in the Editor but disappears when the site is viewed as an external visitor.
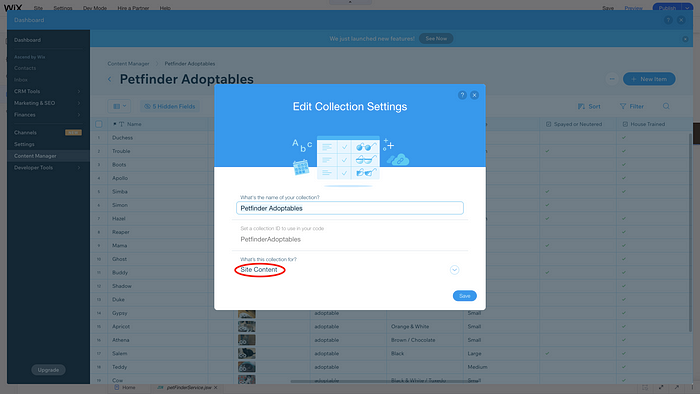
The only ‘general permissions’ options — the options that will make the data viewable to a non-logged-in user — are Site Content and Form Submission. Since I was building a gallery, I chose Site Content.
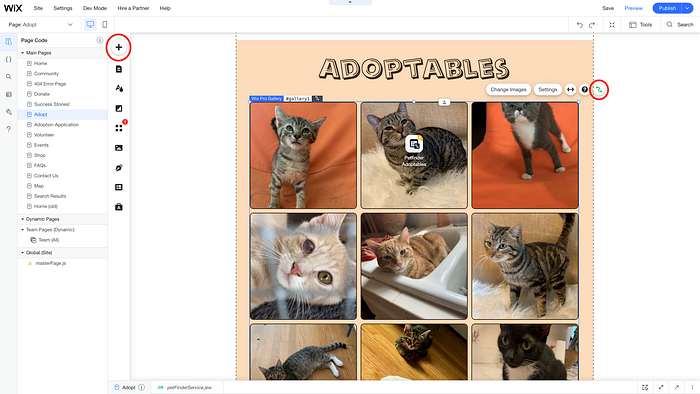
From there, I went to the place on the Adopt page where the site owner wanted her gallery, and added a gallery linked to the Content Collection I had just populated with API data. First, I added a gallery object using the large “+” button available for adding site content. I chose a grid gallery because that is what the client requested. Next, I linked the gallery to the Content Collection PetfinderAdoptables.
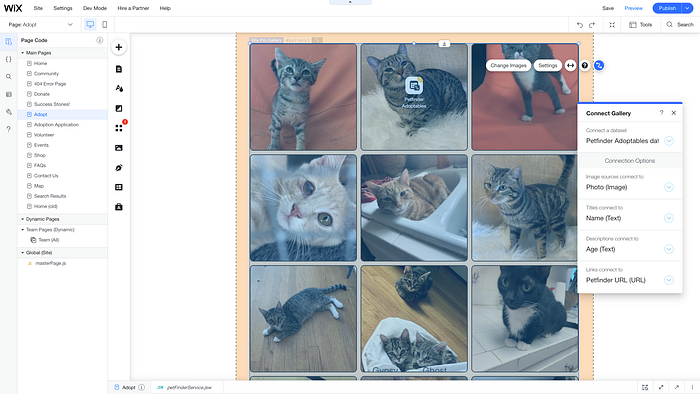
When a Content Collection is first connected to a Wix element like a gallery, a new dataset must be created — however, existing Content Collections are in the menu for creating the new dataset, so it is only a matter of clicking on the desired collection for the dataset to be generated. Next, and quite important for a gallery feature, columns in the dataset can be selected for image sources, titles, descriptions, and links. My selections are visible in the image above. In the gallery settings, I chose for the links to be attached to the pictures themselves, so that when site users click a cat, a new tab takes them to the Petfinder site for that cat. Rollover of the picture shows the cat’s name and age. These are all features customized using the Wix GUI editor.
Final Step: Call the Service Function and Publish Site
Note: calling the service function could actually be done first. I would, in fact, recommend doing it that way. It’s a tiny piece of code that wouldn’t have required me to externally test API calls.
In order for any of the fruits of this labor to show up — once the API calls are working and the data is setup to be displayed — the service module needs to be called from a Wix page. The two best options are either the Global/Site page or the specific page in which an element is displayed. Since the data I digested only needed to be loaded on the Adopt page, I chose to place the code there.
import {petFinderService} from 'backend/petFinderService'$w.onReady(function () {
  petFinderService();
});
The ‘onReady’ event handler on each Wix page is very similar to the DOMContentLoaded event handler in vanilla JavaScript, so this code simply calls the asynchronous function petFinderService from the module petFinderService once the page is ready.
Lastly, I had to remember to click the big blue Publish button to finalize my changes to the site. I had automatic saving enabled and had been previewing the work throughout, but to make the changes viewable to visitors I needed to publish.
Despite the fact that this project involved far less code than a usual project, it was important to learn how to use one a hybrid development environment like Wix, that allows for direct contribution by both technical and non-technical stakeholders. It was interesting to see how DOM content features differ in a GUI-driven environment and how some code — like the fetch requests shown here — is remarkably the same. I would actually recommend Wix to developers for certain types of sites, like portfolio sites, that need to get up and running quickly while still having a professional look and feel. With Velo under the surface, even fairly advanced code application is possible.
If you are in the Charlotte-Gastonia-Fort Mill-Rock Hill metropolitan area and looking for a cat, check out Jazz’s Wayward Kitties!

