Creating a 3D Model of Coyote, (Canis latrans), Skull
The anthropology comparative collection at the Museum of Texas Tech University is composed of various bones from native animals that can be used to compare and contrast other finds that are difficult to or have not yet been identified. I chose a small coyote Canis latrans skull to create a 3D model.
After selecting my object I began the picture taking process. For this process we had to introduce a few new pieces of equipment. The new equipment included a light tent, four lighting lamps (one on each side of the lighting box), a handmade lazy-susan-type plate with intervalling 10˚ markers (red, blue, and green) to be placed inside the lighting box, a small sheet of green paper to be placed in the back of the lighting box to avoid having to mask the images, a tripod to stabilize the camera, and a laptop that was hooked up to the camera via HDMI cable and with Smart Shooter software running. I placed the coyote skull into the lighting box and centered it onto the spinning plate, then adjusted the camera to first take shots of the skull from a lower position facing upwards. I took 36 pictures of the object in a 10˚ rotation. I did this four times, each time moving the camera’s height and angle and choosing a different degree section, so that the entire object would be captured and overlapping pictures were guaranteed. Once I felt comfortable that the top half of the skull had been captured, I flipped it over and began the same process over again for the bottom half.
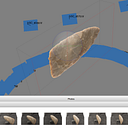
The Smart Shooter software that we used on the laptop automatically saved all the photos taken by the camera on the tripod, so I just compiled those into a folder and inserted them into Photoscan. Since I had two versions of the skull, a top and a bottom, I separated the top view pictures from the bottom view pictures and inserted them as two different chunks into Photoscan. Once in Photoscan, I aligned the photos, created dense clouds, meshes and textures through a batch process. Using the batch process allowed me to assign the creation of all the elements at once and not have to wait for every element to be completed before assigning the next. Once texture was applied to both chunks of the model, and everything looked in sync, I began the method of combing the two chunks. The first step of combining the chunks was to edit the dense clouds and meshes of each chunk, making sure to delete any unneeded background information. Then I merged the two dense cloud chunks together, rerun the mesh for the new chunk (combined chunk), and recreate/apply a new texture. After combining the two chunks and applying a texture my model was complete and ready to be altered for 3D printing.

