Hopi Chasing Star Kachina Figure: Making a 3D Model
The heritage of the Hopi people are very strongly tied to the divine beings that they believe govern the natural phenomenon that rule the natural world. Events such as lightning, wind, the stars in the night sky, and the sun are all attributed to deities which the Hopi carve into soft wood as Kachina figures. These effigies of their gods are often times very detailed and brightly colored with elaborate costumes and headdresses.
While on a trip to the Grand Canyon world heritage site several years ago my mother bought me a miniature Hopi Katchina figure from the gift shop that was handcrafted by a native Hopi artisan. The figure that I received was a two inch black and yellow figure holding a red bottle and wand like object in his hand. On the back of the Kachina doll there is a ribbon that has six feathers, three on either side, sticking off the sides of the model, there is one additional feather that is attached to the antenna of the back of figure’s head.
The specific figurine that my mother bought me was the Chasing Star Dancer Kachina who according to the small card that came with the figurine “is a symbol for the plants and the stars and can resurrect those that have fallen from the sky, by lifting them back up to the stars.” I chose to do this model because it appears challenging with the thin feathers that stick off the back, but simple enough that the program shouldn’t have trouble aligning the photos.
To start, I first set up a light tent to diffuse the light and set up the Nikon D7100 camera that I was able to use for the close angle photography of the object. After fiddling with the settings on the camera to optimize lighting conditions, I was able to capture forty five images by rotating the Kachina figure from about fifteen degrees at a time to capture all angles and properly create the overlapping shots necessary for the three dimensional photogrammetry. I set the F stop to 9 the Shutter speed to 60 and the Exposure to +1.3.

After taking about half of the photos I decided to flip the model and try and take a second orbit of photos from the underside of the figure. To accomplish this I first tried to stick the antenna of the figure into a ball of clay that I stuck to a lens cap from the camera. Although this worked initially the clay was not strong enough to hold the figure upright for very long so I opted for a different approach.

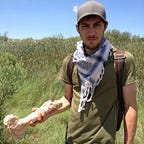
I decided to use a binder clip to pinch onto the antenna bit of the figure. With the clips “arms” sticking off to the side it created a stable base that made taking the second half of the images fairly easy.

Once I had taken all of the images I used Adobe Photoshop to convert the RAW images into TIFF files and to mask off the images. After I masked the images I imported them into Agisoft Photoscan and started to construct the model.

Luckily for me because the figurine itself was so detailed and colorful the Photoscan program was able to properly align the photos on the high setting on the first try. With the excellent results gained from the photo alignment I was able to complete the remaining steps all on the first try as well.


The final results for the model were very good, however the feathers that stick off of the back of the figure did not come out completely in the model’s mesh. I do not know where this problem came from because the feathers came through very clear in the dense cloud of the model. The only other problem that was present in the final model was the hole left in between the figures legs behind the apron that he is wearing. Unfortunately I cannot think of a way to fix this problem, I thought that taking pictures of the underside of the figure would compensate for this problem but it seems that the angle between the apron and the base of the figure can only be properly captured at one or two angles so it does not provide the proper amount of overlap necessary for Photoscan to create point data.