2D Path-finding with AStar in Godot 3.0
An image-heavy explanation of a general-purpose solution

So you’re making a 2D game in Godot and you need to add path-finding? You’ve come to the right place! Today, I’ll be showing you how to add path-finding to your game in a modular way which should scale with your game.
Download these assets as we will use them throughout this tutorial.
- Start a new Godot project. We should be looking at a blank screen like this:

Now open your file explorer and copy the “entities” folder from the .zip file you downloaded earlier into the project folder. Your folder structure should look like this:

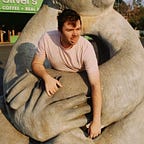
2. Add a new root node of type Node. We’ll call this “game”:


Simple enough so far, huh?
3. Now let’s make our navigation map! Add a new scene and add a “TileMap” as the root node. Name it “navigation_map”.


Now it’s time to add the a tileset so we can paint our map.


IMPORTANT! We have to save the scene at the right place.

Now it’s time to write some code! This will be the most complex part of the tutorial, so it will be explained by comments in the code.


Your window will now look like this:

Now here’s my code. Read through it, try to understand it. It’s okay if you don’t fully understand it — come back when we’ve finished the tutorial and perhaps it will make more sense.
Replace that code in your editor with the code above and save it.

The hardest part of the tutorial is now over!
4. Time to make our player! Our player will be able to move anywhere on the screen — we won’t bother setting up collisions for them right now. They will also be able to “whistle”. When they do this, the sidekick will find a path to the player and follow it.
Let’s make our player! As earlier, create a new scene and add a root node of type Sprite. Name it “player”.


Now we have a player! Time to add some scripting. Add a new script to the player node. I will implement my own movement — you can use your own code if you want, but ensure that the player emits the same signal as I use:

Save the file and let’s move on!
5. Time to create the sidekick! The process is similar to creating the player with only a few differences.


The major difference however is the code! The sidekick will not be directly controlled but rather controlled internal systems. The only function it has is to accept a path and follow it. Let’s write its code!
The sidekick will follow a path if it has one and do nothing if it doesn’t. Upon reaching the end of the path, it will nullify its path variable.

6. Now it’s time to put all the pieces together! Return to the original scene, and drag all scenes from their subfolders into the root node:

Click on the navigation_map and create a map with gaps in it.

It’s about time that we save the scene! Let’s do that.

We just need a little bit more code to connect everything together. So click on the game node and add a new script:

Once again, accept the defaults. We have to connect the player’s whistle the navigation_map’s path generation and the sidekick’s path variable. This is how:
Shove it in Godot and save.

Position the player and sidekick on the map.

Save the scene and press F6 to test. And that’s it! Press “Space” to make the sidekick come to you!
Thank you for reading! Hopefully this tutorial has been useful. Comment if you have used the information here in a project!
You can follow Kitsch Digital for more posts like this:
Facebook: http://facebook.com/kitschdigital
Twitter: https://twitter.com/KitschDigital