Classification of Weather Images using ResNet-34 in PyTorch

In this post we will train a multi-class image classification model using deep learning techniques that accurately classifies the images into one of the 5 weather categories: Sunrise, Cloudy, Rainy, Shine, or Foggy. We will implement this project in PyTorch.
PyTorch is a widely used, open source deep learning platform developed by Facebook for easily writing neural network layers in Python enabling a seamless workflow from research to production. It is also one of the preferred deep learning research platforms built to provide maximum flexibility and speed.
We have downloaded this weather dataset from Kaggle for creating our classification model. It contains about 300–400 images in each of the 5 category of images.
As it can be seen in the dataset, all the images are of different sizes. It is important to resize all our images to the same size before they can be fed into the model. We will use PyTorch Transformations on the Training and Testing dataset to resize the images and convert them to PyTorch tensors.
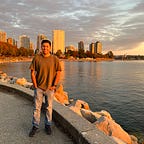
Let’s look at a couple of images from the dataset. We can view the images using the Matplotlib visualization library.
We created data loaders for training and validation, to load the data in batches, each containing 64 images. Let’s visualize a random batch of images from the dataset using the make_grid method from torchvision. Each time the following code is run, we get a different batch, since the sampler shuffles the indices before creating batches.

Defining our Neural Network Architecture
ResNet, also known as residual neural network, refers to the idea of adding residual learning to the traditional convolutional neural network, which solves the problem of gradient dispersion and accuracy degradation in deep networks, so that as the network gets more and more deeper, both the accuracy and the speed are controlled.
One of the key changes in ResNet was the addition of the residual block, which adds the original input back to the output feature map obtained by passing the input through one or more convolutional layers.

If you are interested in a detailed description of the ResNet architecture, it is highly recommended you can read this research paper published in 2015.
Before we define our ResNet model, an ImageClassificationBase class is created which contains helper methods for training & validation.
Let us now define our ResNet architecture. We will create a 9 layer ResNet model from scratch. You can see the visual representation of this model from here.
We have defined our ResNet-9 architecture above. Now let us pass this model to our GPU device.
We’re now ready to train our model. Instead of SGD (stochastic gradient descent), we’ll use the Adam optimizer which uses techniques like momentum and adaptive learning rates for faster training.
We cans see that our model accuracy peaks at around 76% in the 25th epoch.
Let us see how the model performs on the Test dataset.
As we can see, our model achieves an test accuracy of about 80% using the ResNet-9 Model.
We went a step ahead and tried to improve the accuracy by using a different architecture of the ResNet Model.
Before we define our new architecture, we will make some changes in our `fit` function:
- Learning rate scheduling: Instead of using a fixed learning rate, we will use a learning rate scheduler, which will change the learning rate after every batch of training. We’ll use the ”One Cycle Learning Rate Policy”, which involves starting with a low learning rate, gradually increasing it batch-by-batch to a high learning rate for about 30% of epochs, then gradually decreasing it to a very low value for the remaining epochs. More information can be found at: https://sgugger.github.io/the-1cycle-policy.html
- Weight Decay: We also use weight decay, which is yet another regularization technique which prevents the weights from becoming too large by adding an additional term to the loss function. More information can be found at: https://towardsdatascience.com/this-thing-called-weight-decay-a7cd4bcfccab
- Gradient Clipping: It is helpful to limit the values of gradients to a small range to prevent undesirable changes in parameters due to large gradient values. More information can be found at: https://towardsdatascience.com/what-is-gradient-clipping-b8e815cdfb48
So let’s define the functions to incorporate these changes. We’ll also record the learning rate used for each batch.
We will now try the 34 layer variant of ResNet for our classification problem. Let’s use Transfer Learning to define our ResNet-34 model.
As shown in the code below, we have utilized the resnet34 model from the torchvision library. This model is pretrained on the ImageNet dataset which has hundreds of images in more than 20,000 categories. We have replaced the last layer of this model and used our own forward connection layer that will give us probabilities of each of the 5 weather categories the image can belong to.
Let us load the model into our GPU device and then visualize our model architecture.
We’ll first freeze the ResNet layers and train for some epochs. This only trains the final layer to start classifying the images.
Now let us unfreeze these layers and train the full network.
The accuracy plot is shown below. The accuracy starts to increase steeply after the 3rd epoch. The accuracy reaches about 90% in only a few more epochs.
We can also visualize this trend in the training and validation losses. These decrease rapidly after the third epoch.
Let us look at how the learning rate was varied with each batch.
The overall accuracy on the testing dataset can be calculated as shown below.
We reached an impressive accuracy of 96.8% on the testing dataset. This was possible due to the much more powerful ResNet-34 architecture that can easily learn more complex relationships. Our accuracy also increased due to the noteworthy changes we made in the training process: Learning Rate Scheduling, Gradient Clipping and Weight decay.
Let’s also look at our model’s predictions on some individual images from the testing dataset.
As we can see, the model accurately predicted the second image as shine and did not misinterpret it as sunrise!
That was all from my side for this post.
You can find the complete implementation of this model from my notebook here.
You can also try to train this ResNet-34 model on a much larger image dataset with a lot more categories.
Let me know if you liked this post and if have any questions or suggestions in the response box below.
Connect with me at: https://www.linkedin.com/in/chiragdaryani/