Member-only story
SwiftUI: Create a Sound Visualizer.
Using the built-in microphone, sample the sound level in dB to visualize it in SwiftUI.
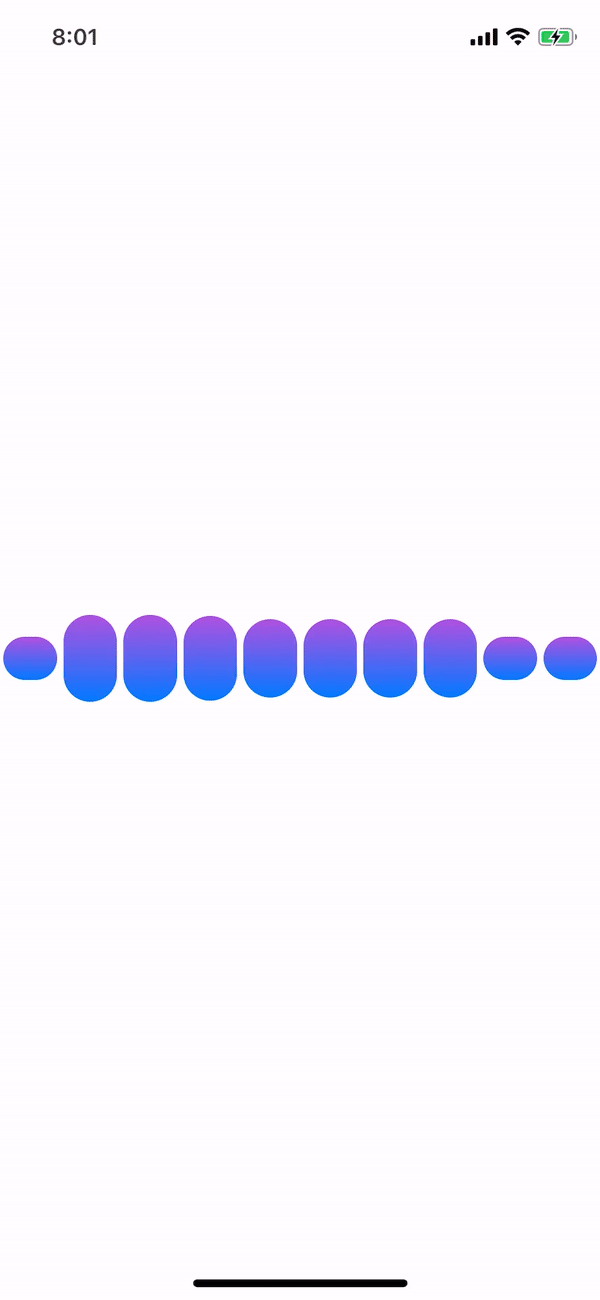
This is what we are going to accomplish in this tutorial:
Getting Started
Create a new SwiftUI Project in Xcode. Make sure you’re running macOS Catalina and have Xcode 11 installed. (Allows you to use SwiftUI)
Open Xcode → File → New → Project → iOS → Single View App
Then hit next.
I called mine SoundVisualizer, but feel free to name it whatever you’d like.
Make sure you have User Interface set to SwiftUI.

How are we going to accomplish this?

Imagine the red line above is our analog sound wave. Using Swift, we can capture the level of the sound at any given time. We then take various samples of our sound and store them in an array (buffer). Using this array, we can map it to our SwiftUI bar chart where the height is directly correlated to the sound received from the microphone!
Implementation
Let’s create a new Swift file. This swift file will hold the logic needed to capture the audio from our phone.
Create a new Swift file and name it MicrophoneMonitor.swift .
In this file, we’ll deal with the setup associated with ‘recording’ the audio from the user's phone as well as publishing when our sound level buffer changes.
We will set up our AVAudioSession and configure it to capture the sound levels every 0.01 seconds. (You can always change this value and play around with some to see how it affects the outcome of our project)

