RGBDESIGNER TUTORIAL #4
Circle Lines for rgbDesigner
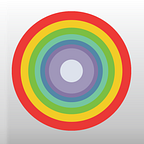
LATEST: New Image Generator released with V2.0.6

If you’d like to download the app before we get started, you can do that here. The app comes with a 7 day free trial, with a cheap monthly subscription (the lowest tier on the Appstore).
Part of the ongoing development of rgbDesigner is adding new image generators. With over 8 almost ready for release and another 20 in the pipeline, we’ve got an exciting year ahead.
Circle Lines in the 34th Image Generator to be added to rgbDesigner.
Its design consists of a series of vertical lines made out of circles. The circles and lines can be modulated in a variety of different ways to give a range of effects.
Getting Started With Images

Firstly, lets have a look at the basic controls that are available for all image generators.
- Image Size. Tap on the values to enter your required values.
- Alternatively, select an image size from the presets.
- Random. Some generators randomise the output of the image. If they do, this toggle switch will appear. Once you get a result you are happy with, you can turn Random off, and the parameters will not be randomised further.
- Image Generator. This is where you select the Image Generator, which in the image above is set to “Circle Line”, the generator we’re exploring today.
- Gradient. This is the gradient that will be used to generate the image.
- Render. Apply the parameter settings to the image. If the image generator has random elements, a new image will be generated without a change in parameters.
- Share. A share sheet with all the available share options will appear.
- Image Files. Save the current parameters or load in a saved image.
Our First Image

This image was generated using the default settings. There are 10 vertical lines (1) each made up of 20 circles (2). The circles’ radius is modulated with a sine wave between the minimum and maximum radius (3). Each circle has an opacity of 50%(4) and the Colour Mode (5) uses the gradient directly, ie. circle 1 is colour 1 of the gradient. A frequency (6) of 50 is set and glow is turned off.
Line Count, Circle Count, Radius and Opacity a fairly straightforward. Experiment with different values and see how they are reflected in the image. Values can be changed by either using the slider or tapping on the numerical value to reveal the Number Pad.
Colour Mode (5) is set by a selector with three options:
- Grad. This uses the colour number to match the circle number. Circle 0 is the top circle.
- <-> This uses the full range of the gradient across the number of circles.
- Rnd. This randomly selects a colour from the gradient for each circle.
Background Colour
The background colour is always set to colour 0.
Circle Size Frequency and Phase Modulation (6)
As we map out the size of the circles that make up each line, the frequency determines how quickly the size changes between the minimum and maximum. A low frequency represents a slow change, a high frequency a quick change.
Each line is assigned a frequency within the range set by the Freq Min and the Freq Max value. If the minimum and maximum values are the same, as shown in the example above, each line will be the same.
Here are some examples of how these values change the image:


Circle Glow
The final control you have is to add glow to each circle. There are four modes:
- Off. No glow is rendered. Glow is off in the examples above.
- Whi. White glow is added to each circle.
- Blk. Black “glow” is added to each circle. Yes, I know black doesn’t really glow, so let’s call it anti-glow!
- Rnd. Random. The glow for each circle is randomly selected from the gradient.
Glow Width and Opacity
The glow is placed at the edge of the circle with the width of the glow being set in pixels. If Glow Width is set to 0, this is the same as the glow being off.
Glow Opacity is the percentage (%) intensity of the glow. 0%, the glow is off, 100% the glow is at full intensity.
The covers all the controls for Circle Line. As always, the outcome is highly dependent on the colours in the gradient. Here are some examples, showing the gradient and the parameter settings, of the variety of images you can achieve.
Science Book. Remember those textbook covers from the 70s?

Retro Sci Fi. Some inspiration for Richard Powers style illustration. Often I use rgbDesigner as a launching point for an illustration or other ideas.

Abstract Landscape. Sometimes pushing the parameters hard can glitch the generator out into some unusual territory.

Wall Hanging. Too often the digital world gets us thinking about set aspect ratios. Sometimes it’s good to break out of that.

Seabed. Working with colours can provide all sorts of variety.

Thanks for reading. If you’re looking for an overview to get started with rgbDesigner, try out this one!