Daily Scraps, Technical Case Study
Insights for our Isle of Dogs social campaign

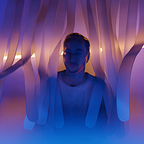
We recently worked on a digital campaign for Wes Anderson’s latest film, Isle of Dogs. Today we’re looking at Daily Scraps, an interactive social experience, which allowed fans to compete for props from the movie. At specific times throughout the week, users were able to open trash bags in hopes of winning a treat before all the bags ran out.
Our goal was to create 3D trash bags that featured smooth interactivity while staying true to the film’s look and feel. Because of this, WebGL felt like the right choice for the project.
Let’s see how it was done!

Tearing Open the Bags
The central element of the experience is the trash bag — and users were going to see it a lot. For this reason, we spent a fair amount of time making sure it looked great.
Working with our 3D artist, we designed a rigged model of the trash bag using animations from the movie as reference. Our goal was to get as close to the reference as we could without needing hundreds of bones in the rig.
Over time, new bags and items were going to be added to the site — so we needed to create assets intelligently.
We ended up splitting each bag into 3 parts:
- The animation rig, identical for each bag
- The bottom plate, identical for each bag, with one texture per bag
- The content geometry, unique to each bag, with one texture per bag
This way we could load only what we needed.

Additionally, each geometry was optimized and exported with Blender and the threejs exporter:


- We used the Decimate modifier to reduce the number of faces.
- We unchecked “Normals” and computed them in the logic instead.
- We enabled and lowered precision.
Trial and error was needed to find the correct values — especially for the Decimate modifier. What worked well for us was to decimate step by step until the UV mapping seemed to suffer, then revert one step back. For the most complex geometry, this step alone shaved about 50% of the file size.
Texturing and Lightning
The first thing we noticed during early prototyping of the bag interaction was that using the diffuse texture alone made the animation hard to read.
Because the bag wasn’t casting any shadows, it was hard to distinguish the overlapping layers of the bag. We didn’t want to use dynamic lighting and shadows for aesthetics and performance reasons, so we chose to bake ambient occlusion (AO) instead.
However, baking ambient occlusion results in a static image — and our bag is animated. How could we make it work with our animation, which was controlled by user input?
We decided to bake two separate AO textures, representing the initial and final states of the animation: closed and open. These two textures were interpolated in our shader following the progress of the animation (0 when completely closed, and 1 when completely open). Finally, an easing curve was added on the interpolation variable to make it feel less linear. Effectively, this would make the closed shadow fully visible in the beginning and hidden in the end.
In the resulting animation, shadows appear and extend in sync with the bag opening. The animation is now more readable, for almost no extra performance cost.
By the way, both states (open and closed) were baked into the same texture, using different channels (red and green). For the other meshes, the AO was baked into the Alpha channel. An easy way of doing this in Photoshop is by pasting the AO texture into the mask channel. One less texture to load, one less GPU context switch!

Post-processing
Finally, we adjusted the look of the bag by adding different settings and passes. Implementing this step in code, rather than editing textures, allowed for a fast iteration cycle, since changing values and previewing is close to instant.
Some of the applied tweaks include:
- Blue noise dithering to reduce banding and make the AO more diffuse
- Brightness / saturation / contrast to adjust the colors without editing the texture
- Hard light blend mode to blend together the background, the bag and an additional noise pass
And once again, because this was all done in code, it also made it super easy to apply this step to the other bags and adjust settings as needed.

Interacting with the Bag
We now have our animated bag properly shaded and animated. Our next step was to add some feedback for the users — visual clues to guide them through the interaction.

Ideally, we wanted to transition seamlessly from the paw icon circle (left image) to a full ring (right image). To achieve this, we needed to be able to draw these two shapes (circle and ring) and interpolate between them. Shaders are good at interpolating stuff! However, WebGL doesn’t have a shape drawing API, like Canvas2D does.
To mimic this functionality, we used 2D Signed Distance Functions (SDF) in our custom shader. This technique is usually used for raymarching volumes in 3D (think Shadertoy), but it works great for 2D too. This post from The Book of Shaders does a good job of explaining the concept. This allowed us to draw and interpolate between multiple antialiased shapes, reacting to the user input. Here’s a little breakdown:

1. Drawing the main circle.
2. Drawing a smaller circle to mask the bigger one and create a ring.
3. Adding noise for organic-looking displacement.
4. Changing the radius of the smaller circle to transition to a ring or a circle.
We ended up cleaning up and moving some of the (1, 2) GLSL utils from this project into their own npm libraries, making them easily reusable for future projects.
A similar technique was used for the background transition, which used a triangle pattern to mask part of the background texture. You can see the code and preview of this effect here.

The same thing goes for the circle and rectangles on the dog screen. It’s possible to combine multiple shapes in the same shader by using operations inspired from this library. We used spritesheet-like textures for assets that were always shown together (like a dog and its background), and recalculated their own UVs in the vertex shader to limit GPU context switching.
Adding a Bit More Interaction
To make each view more playful, some elements react to the gyroscope, adding subtle motion or parallax.
Putting It in Motion
Once all the visual elements are ready, there’s only one step left: animation! We always try our best to find new animations that respect the mood of the movie we are working on.
If you take a look at the film’s trailer, you’ll realize a lot of elements in the film either pop into the screen without transition or skip a few frames because of the stop-motion.
After a few rounds of testing, we realized we had to reach a sweet spot between smooth and janky animations — i.e. every animation must have some elements popping in and some moving smoothly at the same time, otherwise it will feel unbalanced.
Later on, while implementing sound, we added a few drum rolls to accentuate the staggered effect of elements popping in.
In the end, it’s this attention to detail that makes each of our projects feel unique and unlike anything else.
Preloading the Trash
The site’s flow is somewhat similar to a “Die and Retry” kind of game — play, lose, try again, until you win or the bags run out. To keep this flow as smooth and responsive as possible, yet load the assets needed for each new page, we used a queue system: the assets for the next page start to load in the background, as soon as the current page is ready. This reduced the initial load to display the site and used user interaction time efficiently.

One thing to keep in mind is that all the textures of a scene will be uploaded at once to the GPU when the scene starts rendering. Since this is a synchronous task, it causes the main thread to freeze for some time. To avoid this, it’s possible to throttle the textures upload using this trick highlighted by Matt DesLauriers.
Another way of tackling this issue is by using compressed textures (more info in this post by Make Me Pulse). However in the case of our mobile site, the performance/file size ratio wasn’t worth it — it wasn’t possible to optimize these textures as finely as JPG or PNG. In our tests, this would have resulted in a file size increase of around 300%.
Conclusion
Hopefully this case study highlights a bit of our process: it’s all about iterating and polishing that extra little thing. As developers, we try to build everything in a fun way that allows us to learn something new, and in this case, we were lucky to be able to do that on such an exciting project! Working on films is always an exciting creative challenge.
See it live, get some treats: dailyscraps.dog