Stubborn Resilience or How to Start Selling Your Photography at the Art Festivals

When you walk through booths at the art festival, everything looks easy, streamlined, and organized. Cheerful artists meet and greet you with a smile, ready to answer any questions. You don’t necessarily think how they came to be there and how much effort it took to set up a booth and bring the artwork. Everything changes when you try to do it for the first time.
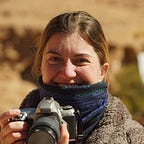
My boyfriend Stas is a gifted photographer, but with impostor syndrome. I had a very hard time convincing him that his pictures bring joy and deserve to be seen by more than just me and his close group of Instagram followers. I thought the only way I can prove to him that his pictures are as good as I say they are, is to get external validation. That validation had to come from professionals in the industry or those who are bold enough to claim to be them.
So I became his promoter. Now looking back it’s easy to break down the process into major milestones. Back then it was terra incognita, and we had more unknowns than pictures in his portfolio.

Getting a place under the sun
First I needed to understand how to become a participant at art festivals. I found organizers of my personal favorite — the Los Altos Arts & Wine Festival. Turned out that Pacific Fine Arts are managing other similar shows in the SF Bay Area. For convenience, there’s a combined application to apply for different events at the same time. Dana and Troy are PFA’s directors and truly dedicated people pulling these incredible events together. They were kind enough to answer many of my noob questions.
And I had a lot.
Is tent provided? Are displays and hangers provided? What is the set up process like? How do we show our display in the application if we never participated in the event before? Do we need lighting? Is electricity provided? How big of a space do we need? Do we need to rent a truck? How many photographs and in which formats do we need? Are we going to pull this off and how and why…
Before figuring out existential stuff, we focused on the application and getting approved for the event. There are a few things that need to be submitted with the application form:
- Artist statement — write how awesome you are. The hardest part.
- Pictures of your studio and work in progress — to show you’re not a reseller and a genuine artist.
- Pictures of your artwork.
- Picture of your display with the placement of artwork — also a hard one if you don’t have anything printed yet and never participated in a show before.
To hack the display requirement, we got some hooks and hung Stat’s work on the fence in our backyard. We described the rest of the setup in writing.

While we were printing and framing some of his photographs, I took pictures with an iPhone to show work in progress. Totally legit artist.

After all the info was gathered and the application filled, we submitted the package via email and got our fingers crossed. Not everyone gets in. There’s a committee that reviews your application and artwork. Each category of art has a limited number of allowed participants. We were concerned that it would be hard to get approved for photography it being such a popular medium.
But we got in!
And so we procrastinated and procrastinated, like any normal person with a day job and many other things to do. Up until the month before the festival, I woke up in a cold sweat realizing that we have nothing for the fest. Absolutely nothing, except those few pictures we printed for the application.
Getting display ready
I don’t know what people did before the Internet. Art Fair Insiders forum and responses from Dana at PFAF saved us. I found where to buy a tent, panels, hooks, and all kinds of tips and tricks for the event. We decided to go with Pro Panels basic layout for the display. Thankfully month was enough time to order panels as they are made to order. We got them pretty tight only one week before the show.

We went with EZ Up ES100S 10x10 tent and found it easy to set up by two people. It performed well at the show, but we didn’t test it with elements — the weather was at its California finest. Sandbags are a must, and I recommend saddlebag type for quick and easy setup.
One thing I want to highlight — don’t compromise on telescopic legs. Our spot at the show was near the curb, with naturally slopped and uneven pavement. We were super happy to have extendable legs for our tent and display panels.
Getting pictures ready
By drawing out layout, brainstorming, and reading forums, we decided to have three distinct types of fine art prints: metal prints, canvases, and framed fine art prints on paper. These more expensive pieces were in sizes ranging from 20"x20" to 30"x45". They had certificates of authenticity and corresponding holograms on each of them. Additionally, we provided information about edition type and number in the limited edition sequence.

We also had some matted only smaller format prints for those who don’t have much wall space or don’t want to break a bank. Neatly packed in clear plastic bags with cardboard for the support they were ready to be framed and hung on the wall.
We printed smaller pictures at home with Epson SureColor P800. It can handle a max cut-sheet size of 17"x22" and you need roll support to print up to 17"x129". We ordered larger prints and canvases at Bay Photo Lab and Richard Photo Lab. The quality of prints is good in both labs, but the goal was to diversify printing and minimize dependency on one shop. It was the right thing to do. Two metal prints didn’t make it on time before the show due to a delay at the lab and an issue with the carrier.

One thing we learned the hard way is not to compromise on the quality of frames. We had a few break while we were framing large-format pictures. Moreover, visually a good frame makes a lot of difference, even if it’s a plain black frame.
Dry run
Don’t skip the step of practicing setting everything up before the show. Unless you are a genius with multiple hands or helpers, no way you’ll be able to set everything up within a dedicated time slot on the opening day of the festival. When you come to the fest, you need to know what you’re doing — no time to think much. You need to unload, set up, and get your truck out of the way so the fresh and happy crowd can flood the streets. While you wipe the sweat and wish there was a shower and a bed to sleep in :)

Because we procrastinated for so long, we were setting everything up, printing, and framing the whole night before the show. We couldn’t find proper boxes to transport the artwork in the U-haul we rented the day before. We were exhausted and on the brink of quitting more than once. But each of us waited for the other to say — “let’s quit”. Neither of us did.
I was filling sandbags at 5 am, while Stas was packing everything in the van. At 6 am we headed out to the festival to do the exact same thing of setting everything up. I drove very gently, not to break anything.
At the event
It’s a special feeling to finally arrive after all the drag, stress, and doubt. We became part of the colorful mosaic of artists gathered together to showcase their art. It was still cloudy and a bit chilly when we joined, but the smell of fresh coffee and sounds of things coming together created a special atmosphere. Excitement and anticipation were in the air.

But there was still this slight anxiety as we did not know what to expect and how people would react to our art. We put up the tent, display, pictures, some decorations, and a sanitizer as an unavoidable sign of the time. We sat and watched people come in, comment in admiration, but not buy.
Mid first day of the event was a second breaking point when we thought that we did all this for nothing, not even one picture got sold. We seriously considered not coming back for the second day of the festival. But when we came home, we analyzed what we could do differently, printed more small pictures, got a good night’s sleep, and headed back in the morning. It took us a whole day to realize that we actually need to sell. LOL!
Next day, pumped with coffee we started actually “selling” the photographs. We talked to people, told stories about the places and different film equipment Stas used. We absolutely enjoyed interactions with people, and while doing that we sold two pictures, for a total of $750.
That didn’t cover the expenses, but that was never an expectation. We’ve learned valuable lessons, made great connections, and got inspired to experiment and change our approach next time we’re at the festival. Our goal is to recover the full startup cost in about 10 events.

Expenses & Equipment
- Printer Epson SureColor P800: $1,195.
- 14 large format paper, metallic prints & canvas from Bay Photo Lab and Richard Photo Lab: $2,961.
- Frames, mats, printing paper, sleeves, authenticity certificates, ink & other misc items: ~$500.
- 10x10 spot: $310 for 10x10 space + 10% of sales.
- Tent EZ Up ES100S 10x10: $228 @ Walmart.
- Display ProPanels Plan A with telescopic legs + wires and hooks for frames hanging: $2,282 @ directly from the manufacturer.
- 24x48 foldable utility table: $85 @ local hardware store.
- Table cloth (I used black bedding sheets from Target): $30.
- Saddlebag sandbags: $20 @ Amazon.
- Sand: $15 @ local hardware store.
- Fire extinguisher: $60 @ local hardware store.
- U-haul cargo van rental: $190.
- We ran on coffee and gasoline: $100.
To sum up
Total cost, including event expenses: ~$8,000.
Profit: $750
Amount of spent time: a lot.
Worth it? HELL YEAH.