Screen Recording Your App Using iOS ReplayKit for Bug Reporting
Continuing our quest to explore some uncommon iOS frameworks, we will try investigating an interesting yet unpopular candidate, ReplayKit.
ReplayKit lets app developers record videos of the activity in their apps. You can also capture sound using microphone. This framework was available since iOS 9. Starting iOS 10, this framework allows you to add a face time recording ( like live commentry ) for the video. You can even live broadcast the screen recording of the app.
In their wwdc session, Apple mainly emphasized on using ReplayKit to record / live broadcast your game play from within your game.
One possibility of using ReplayKit in any app is for bug reporting. If testers are given an option to record the flow that led to the bug along with their voice over explaining the flaw, things can get pretty easy. But you wouldn’t be able to report any crashes using ReplayKit. We will come to that later.
Let us take up an example showcasing how ReplayKit can be put to use in such a scenario.
Project Overview
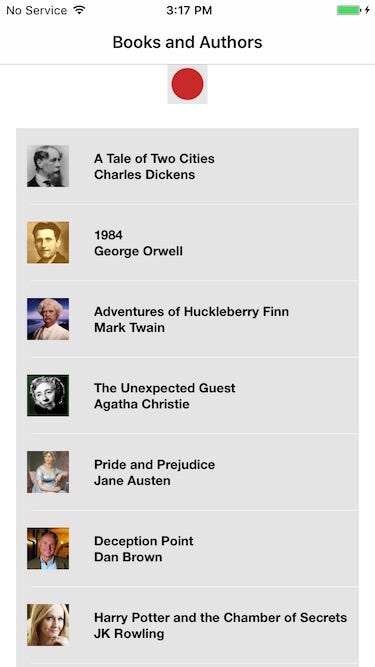
Our project consists of one view controller which displays a list of books and their authors in a table. Since there is no detail screen to navigate to, when you click on a book entry, there is no point in showing selection on table view cells. But by default table view cells are selectable. This can be the bug we are trying to report.
BookListVC : Displays a list of books and authors.
Our finished BookListVC looks like this.

Setting Up Screen Recorder
To set up the screen recorder we use RPScreenRecorder class of ReplayKit.
var screenRecorder: RPScreenRecorder?
We initialize the screen recorder variable. We will be using it later.
Now to the actual recording flow.
The functionality is straightforward. We start recording on a button click and stop recording when the button is tapped again.
Let us take a look at how we can start capturing the screen.
We use the following function of RPScreenRecorder for recording the app.
func startRecording(handler: (Error?) -> Void)? = nil)
As you can see I have updated all the UI in relation to the recording indication here. Incase there is an error, we need to convey it to the user. If you notice, I have updated the record button state before the completion handler is called. This is because the completion handler gets called with a small delay at times, but the actual recording would already have started. This can be confusing to the user. So what of the recording fails to start? Incase there is an error I just revert the state of the record button.
I would like to elaborate upon the recording UI. As you can see from Fig — 1 , we are using a small button docked below the navigation bar. But the UI of this button need not be captured along with the screen recording. For this we will create another UIWindow and add the button UI as its subview. The actual button will be on the main window. We will disable the user interaction of the newly created window so that the window behind receives the touch events.
Finally to stop recording the app:
Recording of the app can be stopped using a simple function.
func stopRecording(handler: (RPPreviewViewController?, Error?) -> Void)? = nil)
RPPreviewViewController
Once the recording is completed, we can let the user preview and edit it. This can be accomplished by simply presenting the instance of RPPreviewViewController passed to the handler as illustrated above.
An illustration of RPViewController can be seen below:

RPPreviewViewControllerDelegate
The delegate of RPPreviewViewController gets notified when it is dismissed. As you can see from the screenshot, there are two ways of dismissing the view controller, either after saving the recording to Photos or opting not to. If your view controller should be notified of how the preview view controller was dismissed you should use the following delegate method.
func previewController(RPPreviewViewController, didFinishWithActivityTypes: Set<String>)
From the activity types you can figure out how the controller was dismissed. If the set contains saveToCameraRoll then the recording has been saved to the camera roll. If the set is empty, the preview view controller was simply dismissed. If you are unfamiliar with activity types, please go through UIActivityType and built in activity types.
As you can see, the preview view controller is being dismissed. We hide the window containing the record indication when the app navigates to the preview view controller. Once it is dismissed it has to be shown since it is part of the main UI.
You can see a recording of our app below.
Crash Reporting Fails !!!!
Now coming back to why crashes cannot be recorded using ReplayKit. If the app crashes , the whole recording flow breaks and the recording can never be saved to Photos. Likewise, bugs which involve moving to the background and then springing back into the application cannot be recorded properly. You’ll get the recording before the application goes to the background and after the application enters the foreground, not the time frame spent outside the application.
If you need more clarity you are free to go through the source code.
References
Developed at Innovation Labs @ Y Media Labs
