Make an iOS app without a storyboard in Objective-C

Hi, are you interested in making an iOS app without a storyboard using Objective-C?
This article will guide you on how to make an iOS app without a storyboard using objective-c.
Though Objective-C language is quite old, companies and individuals still use it, like me and my previous company. Back in the day, I even had a hard time finding a guide on how to make without a storyboard. If not for my friend, Teteng, I would have been searching for a week!
Configuring the project to not use a storyboard, is quite simple, we usually call this here programmatic iOS app development.
Step 1 — Create a new iOS project that uses a storyboard
We will first create a storyboard project as a base since Xcode does not support directly creating non-storyboard projects.
- On your Xcode app, click the File > New > Project. Or simply press ⌘+⇧+N.
- Then under iOS, choose App.
- Name the project. You can use “NoStoryboardDemo”, but it’s up to you.
- Clear the check marks for core data and include tests, since we don’t need them for this demo.
- Click Next. And finally, click Create on the next screen.
Once your project is created, you should be able to see something like this:

Step 2 — Configure the instance implementation method of scene:willConnectToSession:options:
The scene:willConnectToSession:options: is a delegate method inside the SceneDelegate.m. You need to put some necessary implementation code here so that your project will not use the Main.storyboard file.
- Inside the create an instance of UIWindow using the UIScene came from the delegate method
// This line of code creates an instance of UIWindow using the UIScene that came from the delegate method.
// The UIWindow object represents the app’s window on the screen and is responsible for managing the app’s user interface.
self.window = [[UIWindow alloc] initWithWindowScene:(UIWindowScene *)scene];- Set the root view controller of the window’s instance. Do not forget to import the ViewController class.
// This line of code sets the root view controller of the window’s instance.
// The root view controller is responsible for managing the app’s main view and its content.
// In this case, we are setting the root view controller to an instance of the ViewController class.
[self.window setRootViewController:[[ViewController alloc] init]];- Show the current window and position it in front of all other windows at the same level or lower.
// This line of code shows the current window and positions it in front of all other windows at the same level or lower.
// This makes the window visible on the screen and ready to receive user interactions.
[self.window makeKeyAndVisible];
After these, you should have the following code inside the SceneDelegate.m:
#import "SceneDelegate.h"
#import "ViewController.h"

@interface SceneDelegate ()

@end

@implementation SceneDelegate


- (void)scene:(UIScene *)scene willConnectToSession:(UISceneSession *)session options:(UISceneConnectionOptions *)connectionOptions {
    self.window = [[UIWindow alloc] initWithWindowScene:(UIWindowScene *)scene];
    [self.window setRootViewController:[[ViewController alloc] init]];
    [self.window makeKeyAndVisible];
}

...
Step 3 — Configure the ViewController class
Once the root view controller is set to ViewController class, we can now make some UI modifications to see if we really made it a non-storyboard project.
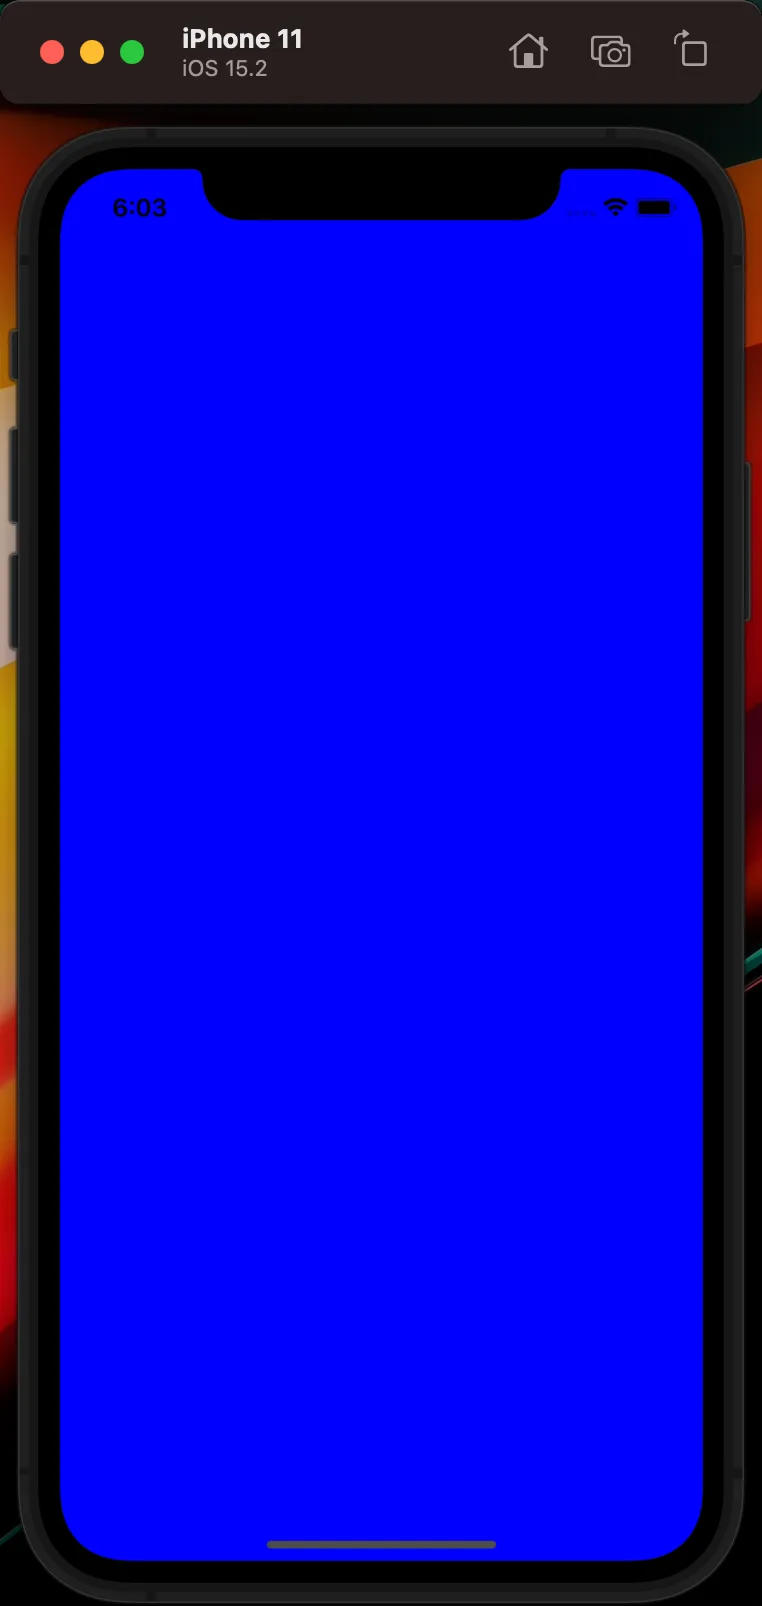
- On ViewController.m, change the background color of the view to blue.
#import "ViewController.h"

@interface ViewController ()
@end

@implementation ViewController

- (void)viewDidLoad {
    [super viewDidLoad];
    self.view.backgroundColor = UIColor.blueColor;
}
@end- Run the project (⌘+R). You will notice that the background has been changed to blue.
Step 4 — Clean up
Now that we made successfully run the non-storyboard project, we can now remove the unnecessary files and entries from Info.plist.
- Delete the Main.storyboard file

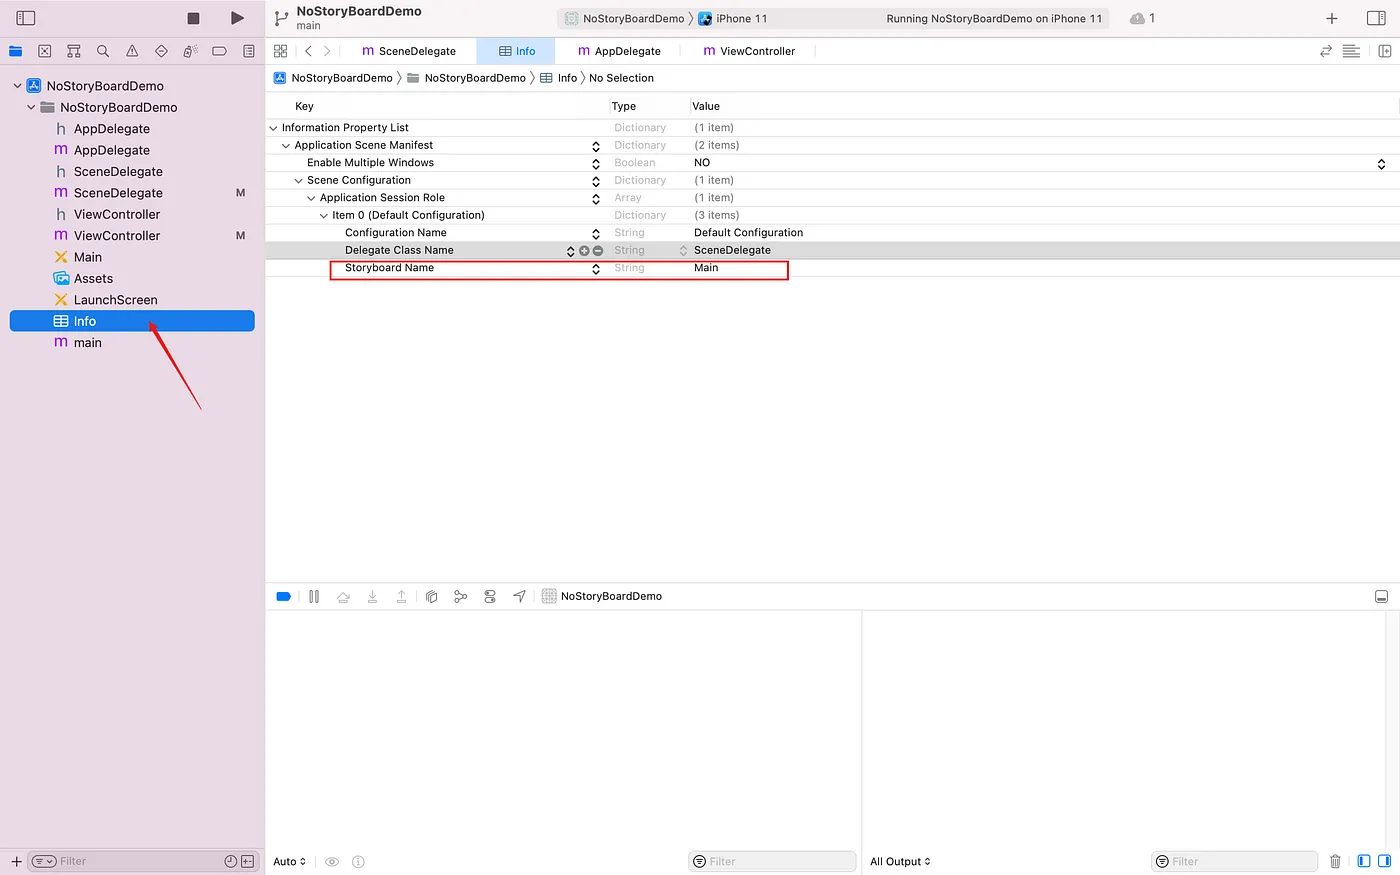
- On the Info.plist file, delete the “Storyboard Name” field
- On the Targets, select the “NoStoryBoardDemo”. Select the Info tab, and delete the “Main storyboard file base name” field

- Run the project again, and it should run without problems.
Conclusion
In conclusion, this tutorial has shown you how to create an iOS app without using a storyboard in Objective-C. By following the steps outlined in this tutorial, you can configure your project to not use a storyboard and instead create your app’s user interface programmatically. This approach gives you more control over the layout and behavior of your app’s user interface and can be a useful skill for iOS developers.
I hope that this tutorial has been helpful and that you now feel confident in creating iOS apps without using a storyboard. Happy coding! 😊
Now that you know how to make an iOS project that does not use storyboard, the next step is to learn how to add your own custom UIViews! Take a breather first, then proceed with the next article linked below: