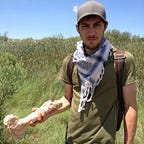
3D printing a Hopi Kachina Doll
The benefits of 3D printing are almost infinite with the only real limitation of the end result being what you can imagine. Some practical uses for replication of an object could be to protect the original from wear and tear, replication at a smaller or larger scale, or possibly to share objects between institutions or individuals top name just a few reasons. The reason that I have chosen to replicate the Hopi Kachina Doll was to practice and gain a working knowledge of the 3D printing process.

To start off I realized that the feather features of the Kachina figure were too thin and would not work on the 3d printer because they were not complete and would need to be removed on the digital model before I could import it into the program for the 3D printer. I reopened my model in the Agisoft Photoscan program and removed the feather details with the cropping tools and any extraneous solid bits. Once I removed the feather wings from the model I had to patch the holes in the model.

After cleaning up the model, I exported it out of Photoscan as an STL file and imported it into the CURA Software that interfaces with the LULZBOT TAZ 5 3D printer. Once the model was in the CURA program, I tried to increase the dimensions to that of the actual figure, however without the actual figure there for comparison I had to estimate the size of the object. I thought that the overall height of the Kachina was about 7.5 cm tall but in actuality the actual about 6.5 centimeters tall. I scaled the figure up to the 7.5 centimeter height and I had to rotate the model onto the base plate. Because I could not figure out how to rotate the model in increments less than 15 degrees at a time I could not get the model to sit completely flat on the build plate so I compensated by building the model on a raft.

The settings that I chose to print the can all be seen on the image below. As you can see the estimated time progression was approximately 4 hours. I started the model around noon and it wasn’t supposed to finish until right before the 3D printing laboratory was closed for the day so I came and picked it up early the next day.

Overall it came out fairly well with the exception of the arms which were not solid because the supports that the arms were supposed to print on top of were not solid enough for the first layer to print on top of.


After the print was final, I used a craft knife to remove the excess supports that were printed onto the model. The biggest problems with the model were the arms, the apron type garment that sits on the figures legs was also slightly singed on the bottom left corner. When I cleaned up the model the wand that the model was holding broke off and the bottle that it was holding in the other hand was not actually attached to the arm as a whole, resulting in the 3D print not having anything in its hands.


If I were to reprint the model I would most likely make the supports more solid so that the arms would print more solid and possibly fiddle with some of the additional settings so that it wouldn’t burn the filament as the model printed. As I did not watch the entire print I can not say for certain where the problems in the print came from but I could consult with someone with more expertise to fix the problems in my print.