The part 1 of this topic was about direction control of your DC motor. Today it’s time to have a look to speed control. Everyone who’s curious about robotic motorization basics can read this post, but I suggest you to begin with the guide to motors in robotics, as well as the part 1 of this post first.
There is also a small post I wrote to summarize the different topics where I discuss about motors.
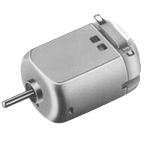
In the following, all the words “motor” refer to “brushed DC motor”.
This is it. You are able to choose the rotating direction of a motor whenever you want. What a sweet sensation. You feel like you almost have the full control… but you want more already.
Ok. Let’s see how you can control the speed of your motor.
Voltage
An electric motor works with electric power — i.e. voltage and current — provided at the input through wires. While inverting these wires results in changing the rotation direction, we also can adjust the voltage and the current to see changes at the motor’s output.
The voltage at the terminals, in particular, is proportional to the speed of the motor. That means the more voltage you provide at the input, the faster the motor will rotate at the output.
Note: If you try to increase the voltage at high ranges without checking its datasheet, you’ll likely burn it down. Each motor has a specific voltage — and current — it can bear according to its parts, and going below these values is not a good idea.
We will see later what the current does.
So here you are, you can now control the rotating speed of the motor. Of course you will have to change the voltage at the input. Manually.
We could use a serie variable resistor (R1), so that we can adjust the voltage, i.e. the motor’s speed.

But:
- This is not automated — this is not robotics!
- A resistor dissipates power when current flows through it, and generates heat. That means less power, and lower efficiency.
- As current varies with motor’s load (we will see that later), and as voltage drops vary with current into the resistor, the speed control wouldn't be linear if the load of the motor varies.
Is that really control? No it’s not.
As for the changes of direction, we want to control the speed, i.e. the voltage, through a microcontroller programmed with our own code.
But first let’s dig into a new concept:
PWM — What is it?
PWM (Pulse Width Modulation) is a way of providing voltage, but instead of being a flat value many small high-low steps of voltage.

Applying to a motor, it’s like switching it ON and OFF a lot of times and very fast.
- The ON phases are called pulses.
- The short time of one pulse of HIGH is called the duty cycle (in seconds — for now).
- One pulse of HIGH and one fraction of time of LOW is called the period (also in seconds).
- The high value of the pulse is called the amplitude (in Volt).
- The frequency (f) in Hertz, is the inverse of the period (T).

Let’s have a look at the illustration of a PWM signal:

As for the scale of time, a PWM frequency chosen for controlling a motor can vary (very) roughly between some Hertz to some kilo-Hertz. Applying the last formula, it means that for a PWM frequency of f = 10 kHz, we have a period of T = 1/10,000 = 0.0001 s. So in that example, every pulse lasts less than 0.1 milliseconds. That’s not much.
When generating a PWM signal, it will only be defined by its frequency, in Hertz and its duty cycle, in % of the period.
How PWM is created?
You can use various electronic components to make a circuit that provides a PWM signal, but you will find it easier with a microcontroller. The microcontroller carries a tiny internal clock that basically paces the system according to its frequency. It’s called a clock. How original. And still inside, they are some other clocks — this time they are called timers — which can be used for generating the PWM signal.
While writing a program for your microcontroller, you can choose the specs of your PWM: frequency and duty cycle. The amplitude is defined by the voltage inside the microproc, it’s an HIGH value.
At the end, the PWM will get out from an output pin of your microcontroller, and, if you are using a developing board from one of its output pin.
How does PWM works on motors?
As we don’t really choose the amplitude, let me remind you that PWM is not used for powering the motor. It’s a command signal, not a power signal. In order to use a PWM signal, you must send it through a transistor (the little door we talked about in the part 1) that will let the power signal pass:

So, what happens in this picture:
- The power supply is Vcc (the positive wire of your battery).
- Q1 is a transistor (a “door”).
- When the PWM signal is down (LOW value), Q1 is opened. No current flows through the motor, it doesn’t turn.
- When the PWM signal is up (HIGH value), Q1 is closed, the current can flow through the motor, from Vcc to the ground, making it turn.
- The resistor R2 prevents too much current to flow inside the transistor Q1.
- When the transistor opens, the motor is not powered during a short time before the transistor closes again. During this time, it can be in generator mode and the generated current could damage the transistor. That’s why D1 is here: the current flows into D1 instead of Q1. The diode D1 is called a free-wheeling diode.
Note: Saying that a transistor or a push-button is closed is the same than saying that a door is opened; Because an opened door lets the passage to whatever wants to go through, a closed transistor or push-button lets the passage to current
Of course the motor does not stop after each pulse, when the PWM signal is LOW. Everything happens so fast that the free rotor, pushed by its inertia, doesn’t have time to stop before it’s powered on again with the next pulse.
This is how you use PWM. But maybe you can sleep on it first before to finish reading this post, that’s a lot to process. See you tomorrow then. Sleep tight.
Hi. I know that you didn’t sleep, because you still don’t know when the speed is actually controlled. Since the beginning of this post we only replaced a simple-enough-flat-voltage circuit with a too-complex-with-Qs-and-Ds-and-Rs-PWM-voltage circuit. But still no speed control? Come on!
Right, this is how you control the speed:
Speed control. Finally.
Viewed from the motor, it’s another kind of PWM that is incoming at its terminals. The transistor closes and opens really fast, alternatively letting the current flows and stopping it, so it receives steps of Vcc (which is the value of your battery). This is the power signal.
Let’s go back to the command signal. As I said earlier, PWM is defined by its frequency and its duty-cycle. This duty-cycle is originally a time, in seconds for example, but it is mostly expressed as a percentage of the total period.

This percentage value of duty cycle will define the speed of the motor: the higher the value, the faster the rotor.
The power signal will look a lot like the command signal — same duty cycle — but with more amplitude (Vcc). Again, how does the motor see this? Well, if we take several pulses, we can deduce an average value from this power signal. For example, a PWM signal with a 24 V amplitude and a 33 % duty cycle has a mean voltage of 8 V. Because 24 x 33% = 8.
Let’s have a look to the power signal and the average voltage:

Regarding the evolution of the speed, it looks roughly like that:

If I summarize this whole PWM thing:
- You can create a PWM signal from a microcontroller (e.g. an Arduino board) that drives the speed of your motor in a small circuit.
- This PWM signal is defined by its frequency and its duty cycle.
- The PWM signal opens and closes a transistor, allowing a current to flow or not through the motor, and thus creating a power signal that looks like the command signal, but with more amplitude.
- The higher the duty cycle, the faster the motor’s rotational speed.
- The motor reacts to that power signal like a mean voltage, calculated from its duty cycle’s.
Pros of using PWM signal for your motor:
- It’s easy to use.
- Good efficiency (few loss of power).
- It is good for the motor’s coils — better than flat voltage.
- Good robustness.
Cons:
- It can make noises (according to human-audible frequency used).
- EMI noises can be generated.
- The frequency must be chosen wisely (this will be the subject of a future post).
That was a tough one. But look at you now, you can control both the direction and the speed of your DC motor, this is freakin’ robotics!
And we haven’t finished yet, this is only the beginning. Have you heard about torque? No? You will.
Thank you for reading.
— If you liked what you read, please clap the hell out of it and follow us on Medium!
I am an engineer in mechatronics, co-founder of Luos. We are developing new technologies in order to build and produce electronic devices easier and faster.